I recently picked up one of these networked thermal receipt printers.

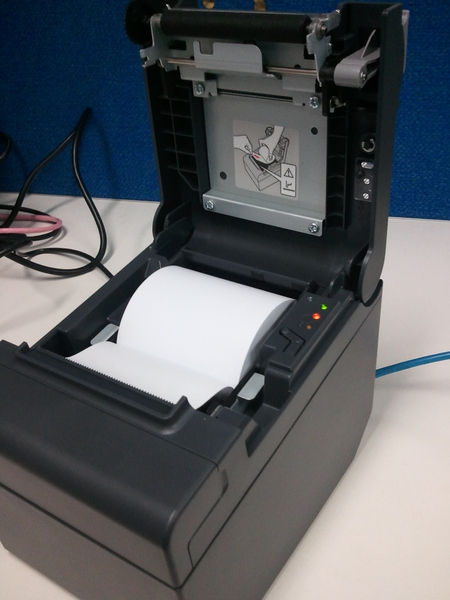
Being Point-of-Sale equipment, these come from a different tradition of printing, and have only a few things in common with regular laser printers. This post will cover the basic steps to getting the printer up and running.
This one has the model number TM-T82II.
Setting up the printer
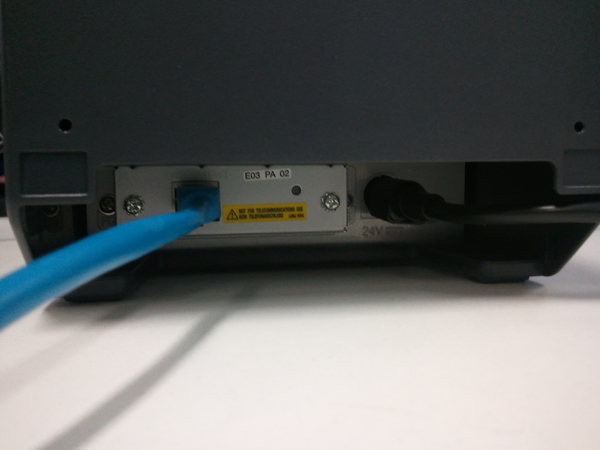
Firstly, this particular printer only has an ethernet interface, which comes configured with a static IP by default, rather than DHCP. Holding the button next to the network port prints out the settings:
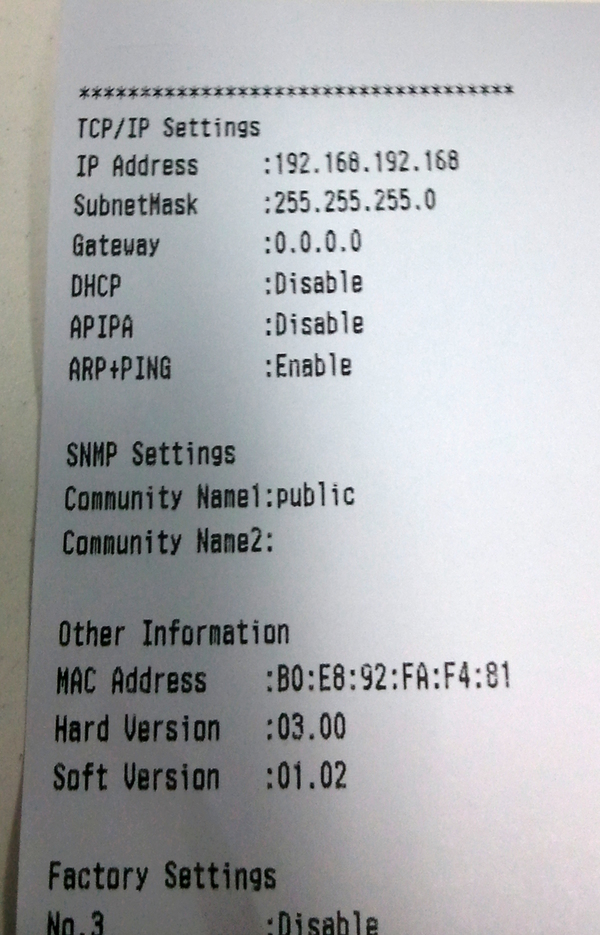
The IP address of the printer is shown 192.168.192.168, and subnet mask 255.255.255.0. To speak to it, we need a computer on the same subnet. In this case the last number of the IP address is the only part which needs to be different.
On GNU/Linux, this is best done with ifconfig:
sudo ifconfig eth0 192.168.192.169 netmask 255.255.255.0
If you used the correct interface, address and netmask, then you should now be able to ping the printer:
$ sudo ifconfig
eth0      Link encap:Ethernet  HWaddr ...
          inet addr:192.168.192.169  Bcast:192.168.192.255  Mask:255.255.255.0
          ...
$ ping 192.168.192.168
PING 192.168.192.168 (192.168.192.168) 56(84) bytes of data.
64 bytes from 192.168.192.168: icmp_seq=1 ttl=255 time=1.09 ms
64 bytes from 192.168.192.168: icmp_seq=2 ttl=255 time=0.506 ms
...
The printer has a web interface, and is open on two ports for printing:
$ nmap 192.168.192.168
...
PORT     STATE SERVICE
80/tcp   open  http
515/tcp  open  printer
9100/tcp open  jetdirect
The web interface will let you set different IP settings, so that you can get the printer on your network. If you mess up and can’t connect, then do a factory reset: Hold the button used before, and then reboot the printer.
Using the printer
Epson provides drivers for several platforms, which may fit your use case.
However, these printers do support ESC/POS (See Wikipedia). making it quite accessible without installed drivers.
The printer will immediately print any regular text it receives over Port 9100, line by line:
echo "Hello World" | nc 192.168.192.168 9100
ESC/POS commands allow you to format the text, print barcodes, and cut the paper. A good resource for them is this PDF reference from Epson.
I’ve included a PHP script to produce the ESC/POS commands for the below receipt, showing how to use a few of the supported features:
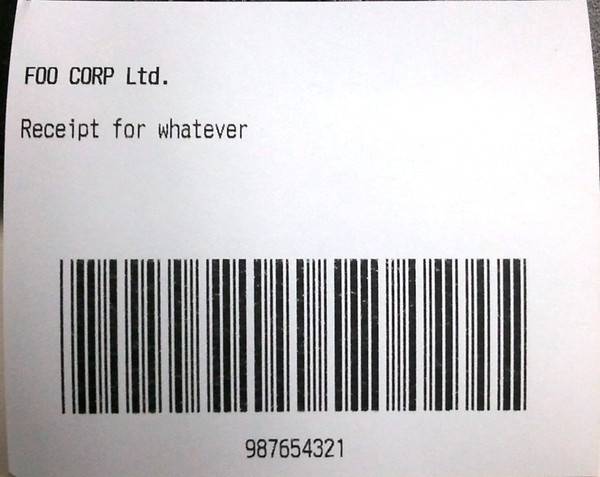
And the script which created it:
<?php
/* ASCII constants */
const ESC = "\x1b";
const GS="\x1d";
const NUL="\x00";

/* Output an example receipt */
echo ESC."@"; // Reset to defaults
echo ESC."E".chr(1); // Bold
echo "FOO CORP Ltd.\n"; // Company
echo ESC."E".chr(0); // Not Bold
echo ESC."d".chr(1); // Blank line
echo "Receipt for whatever\n"; // Print text
echo ESC."d".chr(4); // 4 Blank lines

/* Bar-code at the end */
echo ESC."a".chr(1); // Centered printing
echo GS."k".chr(4)."987654321".NUL; // Print barcode
echo ESC."d".chr(1); // Blank line
echo "987654321\n"; // Print number
echo GS."V\x41".chr(3); // Cut
exit(0);
This can again be sent to the printer using netcat:
php foo.php | nc 192.168.192.168 9100