ESC/POS is the command set which makes receipt printers print.
Introduction
Before we begin, there’s three things you need to know about ESC/POS:
- Most modern receipt printers support it in some form.
- It’s dead simple to write.
- Commands start with an ESC character (ASCII 27).
The most useful reference for the protocol is this Epson FAQ, which I’ve used previously to implement an ESC/POS printer driver for PHP.
Incidentally, the receipt printed in the above video is an example from the escpos-php repository. I’ll step through this print-out, as it demonstrates all of the basic ESC/POS features.
Command structure
Four specific ASCII characters make appearances in the command sequences-
| Abbreviation | Name | Code (Hex) |
|---|---|---|
| NUL | Null | 0x00 |
| LF | Line Feed | 0x0A |
| ESC | Escape | 0x1B |
| GS | Group Separator | 0x1D |
Regular text is simply sent to the printer, separated by line-breaks. Commands begin with ESC or GS, and are followed by a printable character, and sometimes some numbers
Numbers are simply passed as a character. For example, ‘5’ is passed as 0x05.
Examples
These examples are taken from the output of demo.php.
Initialisation
When you first connect to the printer, you should initialise it. This reverts to default formatting, rather than the triple-underlined double-strike font which the previous print-out may have been using.
- The command to reset the formatting is:
- ESC @
require __DIR__ . '/autoload.php';
use Mike42\Escpos\Printer;
use Mike42\Escpos\PrintConnectors\FilePrintConnector;
$connector = new FilePrintConnector("/dev/usb/lp0");
$printer = new Printer($connector);
$printer -> close();
00000000  1b 40                                             |.@|
00000003
“Hello world” text
This is the simplest type of receipt, and contains only unformatted text.

Text is simply sent to the printer.
Each line must be terminated by a line feed.
require __DIR__ . '/autoload.php';
use Mike42\Escpos\Printer;
use Mike42\Escpos\PrintConnectors\FilePrintConnector;
$connector = new FilePrintConnector("/dev/usb/lp0");
$printer = new Printer($connector);

/* Text */
$printer -> text("Hello world\n");
$printer -> cut();
$printer -> close();
00000000  1b 40 48 65 6c 6c 6f 20  77 6f 72 6c 64 0a 1d 56  |.@Hello world..V|
00000010  41 03                                             |A.|
00000012
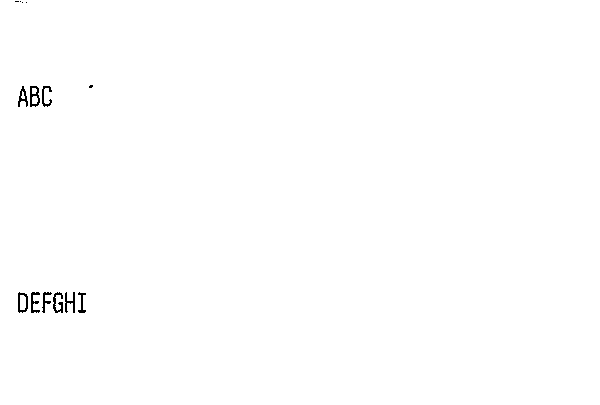
Line feeds
The printer can quickly skip past a given number of lines with this command.
- The commands are:
- LF
- ESC d [ number ]
- ESC v [ number ]
The first command feeds forward, the second feeds in reverse. From the example, it can be seen that the demo printer does not support reverse paper feeding.
require_once(dirname(__FILE__) . "/escpos-php/Escpos.php");
$printer = new Escpos();

/* Line feeds */
$printer -> text("ABC");
$printer -> feed(7);
$printer -> text("DEF");
$printer -> feedReverse(3);
$printer -> text("GHI");
$printer -> feed();
$printer -> cut();
$printer -> close();
00000000  1b 40 41 42 43 1b 64 07  44 45 46 1b 65 03 47 48  |.@ABC.d.DEF.e.GH|
00000010  49 0a 1d 56 41 03                                 |I..VA.|
00000016
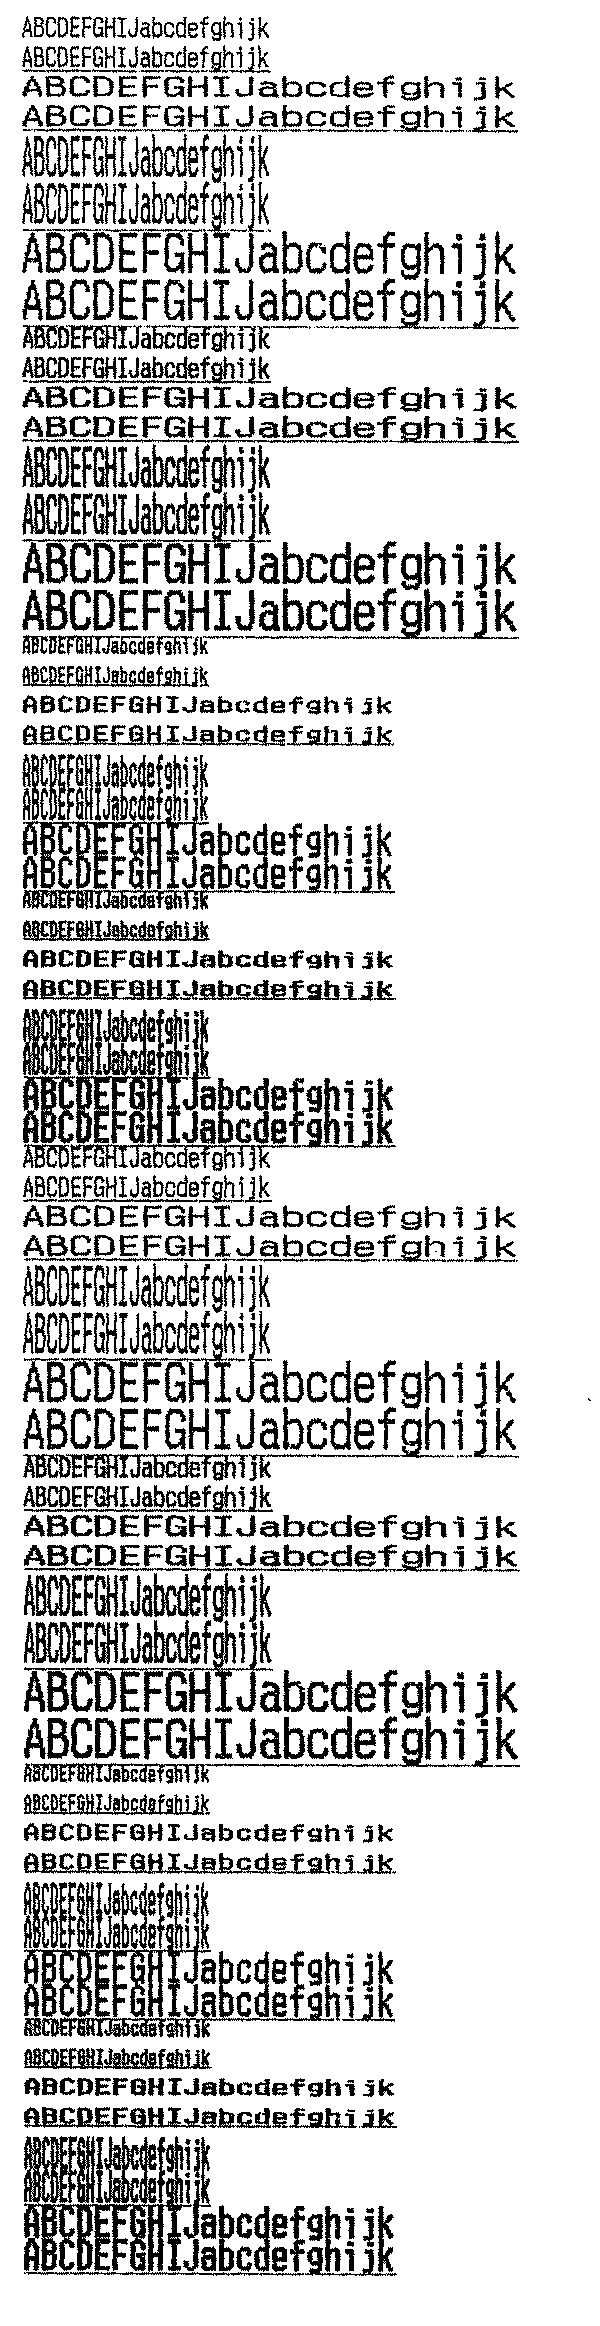
Print modes
Print modes include font height, width and boldness into a single attribute.
- The command is:
- ESC ! [number]
The font modes are made from logically OR’ing together a selection of attributes. 0 represents plan Font A text. Mode flags are:
| Mode | Number |
|---|---|
| Font A (no mode) | 0 |
| Font B | 1 |
| Emphasized | 8 |
| Double height | 16 |
| Double width | 32 |
| Underline | 128 |
The example receipt illustrates the effect of each flag.
require __DIR__ . '/autoload.php';
use Mike42\Escpos\Printer;
use Mike42\Escpos\PrintConnectors\FilePrintConnector;
$connector = new FilePrintConnector("/dev/usb/lp0");
$printer = new Printer($connector);

/* Font modes */
$modes = array(
	Printer:::MODE_FONT_A,
	Printer:::MODE_FONT_B,
	Printer:::MODE_EMPHASIZED,
	Printer:::MODE_DOUBLE_HEIGHT,
	Printer:::MODE_DOUBLE_WIDTH,
	Printer:::MODE_UNDERLINE);
for($i = 0; $i < 2 ** count($modes); $i++) {
	$bits = str_pad(decbin($i), count($modes), "0", STR_PAD_LEFT);
	$mode = 0;
	for($j = 0; $j < strlen($bits); $j++) {
		if(substr($bits, $j, 1) == "1") {
			$mode |= $modes[$j];
		}
	}
	$printer -> selectPrintMode($mode);
	$printer -> text("ABCDEFGHIJabcdefghijk\n");
}
$printer -> selectPrintMode(); // Reset
$printer -> cut();
$printer -> close();
00000000  1b 40 1b 21 00 41 42 43  44 45 46 47 48 49 4a 61  |.@.!.ABCDEFGHIJa|
00000010  62 63 64 65 66 67 68 69  6a 6b 0a 1b 21 80 41 42  |bcdefghijk..!.AB|
00000020  43 44 45 46 47 48 49 4a  61 62 63 64 65 66 67 68  |CDEFGHIJabcdefgh|
00000030  69 6a 6b 0a 1b 21 20 41  42 43 44 45 46 47 48 49  |ijk..! ABCDEFGHI|
00000040  4a 61 62 63 64 65 66 67  68 69 6a 6b 0a 1b 21 a0  |Jabcdefghijk..!.|
00000050  41 42 43 44 45 46 47 48  49 4a 61 62 63 64 65 66  |ABCDEFGHIJabcdef|
00000060  67 68 69 6a 6b 0a 1b 21  10 41 42 43 44 45 46 47  |ghijk..!.ABCDEFG|
00000070  48 49 4a 61 62 63 64 65  66 67 68 69 6a 6b 0a 1b  |HIJabcdefghijk..|
00000080  21 90 41 42 43 44 45 46  47 48 49 4a 61 62 63 64  |!.ABCDEFGHIJabcd|
00000090  65 66 67 68 69 6a 6b 0a  1b 21 30 41 42 43 44 45  |efghijk..!0ABCDE|
000000a0  46 47 48 49 4a 61 62 63  64 65 66 67 68 69 6a 6b  |FGHIJabcdefghijk|
000000b0  0a 1b 21 b0 41 42 43 44  45 46 47 48 49 4a 61 62  |..!.ABCDEFGHIJab|
000000c0  63 64 65 66 67 68 69 6a  6b 0a 1b 21 08 41 42 43  |cdefghijk..!.ABC|
000000d0  44 45 46 47 48 49 4a 61  62 63 64 65 66 67 68 69  |DEFGHIJabcdefghi|
000000e0  6a 6b 0a 1b 21 88 41 42  43 44 45 46 47 48 49 4a  |jk..!.ABCDEFGHIJ|
000000f0  61 62 63 64 65 66 67 68  69 6a 6b 0a 1b 21 28 41  |abcdefghijk..!(A|
00000100  42 43 44 45 46 47 48 49  4a 61 62 63 64 65 66 67  |BCDEFGHIJabcdefg|
00000110  68 69 6a 6b 0a 1b 21 a8  41 42 43 44 45 46 47 48  |hijk..!.ABCDEFGH|
00000120  49 4a 61 62 63 64 65 66  67 68 69 6a 6b 0a 1b 21  |IJabcdefghijk..!|
00000130  18 41 42 43 44 45 46 47  48 49 4a 61 62 63 64 65  |.ABCDEFGHIJabcde|
00000140  66 67 68 69 6a 6b 0a 1b  21 98 41 42 43 44 45 46  |fghijk..!.ABCDEF|
00000150  47 48 49 4a 61 62 63 64  65 66 67 68 69 6a 6b 0a  |GHIJabcdefghijk.|
00000160  1b 21 38 41 42 43 44 45  46 47 48 49 4a 61 62 63  |.!8ABCDEFGHIJabc|
00000170  64 65 66 67 68 69 6a 6b  0a 1b 21 b8 41 42 43 44  |defghijk..!.ABCD|
00000180  45 46 47 48 49 4a 61 62  63 64 65 66 67 68 69 6a  |EFGHIJabcdefghij|
00000190  6b 0a 1b 21 01 41 42 43  44 45 46 47 48 49 4a 61  |k..!.ABCDEFGHIJa|
000001a0  62 63 64 65 66 67 68 69  6a 6b 0a 1b 21 81 41 42  |bcdefghijk..!.AB|
000001b0  43 44 45 46 47 48 49 4a  61 62 63 64 65 66 67 68  |CDEFGHIJabcdefgh|
000001c0  69 6a 6b 0a 1b 21 21 41  42 43 44 45 46 47 48 49  |ijk..!!ABCDEFGHI|
000001d0  4a 61 62 63 64 65 66 67  68 69 6a 6b 0a 1b 21 a1  |Jabcdefghijk..!.|
000001e0  41 42 43 44 45 46 47 48  49 4a 61 62 63 64 65 66  |ABCDEFGHIJabcdef|
000001f0  67 68 69 6a 6b 0a 1b 21  11 41 42 43 44 45 46 47  |ghijk..!.ABCDEFG|
00000200  48 49 4a 61 62 63 64 65  66 67 68 69 6a 6b 0a 1b  |HIJabcdefghijk..|
00000210  21 91 41 42 43 44 45 46  47 48 49 4a 61 62 63 64  |!.ABCDEFGHIJabcd|
00000220  65 66 67 68 69 6a 6b 0a  1b 21 31 41 42 43 44 45  |efghijk..!1ABCDE|
00000230  46 47 48 49 4a 61 62 63  64 65 66 67 68 69 6a 6b  |FGHIJabcdefghijk|
00000240  0a 1b 21 b1 41 42 43 44  45 46 47 48 49 4a 61 62  |..!.ABCDEFGHIJab|
00000250  63 64 65 66 67 68 69 6a  6b 0a 1b 21 09 41 42 43  |cdefghijk..!.ABC|
00000260  44 45 46 47 48 49 4a 61  62 63 64 65 66 67 68 69  |DEFGHIJabcdefghi|
00000270  6a 6b 0a 1b 21 89 41 42  43 44 45 46 47 48 49 4a  |jk..!.ABCDEFGHIJ|
00000280  61 62 63 64 65 66 67 68  69 6a 6b 0a 1b 21 29 41  |abcdefghijk..!)A|
00000290  42 43 44 45 46 47 48 49  4a 61 62 63 64 65 66 67  |BCDEFGHIJabcdefg|
000002a0  68 69 6a 6b 0a 1b 21 a9  41 42 43 44 45 46 47 48  |hijk..!.ABCDEFGH|
000002b0  49 4a 61 62 63 64 65 66  67 68 69 6a 6b 0a 1b 21  |IJabcdefghijk..!|
000002c0  19 41 42 43 44 45 46 47  48 49 4a 61 62 63 64 65  |.ABCDEFGHIJabcde|
000002d0  66 67 68 69 6a 6b 0a 1b  21 99 41 42 43 44 45 46  |fghijk..!.ABCDEF|
000002e0  47 48 49 4a 61 62 63 64  65 66 67 68 69 6a 6b 0a  |GHIJabcdefghijk.|
000002f0  1b 21 39 41 42 43 44 45  46 47 48 49 4a 61 62 63  |.!9ABCDEFGHIJabc|
00000300  64 65 66 67 68 69 6a 6b  0a 1b 21 b9 41 42 43 44  |defghijk..!.ABCD|
00000310  45 46 47 48 49 4a 61 62  63 64 65 66 67 68 69 6a  |EFGHIJabcdefghij|
00000320  6b 0a 1b 21 00 41 42 43  44 45 46 47 48 49 4a 61  |k..!.ABCDEFGHIJa|
00000330  62 63 64 65 66 67 68 69  6a 6b 0a 1b 21 80 41 42  |bcdefghijk..!.AB|
00000340  43 44 45 46 47 48 49 4a  61 62 63 64 65 66 67 68  |CDEFGHIJabcdefgh|
00000350  69 6a 6b 0a 1b 21 20 41  42 43 44 45 46 47 48 49  |ijk..! ABCDEFGHI|
00000360  4a 61 62 63 64 65 66 67  68 69 6a 6b 0a 1b 21 a0  |Jabcdefghijk..!.|
00000370  41 42 43 44 45 46 47 48  49 4a 61 62 63 64 65 66  |ABCDEFGHIJabcdef|
00000380  67 68 69 6a 6b 0a 1b 21  10 41 42 43 44 45 46 47  |ghijk..!.ABCDEFG|
00000390  48 49 4a 61 62 63 64 65  66 67 68 69 6a 6b 0a 1b  |HIJabcdefghijk..|
000003a0  21 90 41 42 43 44 45 46  47 48 49 4a 61 62 63 64  |!.ABCDEFGHIJabcd|
000003b0  65 66 67 68 69 6a 6b 0a  1b 21 30 41 42 43 44 45  |efghijk..!0ABCDE|
000003c0  46 47 48 49 4a 61 62 63  64 65 66 67 68 69 6a 6b  |FGHIJabcdefghijk|
000003d0  0a 1b 21 b0 41 42 43 44  45 46 47 48 49 4a 61 62  |..!.ABCDEFGHIJab|
000003e0  63 64 65 66 67 68 69 6a  6b 0a 1b 21 08 41 42 43  |cdefghijk..!.ABC|
000003f0  44 45 46 47 48 49 4a 61  62 63 64 65 66 67 68 69  |DEFGHIJabcdefghi|
00000400  6a 6b 0a 1b 21 88 41 42  43 44 45 46 47 48 49 4a  |jk..!.ABCDEFGHIJ|
00000410  61 62 63 64 65 66 67 68  69 6a 6b 0a 1b 21 28 41  |abcdefghijk..!(A|
00000420  42 43 44 45 46 47 48 49  4a 61 62 63 64 65 66 67  |BCDEFGHIJabcdefg|
00000430  68 69 6a 6b 0a 1b 21 a8  41 42 43 44 45 46 47 48  |hijk..!.ABCDEFGH|
00000440  49 4a 61 62 63 64 65 66  67 68 69 6a 6b 0a 1b 21  |IJabcdefghijk..!|
00000450  18 41 42 43 44 45 46 47  48 49 4a 61 62 63 64 65  |.ABCDEFGHIJabcde|
00000460  66 67 68 69 6a 6b 0a 1b  21 98 41 42 43 44 45 46  |fghijk..!.ABCDEF|
00000470  47 48 49 4a 61 62 63 64  65 66 67 68 69 6a 6b 0a  |GHIJabcdefghijk.|
00000480  1b 21 38 41 42 43 44 45  46 47 48 49 4a 61 62 63  |.!8ABCDEFGHIJabc|
00000490  64 65 66 67 68 69 6a 6b  0a 1b 21 b8 41 42 43 44  |defghijk..!.ABCD|
000004a0  45 46 47 48 49 4a 61 62  63 64 65 66 67 68 69 6a  |EFGHIJabcdefghij|
000004b0  6b 0a 1b 21 01 41 42 43  44 45 46 47 48 49 4a 61  |k..!.ABCDEFGHIJa|
000004c0  62 63 64 65 66 67 68 69  6a 6b 0a 1b 21 81 41 42  |bcdefghijk..!.AB|
000004d0  43 44 45 46 47 48 49 4a  61 62 63 64 65 66 67 68  |CDEFGHIJabcdefgh|
000004e0  69 6a 6b 0a 1b 21 21 41  42 43 44 45 46 47 48 49  |ijk..!!ABCDEFGHI|
000004f0  4a 61 62 63 64 65 66 67  68 69 6a 6b 0a 1b 21 a1  |Jabcdefghijk..!.|
00000500  41 42 43 44 45 46 47 48  49 4a 61 62 63 64 65 66  |ABCDEFGHIJabcdef|
00000510  67 68 69 6a 6b 0a 1b 21  11 41 42 43 44 45 46 47  |ghijk..!.ABCDEFG|
00000520  48 49 4a 61 62 63 64 65  66 67 68 69 6a 6b 0a 1b  |HIJabcdefghijk..|
00000530  21 91 41 42 43 44 45 46  47 48 49 4a 61 62 63 64  |!.ABCDEFGHIJabcd|
00000540  65 66 67 68 69 6a 6b 0a  1b 21 31 41 42 43 44 45  |efghijk..!1ABCDE|
00000550  46 47 48 49 4a 61 62 63  64 65 66 67 68 69 6a 6b  |FGHIJabcdefghijk|
00000560  0a 1b 21 b1 41 42 43 44  45 46 47 48 49 4a 61 62  |..!.ABCDEFGHIJab|
00000570  63 64 65 66 67 68 69 6a  6b 0a 1b 21 09 41 42 43  |cdefghijk..!.ABC|
00000580  44 45 46 47 48 49 4a 61  62 63 64 65 66 67 68 69  |DEFGHIJabcdefghi|
00000590  6a 6b 0a 1b 21 89 41 42  43 44 45 46 47 48 49 4a  |jk..!.ABCDEFGHIJ|
000005a0  61 62 63 64 65 66 67 68  69 6a 6b 0a 1b 21 29 41  |abcdefghijk..!)A|
000005b0  42 43 44 45 46 47 48 49  4a 61 62 63 64 65 66 67  |BCDEFGHIJabcdefg|
000005c0  68 69 6a 6b 0a 1b 21 a9  41 42 43 44 45 46 47 48  |hijk..!.ABCDEFGH|
000005d0  49 4a 61 62 63 64 65 66  67 68 69 6a 6b 0a 1b 21  |IJabcdefghijk..!|
000005e0  19 41 42 43 44 45 46 47  48 49 4a 61 62 63 64 65  |.ABCDEFGHIJabcde|
000005f0  66 67 68 69 6a 6b 0a 1b  21 99 41 42 43 44 45 46  |fghijk..!.ABCDEF|
00000600  47 48 49 4a 61 62 63 64  65 66 67 68 69 6a 6b 0a  |GHIJabcdefghijk.|
00000610  1b 21 39 41 42 43 44 45  46 47 48 49 4a 61 62 63  |.!9ABCDEFGHIJabc|
00000620  64 65 66 67 68 69 6a 6b  0a 1b 21 b9 41 42 43 44  |defghijk..!.ABCD|
00000630  45 46 47 48 49 4a 61 62  63 64 65 66 67 68 69 6a  |EFGHIJabcdefghij|
00000640  6b 0a 1b 21 00 1d 56 41  03                       |k..!..VA.|
00000649
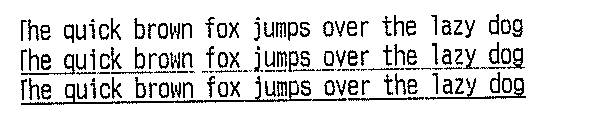
Underline
- The command is:
- ESC - [ number ]
The argument is set to 0 for no underline, 1 for underline, 2 for heavy underline.
require __DIR__ . '/autoload.php';
use Mike42\Escpos\Printer;
use Mike42\Escpos\PrintConnectors\FilePrintConnector;
$connector = new FilePrintConnector("/dev/usb/lp0");
$printer = new Printer($connector);

/* Underline */
for($i = 0; $i < 3; $i++) {
	$printer -> setUnderline($i);
	$printer -> text("The quick brown fox jumps over the lazy dog\n");
}
$printer -> setUnderline(0); // Reset
$printer -> cut();
$printer -> close();
00000000  1b 40 1b 2d 00 54 68 65  20 71 75 69 63 6b 20 62  |.@.-.The quick b|
00000010  72 6f 77 6e 20 66 6f 78  20 6a 75 6d 70 73 20 6f  |rown fox jumps o|
00000020  76 65 72 20 74 68 65 20  6c 61 7a 79 20 64 6f 67  |ver the lazy dog|
00000030  0a 1b 2d 01 54 68 65 20  71 75 69 63 6b 20 62 72  |..-.The quick br|
00000040  6f 77 6e 20 66 6f 78 20  6a 75 6d 70 73 20 6f 76  |own fox jumps ov|
00000050  65 72 20 74 68 65 20 6c  61 7a 79 20 64 6f 67 0a  |er the lazy dog.|
00000060  1b 2d 02 54 68 65 20 71  75 69 63 6b 20 62 72 6f  |.-.The quick bro|
00000070  77 6e 20 66 6f 78 20 6a  75 6d 70 73 20 6f 76 65  |wn fox jumps ove|
00000080  72 20 74 68 65 20 6c 61  7a 79 20 64 6f 67 0a 1b  |r the lazy dog..|
00000090  2d 00 1d 56 41 03                                 |-..VA.|
00000096
Cuts
- The command is:
- ESC V [ number ]
The argument apparently represents whether to perform a ‘partial’ (65) or ‘full’ (66) cut, but has no effect on my model of printer.
require __DIR__ . '/autoload.php';
use Mike42\Escpos\Printer;
use Mike42\Escpos\PrintConnectors\FilePrintConnector;
$connector = new FilePrintConnector("/dev/usb/lp0");
$printer = new Printer($connector);

/* Cuts */
for($i = 0; $i < 5; $i++) {
	$printer -> cut(Printer:::CUT_PARTIAL);
	$printer -> cut(Printer:::CUT_FULL);
}
$printer -> cut();
$printer -> close();
00000000  1b 40 1d 56 42 03 1d 56  41 03 1d 56 42 03 1d 56  |.@.VB..VA..VB..V|
00000010  41 03 1d 56 42 03 1d 56  41 03 1d 56 42 03 1d 56  |A..VB..VA..VB..V|
00000020  41 03 1d 56 42 03 1d 56  41 03 1d 56 41 03        |A..VB..VA..VA.|
0000002e
Emphasis

- The command is:
-
ESC E [ number ]
Use 1 to enable emphasis, and 0 to disable it.
require __DIR__ . '/autoload.php';
use Mike42\Escpos\Printer;
use Mike42\Escpos\PrintConnectors\FilePrintConnector;
$connector = new FilePrintConnector("/dev/usb/lp0");
$printer = new Printer($connector);

/* Emphasis */
for($i = 0; $i < 2; $i++) {
	$printer -> setEmphasis($i == 1);
	$printer -> text("The quick brown fox jumps over the lazy dog\n");
}
$printer -> setEmphasis(false); // Reset
$printer -> cut();
$printer -> close();
00000000  1b 40 1b 45 00 54 68 65  20 71 75 69 63 6b 20 62  |.@.E.The quick b|
00000010  72 6f 77 6e 20 66 6f 78  20 6a 75 6d 70 73 20 6f  |rown fox jumps o|
00000020  76 65 72 20 74 68 65 20  6c 61 7a 79 20 64 6f 67  |ver the lazy dog|
00000030  0a 1b 45 01 54 68 65 20  71 75 69 63 6b 20 62 72  |..E.The quick br|
00000040  6f 77 6e 20 66 6f 78 20  6a 75 6d 70 73 20 6f 76  |own fox jumps ov|
00000050  65 72 20 74 68 65 20 6c  61 7a 79 20 64 6f 67 0a  |er the lazy dog.|
00000060  1b 45 00 1d 56 41 03                              |.E..VA.|
00000067
Double-strike

- The command is:
- ESC G [ number ]
Use 1 to enable, or 0 to disable. On the model tested here, this appears to be identical to the “emphasis” mode above.
require __DIR__ . '/autoload.php';
use Mike42\Escpos\Printer;
use Mike42\Escpos\PrintConnectors\FilePrintConnector;
$connector = new FilePrintConnector("/dev/usb/lp0");
$printer = new Printer($connector);

/* Double-strike (looks basically the same as emphasis) */
for($i = 0; $i < 2; $i++) {
	$printer -> setDoubleStrike($i == 1);
	$printer -> text("The quick brown fox jumps over the lazy dog\n");
}
$printer -> setDoubleStrike(false);
$printer -> cut();
$printer -> close();
00000000  1b 40 1b 47 00 54 68 65  20 71 75 69 63 6b 20 62  |.@.G.The quick b|
00000010  72 6f 77 6e 20 66 6f 78  20 6a 75 6d 70 73 20 6f  |rown fox jumps o|
00000020  76 65 72 20 74 68 65 20  6c 61 7a 79 20 64 6f 67  |ver the lazy dog|
00000030  0a 1b 47 01 54 68 65 20  71 75 69 63 6b 20 62 72  |..G.The quick br|
00000040  6f 77 6e 20 66 6f 78 20  6a 75 6d 70 73 20 6f 76  |own fox jumps ov|
00000050  65 72 20 74 68 65 20 6c  61 7a 79 20 64 6f 67 0a  |er the lazy dog.|
00000060  1b 47 00 1d 56 41 03                              |.G..VA.|
00000067
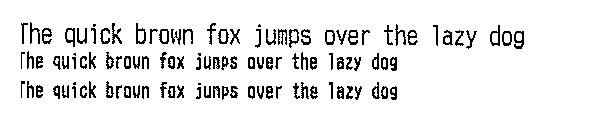
Fonts
- The command is:
- ESC M [ number ]
There are three possible fonts, documented as “A”, “B” and “C”, and numbered 0, 1, and 2. Many printers, including this one, don’t have Font C.
require __DIR__ . '/autoload.php';
use Mike42\Escpos\Printer;
use Mike42\Escpos\PrintConnectors\FilePrintConnector;
$connector = new FilePrintConnector("/dev/usb/lp0");
$printer = new Printer($connector);

/* Fonts (many printers do not have a 'Font C') */
$fonts = array(
	Printer:::FONT_A,
	Printer:::FONT_B,
	Printer:::FONT_C);
for($i = 0; $i < count($fonts); $i++) {
	$printer -> setFont($fonts[$i]);
	$printer -> text("The quick brown fox jumps over the lazy dog\n");
}
$printer -> setFont(); // Reset
$printer -> cut();
$printer -> close();
00000000  1b 40 1b 4d 00 54 68 65  20 71 75 69 63 6b 20 62  |.@.M.The quick b|
00000010  72 6f 77 6e 20 66 6f 78  20 6a 75 6d 70 73 20 6f  |rown fox jumps o|
00000020  76 65 72 20 74 68 65 20  6c 61 7a 79 20 64 6f 67  |ver the lazy dog|
00000030  0a 1b 4d 01 54 68 65 20  71 75 69 63 6b 20 62 72  |..M.The quick br|
00000040  6f 77 6e 20 66 6f 78 20  6a 75 6d 70 73 20 6f 76  |own fox jumps ov|
00000050  65 72 20 74 68 65 20 6c  61 7a 79 20 64 6f 67 0a  |er the lazy dog.|
00000060  1b 4d 02 54 68 65 20 71  75 69 63 6b 20 62 72 6f  |.M.The quick bro|
00000070  77 6e 20 66 6f 78 20 6a  75 6d 70 73 20 6f 76 65  |wn fox jumps ove|
00000080  72 20 74 68 65 20 6c 61  7a 79 20 64 6f 67 0a 1b  |r the lazy dog..|
00000090  4d 00 1d 56 41 03                                 |M..VA.|
00000096
Justification

- The command is:
- ESC a [ number ]
Use 0 to justify left, 1 to centre the text, or 2 to right-align it.
require __DIR__ . '/autoload.php';
use Mike42\Escpos\Printer;
use Mike42\Escpos\PrintConnectors\FilePrintConnector;
$connector = new FilePrintConnector("/dev/usb/lp0");
$printer = new Printer($connector);

/* Justification */
$justification = array(
	Printer:::JUSTIFY_LEFT,
	Printer:::JUSTIFY_CENTER,
	Printer:::JUSTIFY_RIGHT);
for($i = 0; $i < count($justification); $i++) {
	$printer -> setJustification($justification[$i]);
	$printer -> text("A man a plan a canal panama\n");
}
$printer -> setJustification(); // Reset
$printer -> cut();
$printer -> close();
00000000  1b 40 1b 61 00 41 20 6d  61 6e 20 61 20 70 6c 61  |.@.a.A man a pla|
00000010  6e 20 61 20 63 61 6e 61  6c 20 70 61 6e 61 6d 61  |n a canal panama|
00000020  0a 1b 61 01 41 20 6d 61  6e 20 61 20 70 6c 61 6e  |..a.A man a plan|
00000030  20 61 20 63 61 6e 61 6c  20 70 61 6e 61 6d 61 0a  | a canal panama.|
00000040  1b 61 02 41 20 6d 61 6e  20 61 20 70 6c 61 6e 20  |.a.A man a plan |
00000050  61 20 63 61 6e 61 6c 20  70 61 6e 61 6d 61 0a 1b  |a canal panama..|
00000060  61 00 1d 56 41 03                                 |a..VA.|
00000066
Barcodes
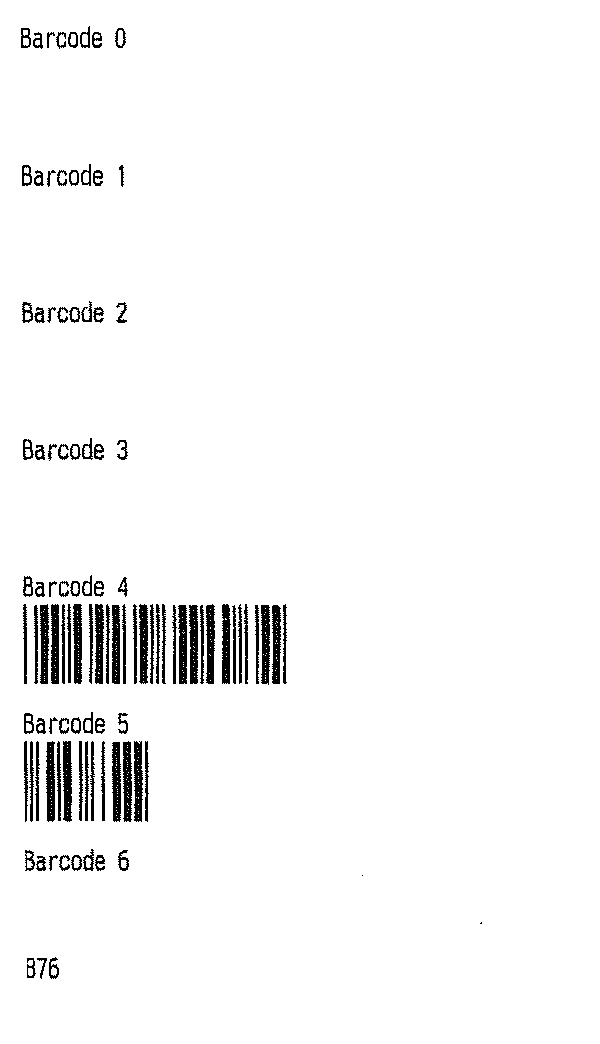
- The commands are:
- GS h [ number ]
- ESC k [ number ] [ text ] NUL
The first command sets the barcode height — measured in dots, while the second one prints the actual barcode. The number represents the barcode standard, which for most purposes should be “4”, representing CODE39. 6 standards are supported by the PHP driver.
You will notice that due to driver glitches or printer incompatibility, not all of the barcodes print! As above, my advice is to use CODE39 if you run into this.
require __DIR__ . '/autoload.php';
use Mike42\Escpos\Printer;
use Mike42\Escpos\PrintConnectors\FilePrintConnector;
$connector = new FilePrintConnector("/dev/usb/lp0");
$printer = new Printer($connector);

/* Barcodes */
$barcodes = array(
	Printer:::BARCODE_UPCA,
	Printer:::BARCODE_UPCE,
	Printer:::BARCODE_JAN13,
	Printer:::BARCODE_JAN8,
	Printer:::BARCODE_CODE39,
	Printer:::BARCODE_ITF,
	Printer:::BARCODE_CODABAR);
$printer -> setBarcodeHeight(80);
for($i = 0; $i < count($barcodes); $i++) {
	$printer -> text("Barcode $i " . "\n");
	$printer -> barcode("9876", $barcodes[$i]);
	$printer -> feed();
}
$printer -> cut();
$printer -> close();
00000000  1b 40 1d 68 50 42 61 72  63 6f 64 65 20 30 20 0a  |.@.hPBarcode 0 .|
00000010  1d 6b 00 39 38 37 36 00  0a 42 61 72 63 6f 64 65  |.k.9876..Barcode|
00000020  20 31 20 0a 1d 6b 01 39  38 37 36 00 0a 42 61 72  | 1 ..k.9876..Bar|
00000030  63 6f 64 65 20 32 20 0a  1d 6b 02 39 38 37 36 00  |code 2 ..k.9876.|
00000040  0a 42 61 72 63 6f 64 65  20 33 20 0a 1d 6b 03 39  |.Barcode 3 ..k.9|
00000050  38 37 36 00 0a 42 61 72  63 6f 64 65 20 34 20 0a  |876..Barcode 4 .|
00000060  1d 6b 04 39 38 37 36 00  0a 42 61 72 63 6f 64 65  |.k.9876..Barcode|
00000070  20 35 20 0a 1d 6b 05 39  38 37 36 00 0a 42 61 72  | 5 ..k.9876..Bar|
00000080  63 6f 64 65 20 36 20 0a  1d 6b 06 39 38 37 36 00  |code 6 ..k.9876.|
00000090  0a 1d 56 41 03                                    |..VA.|
00000095
Resources
Linked previously in this post:
- escpos-php: Library to work with ESC/POS thermal printers
- Epson FAQ on ESC/POS (via the Internet Archive)
And if you’ve just received an Epson printer and need to figure out how it works:
Update 2015-03-10: Re-wrote examples for the newer version of escpos-php.
Update 2016-04-22: Updated examples again to match the latest driver code.