Asterisk is an open-source IP PABX, meaning it lets you run a phone system over your computer network. Whilst IP telephony has been gaining the upper hand over traditional PABX’s for years, few people outside the industry realise just how easy it is to set up your own phone server.
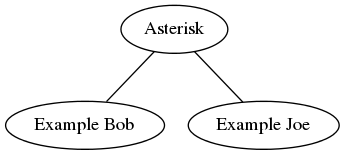
With this guide, you can turn any Linux device into your own PABX for free. We’ll set up two SIP devices on a small network, so that they can dial each other.
Prepare the environment
First, you should get something with Linux. A virtual machine, a spare laptop, a Raspberry pi- anything.
Install asterisk with one of the following commands, depending on your distribution:
apt-get install asterisk
yum install asterisk
If you don’t have an IP phone handy, then you need a program on your computer which speaks SIP (Session Initiation Protocol). This guide uses Linphone (available for Linux and Windows among other platforms) and the Polycom 331 as examples, but any two SIP endpoints will work just as well for testing.
Make users on the server
Asterisk keeps its configuration in /etc/asterisk. The file we need to edit for this setup is users.conf. Open it up with your favourite text editor:
nano /etc/asterisk/users.conf
The syntax is similar to .ini files. Add two users to the bottom of the file:
[6001]
fullname = Example Bob
secret = 1234
hassip = yes
context = users
host = dynamic

[6002]
fullname = Example Joe
secret = 1234
hassip = yes
context = users
host = dynamic
What does this mean?
[600..]- This is the username, and will become the user’s extension on our small network. Dial 6001 for Bob or 6002 for Joe. Whilst
'bob'and'joe'could also be used here, numeric usernames are more common. fullname = ...- Used in the Caller ID.
secret = ...- The password used to log in. In a secure system, you would use something other than
1234! hassip = yes- This tells Asterisk to make a SIP account for the user. Asterisk supports a few other account types, but SIP is the most widely implemented.
context = users- A context is a bit like a category for the user. The extensions which they can dial depend on this.
host = dynamic- This tells Asterisk that the users don’t have a fixed IP address. This means that they must register periodically with the SIP server so that their IP is known.
To activate these changes, save the file, and reload the configuration through the Asterisk console:
mike# asterisk -r -vvvvvvvvv
CLI> reload
CLI> sip show users
Username                   Secret           Accountcode      Def.Context      ACL  ForcerPort
6002                       1234                              users            No   Yes
6001                       1234                              users            No   Yes
All of those v’s stand for verbose, meaning that the asterisk console will give you more information.
Configure the clients
First you should find out your server’s IP address. From the terminal, you can find this with:
ifconfig
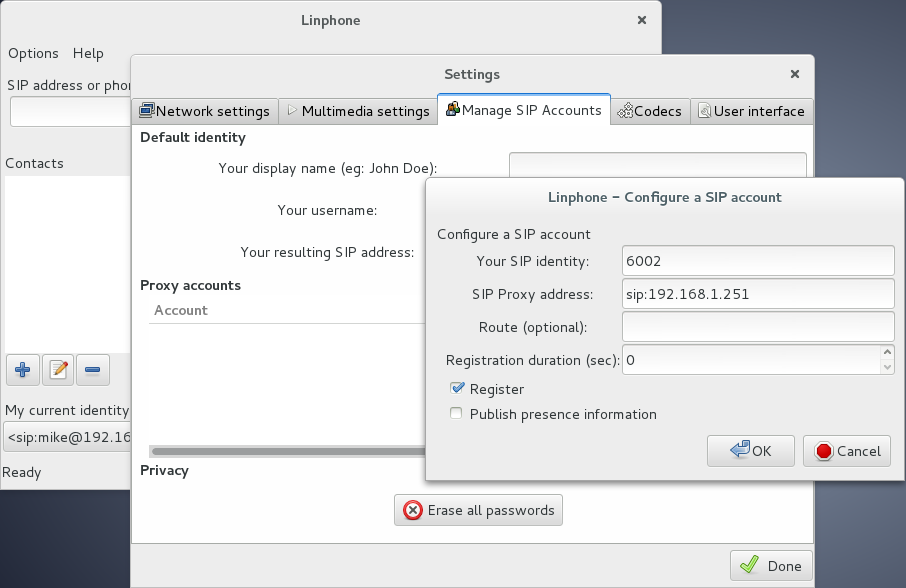
Setting up “Example Joe” on a Linphone instance only takes a few clicks. Add a new account, with 6002 as the identity, and your asterisk server as the proxy address (eg: sip://voip.example.com). Click the image below for an example:
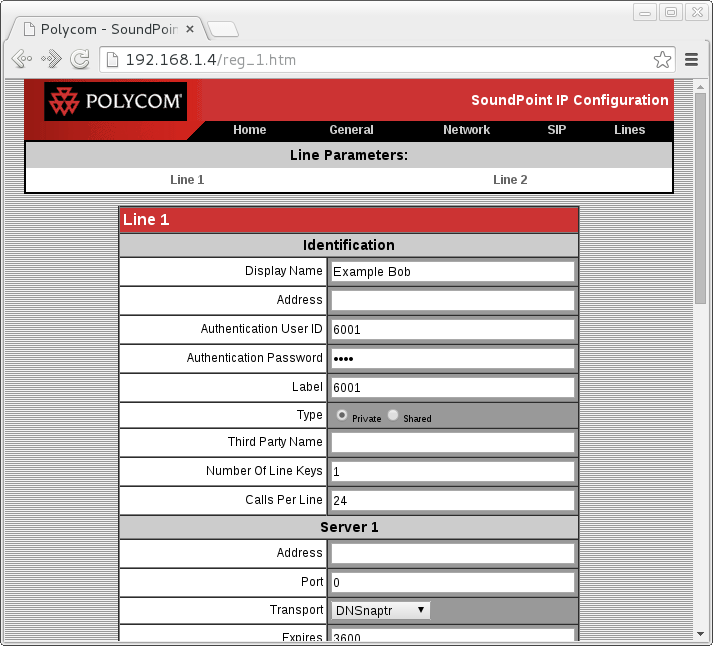
Meanwhile, the Polycom 331 can be configured as “Example Bob” by navigating the menus on the phone itself, or via the web (suggested). The default login is:
- Username:
- Polycom
- Password:
- 456

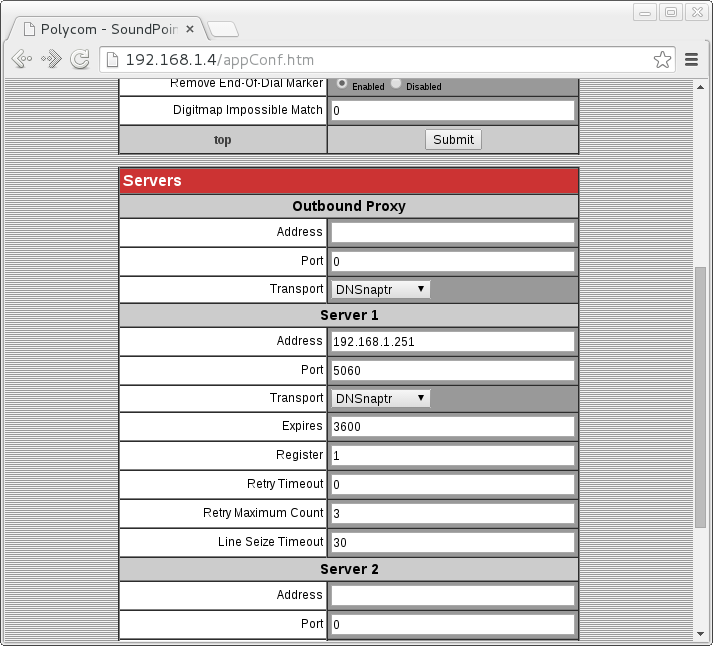
Your asterisk server address needs to be added under SIP -> Servers -> Server 1, while Example Bob’s identity is added under Lines -> Line1. Click the below images for an example.
Once these are saved, the two clients will register with the server. In SIP, clients periodically register so that the server knows where to find them.
In the asterisk console, you will see something like this:
-- Registered SIP '6001' at 192.168.1.4:5060
   > Saved useragent "PolycomSoundPointIP-SPIP_331-UA/3.3.3.0069" for peer 6001
If registration fails, the console will tell you why, provided that you have set the verbosity high enough
You can check which users have registered with this command:
CLI> sip show peers
Name/username              Host                                    Dyn Forcerport ACL Port     Status
6001/6001                  192.168.1.4                              D   N             5060     Unmonitored
6002                       (Unspecified)                            D   N             0        Unmonitored
2 sip peers [Monitored: 0 online, 0 offline Unmonitored: 1 online, 1 offline]
Unfortunately, even after both users have registered, they aren’t ready to communicate yet.
Add extensions to the server
In the world of VOIP, an extension is not a real loop of copper, but a sequential list of things to do when a number is dialled.
This extra step is where Asterisk gets its flexibility. With your extensions.conf setup, you could set your instance to redirect numbers, or dial for 12 seconds before going to voicemail.
We haven’t told the server what to do, so if “Example Bob” makes a call, it wont work yet:
  == Using SIP RTP CoS mark 5
[Nov 15 07:59:30] NOTICE[6070]: chan_sip.c:22753 handle_request_invite: Call from '6001' (192.168.1.4:5060) to extension '6002' rejected because extension not found in context 'users'.
To add extensions, open extensions.conf up:
nano /etc/asterisk/extensions.conf
The syntax is still INI-like. Under [users], we add the steps for each extension, numbered sequentially. In this case, there is only 1 step for each extension: to dial a SIP user.
[users]
exten => 6001,1,Dial(SIP/6001)
exten => 6002,1,Dial(SIP/6002)
In the Asterisk console, type reload to activate the changes.
Now, as planned, both users on the network can dial each-other and have a chat.
More advanced setups
Ok, so you’ve built what is essentially an intercom, but not a full phone system! For a start, you need a way to dial the outside world, and let the outside world dial you. For that, you’ll need to work with hardware and service providers.