
Have you ever wondered how professionals get photos to pop up on their computer as they snap them? Most higher-end cameras have mini USB connection, and software is available to retrieve images as they are taken.
Rather than use a GUI app, in this post I’ll use a command-line program called gphoto2 to drop the images into a folder. With large thumbnails set in your file browser, a desktop program would be redundant.
Basic process
First, you need to install the gphoto2 program. Depending on your system, one of the following commands should do the trick:
apt-get install gphoto2
yum install gphoto2
Now, plug in the camera. The command to do a “tethered capture” is:
gphoto2 --capture-tethered
Unfortunately, in most desktop environments, your file manager will mount the camera automatically. If this is the case, then the command will give you an error:
mike@mikebox:~$ gphoto2 --capture-tethered
Waiting for events from camera. Press Ctrl-C to abort.

*** Error ***
An error occurred in the io-library ('Could not claim the USB device'): Could not claim interface 0 (Device or resource busy). Make sure no other program (gvfs-gphoto2-volume-monitor) or kernel module (such as sdc2xx, stv680, spca50x) is using the device and you have read/write access to the device.
*** Error (-53: 'Could not claim the USB device') ***

For debugging messages, please use the --debug option.
Debugging messages may help finding a solution to your problem.
If you intend to send any error or debug messages to the gphoto
developer mailing list <gphoto-devel@lists.sourceforge.net>, please run
gphoto2 as follows:

    env LANG=C gphoto2 --debug --debug-logfile=my-logfile.txt --capture-tethered

Please make sure there is sufficient quoting around the arguments.
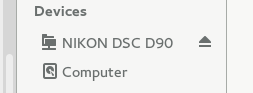
Simply find the camera and unmount it using the eject button:
Now when you type the command, it will block until a photo is taken, and then show you the name of the photo:
mike@mikebox:~$ gphoto2 --capture-tethered
Waiting for events from camera. Press Ctrl-C to abort.
UNKNOWN PTP Property 5007 changed
...
Downloading 'DSC_0236.JPG' from folder '/store_00010001/DCIM/100NCD90'...
Saving file as DSC_0236.JPG
Deleting 'DSC_0236.JPG' from folder '/store_00010001/DCIM/100NCD90'...
Each of the photos is loaded into the working directory after you release the shutter, so you simply close gphoto2 when you’re done — no manual downloading or SD card required.
Extending this method
Ok, so now that I’ve covered this basic use case, the real reason I suggest gphoto2 is that it will let you script just about anything to do with your camera.
Just typing gphoto2 --help shows that it can let you trigger a photo or video on a timer, download and delete folders from the camera, or hook up programs via a pipe for processing the files in realtime.
Endless possibilities.