If you use the libvirt virtualisation libraries, then you will be familiar with the “user session”. This feature lets you provision virtual machines to run under a regular, unprivileged user account.
The user session is used by GNOME Boxes, and can also be managed from Virtual Machine Manager.
The main downside to this setup is that a regular user can only access a very limited range of networking options. The last time that I mentioned this in a blog post, a reader pointed out that you can actually use qemu-bridge-helper to provide bridged networking to unprivileged virtual machines.
Today I finally tried this out, and it worked really well. With a bit of configuration, you can extend proper networking to this type of VM.
The host
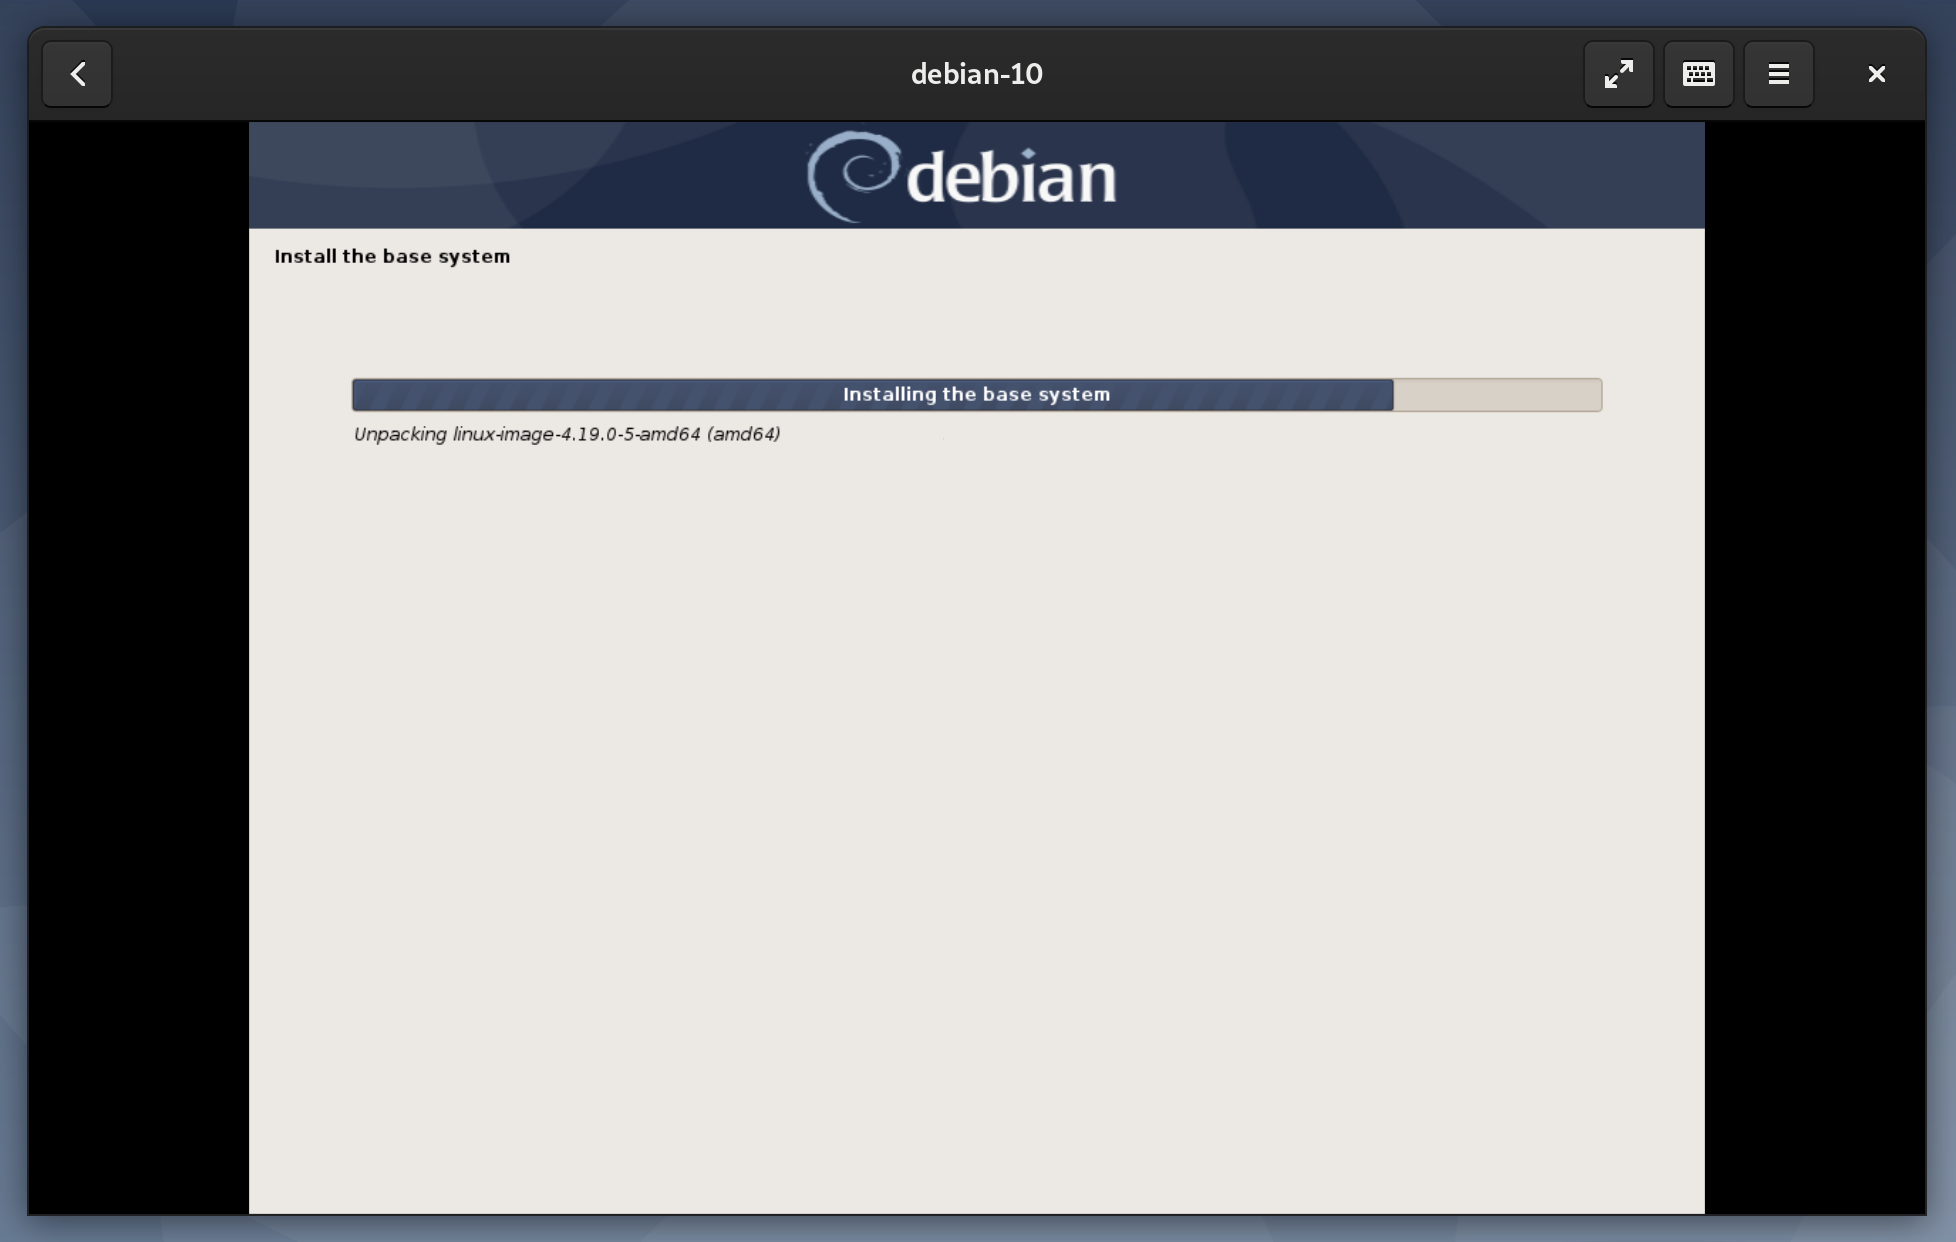
I’m running a graphical Debian 10 desktop, with a few basic virtualisation packages.
gnome-boxesfor creating VM’s as a local user. This depends onlibvirt-daemon, which is enough to host VM’s on the system.virt-managerfor a more advanced graphical interface.
The tool that I’m writing about today is qemu-bridge-helper, which is in the qemu-system-common package.
After installation, you will also need to ensure that libvirtd is running.
$ systemctl enable libvirtd.service
$ systemctl start libvirtd.service
Set up a bridge
Libvirt ships with a basic network bridge configuration, you just need to enable it.
Command-line method
Start the default network bridge, and configure it to run on startup.
$ sudo virsh net-autostart --network default
$ sudo virsh net-start --network default
Once this is set up, you should see the bridge virbr0, reporting the IP range 192.168.122.1/24.
$ ip addr show virbr0
3: virbr0: <NO-CARRIER,BROADCAST,MULTICAST,UP> mtu 1500 qdisc noqueue state DOWN group default qlen 1000
    link/ether xx:xx:xx:xx:xx:xx brd ff:ff:ff:ff:ff:ff
    inet 192.168.122.1/24 brd 192.168.122.255 scope global virbr0
       valid_lft forever preferred_lft forever
Graphical method
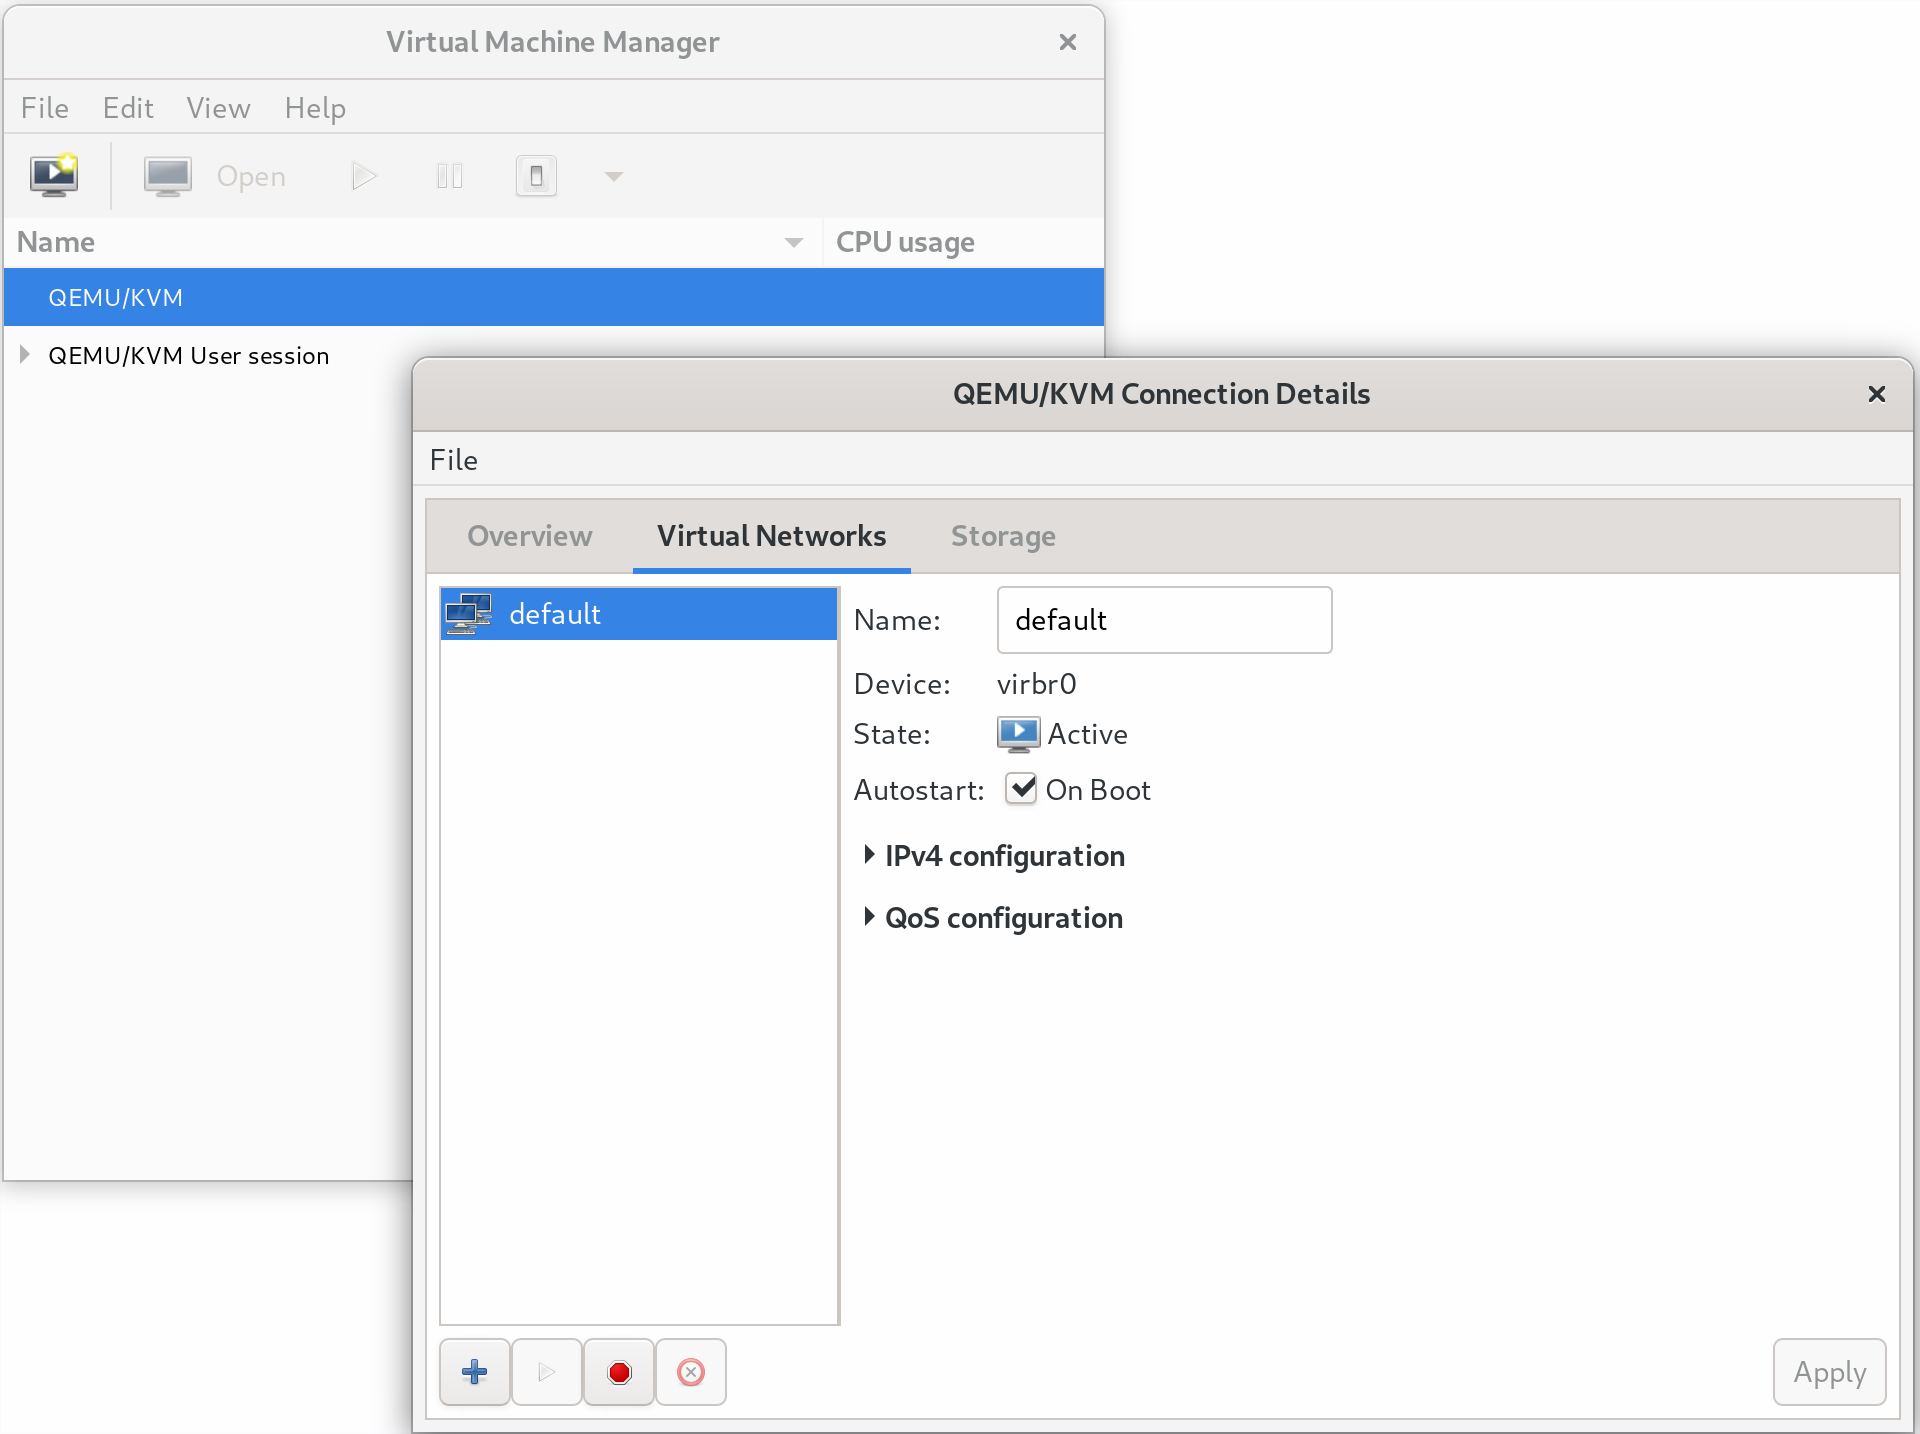
First, open up Virtual Machine Manager, and authenticate. Right click on QEMU/KVM, and select Details.
Under Virtual Networks → default → Autostart, check On Boot, then click Apply.
Setting up qemu-bridge-helper
Create the file /etc/qemu/bridge.conf with the content:
allow virbr0
Restrict the permissions of this file to make sure it can’t be edited by regular users.
# chown root:root /etc/qemu/bridge.conf
# chmod 0640 /etc/qemu/bridge.conf
Add setuid to the qemu-bridge-helper binary.
# chmod u+s /usr/lib/qemu/qemu-bridge-helper
If you do not correctly set this last step, then you will receive the following error when you attempt to connect a VM to the bridge:
Error starting domain: internal error: /usr/lib/qemu/qemu-bridge-helper --use-vnet --br=virbr0 --fd=28: failed to communicate with bridge helper: Transport endpoint is not connected
stderr=failed to create tun device: Operation not permitted
Setting up the VM
Create a virtual machine, either though GNOME Boxes or Virtual Machine Manager. I am using a CentOS VM as an example here, but the guest platform is not particularly important.
Using Virtual Machine Manage, change the network card to the “shared network” virbr0.
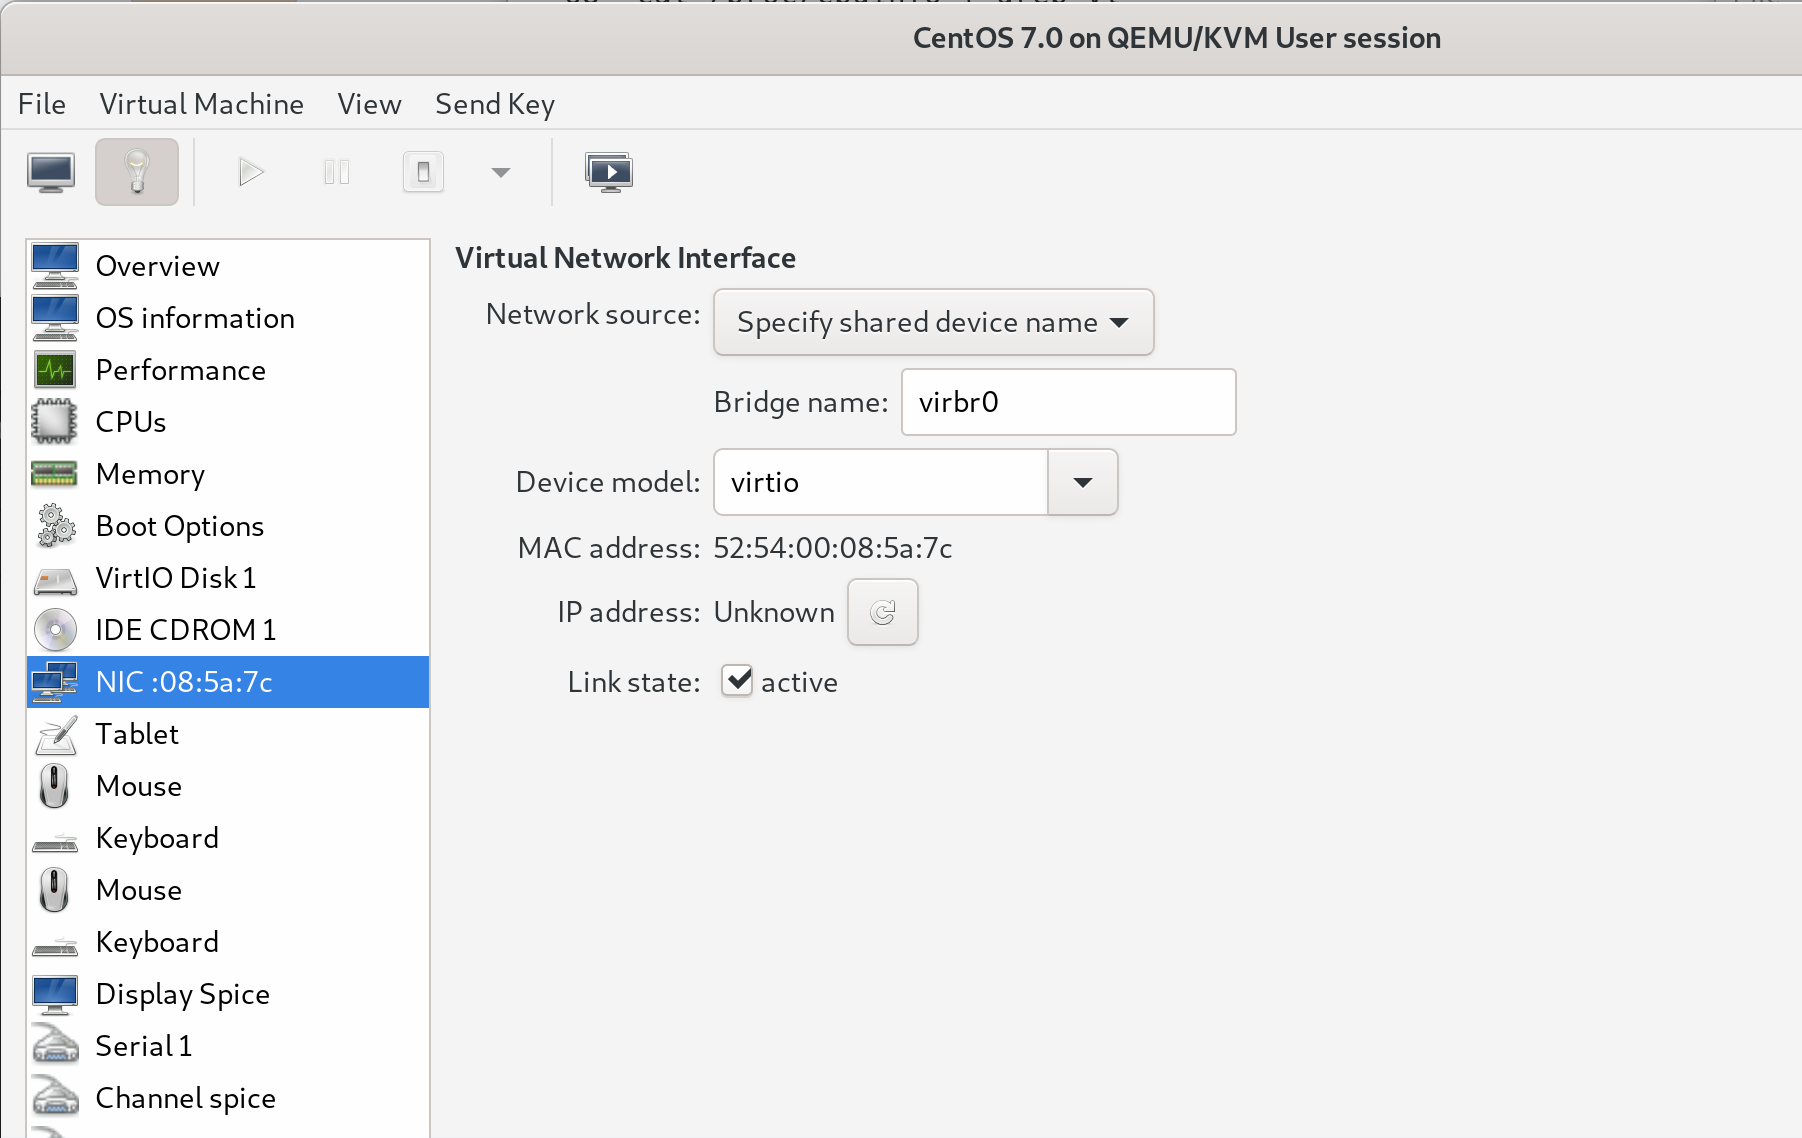
The graphical configuration above is equivalent to the following libvirt domain XML, as below.
<interface type='bridge'>
  <mac address='52:54:00:08:5a:7c'/>
  <source bridge='virbr0'/>
  <model type='virtio'/>
  <address type='pci' domain='0x0000' bus='0x00' slot='0x03' function='0x0'/>
</interface>
Result
After restarting the network interface in the guest, I was able to ping the the guest from the host and vice versa.
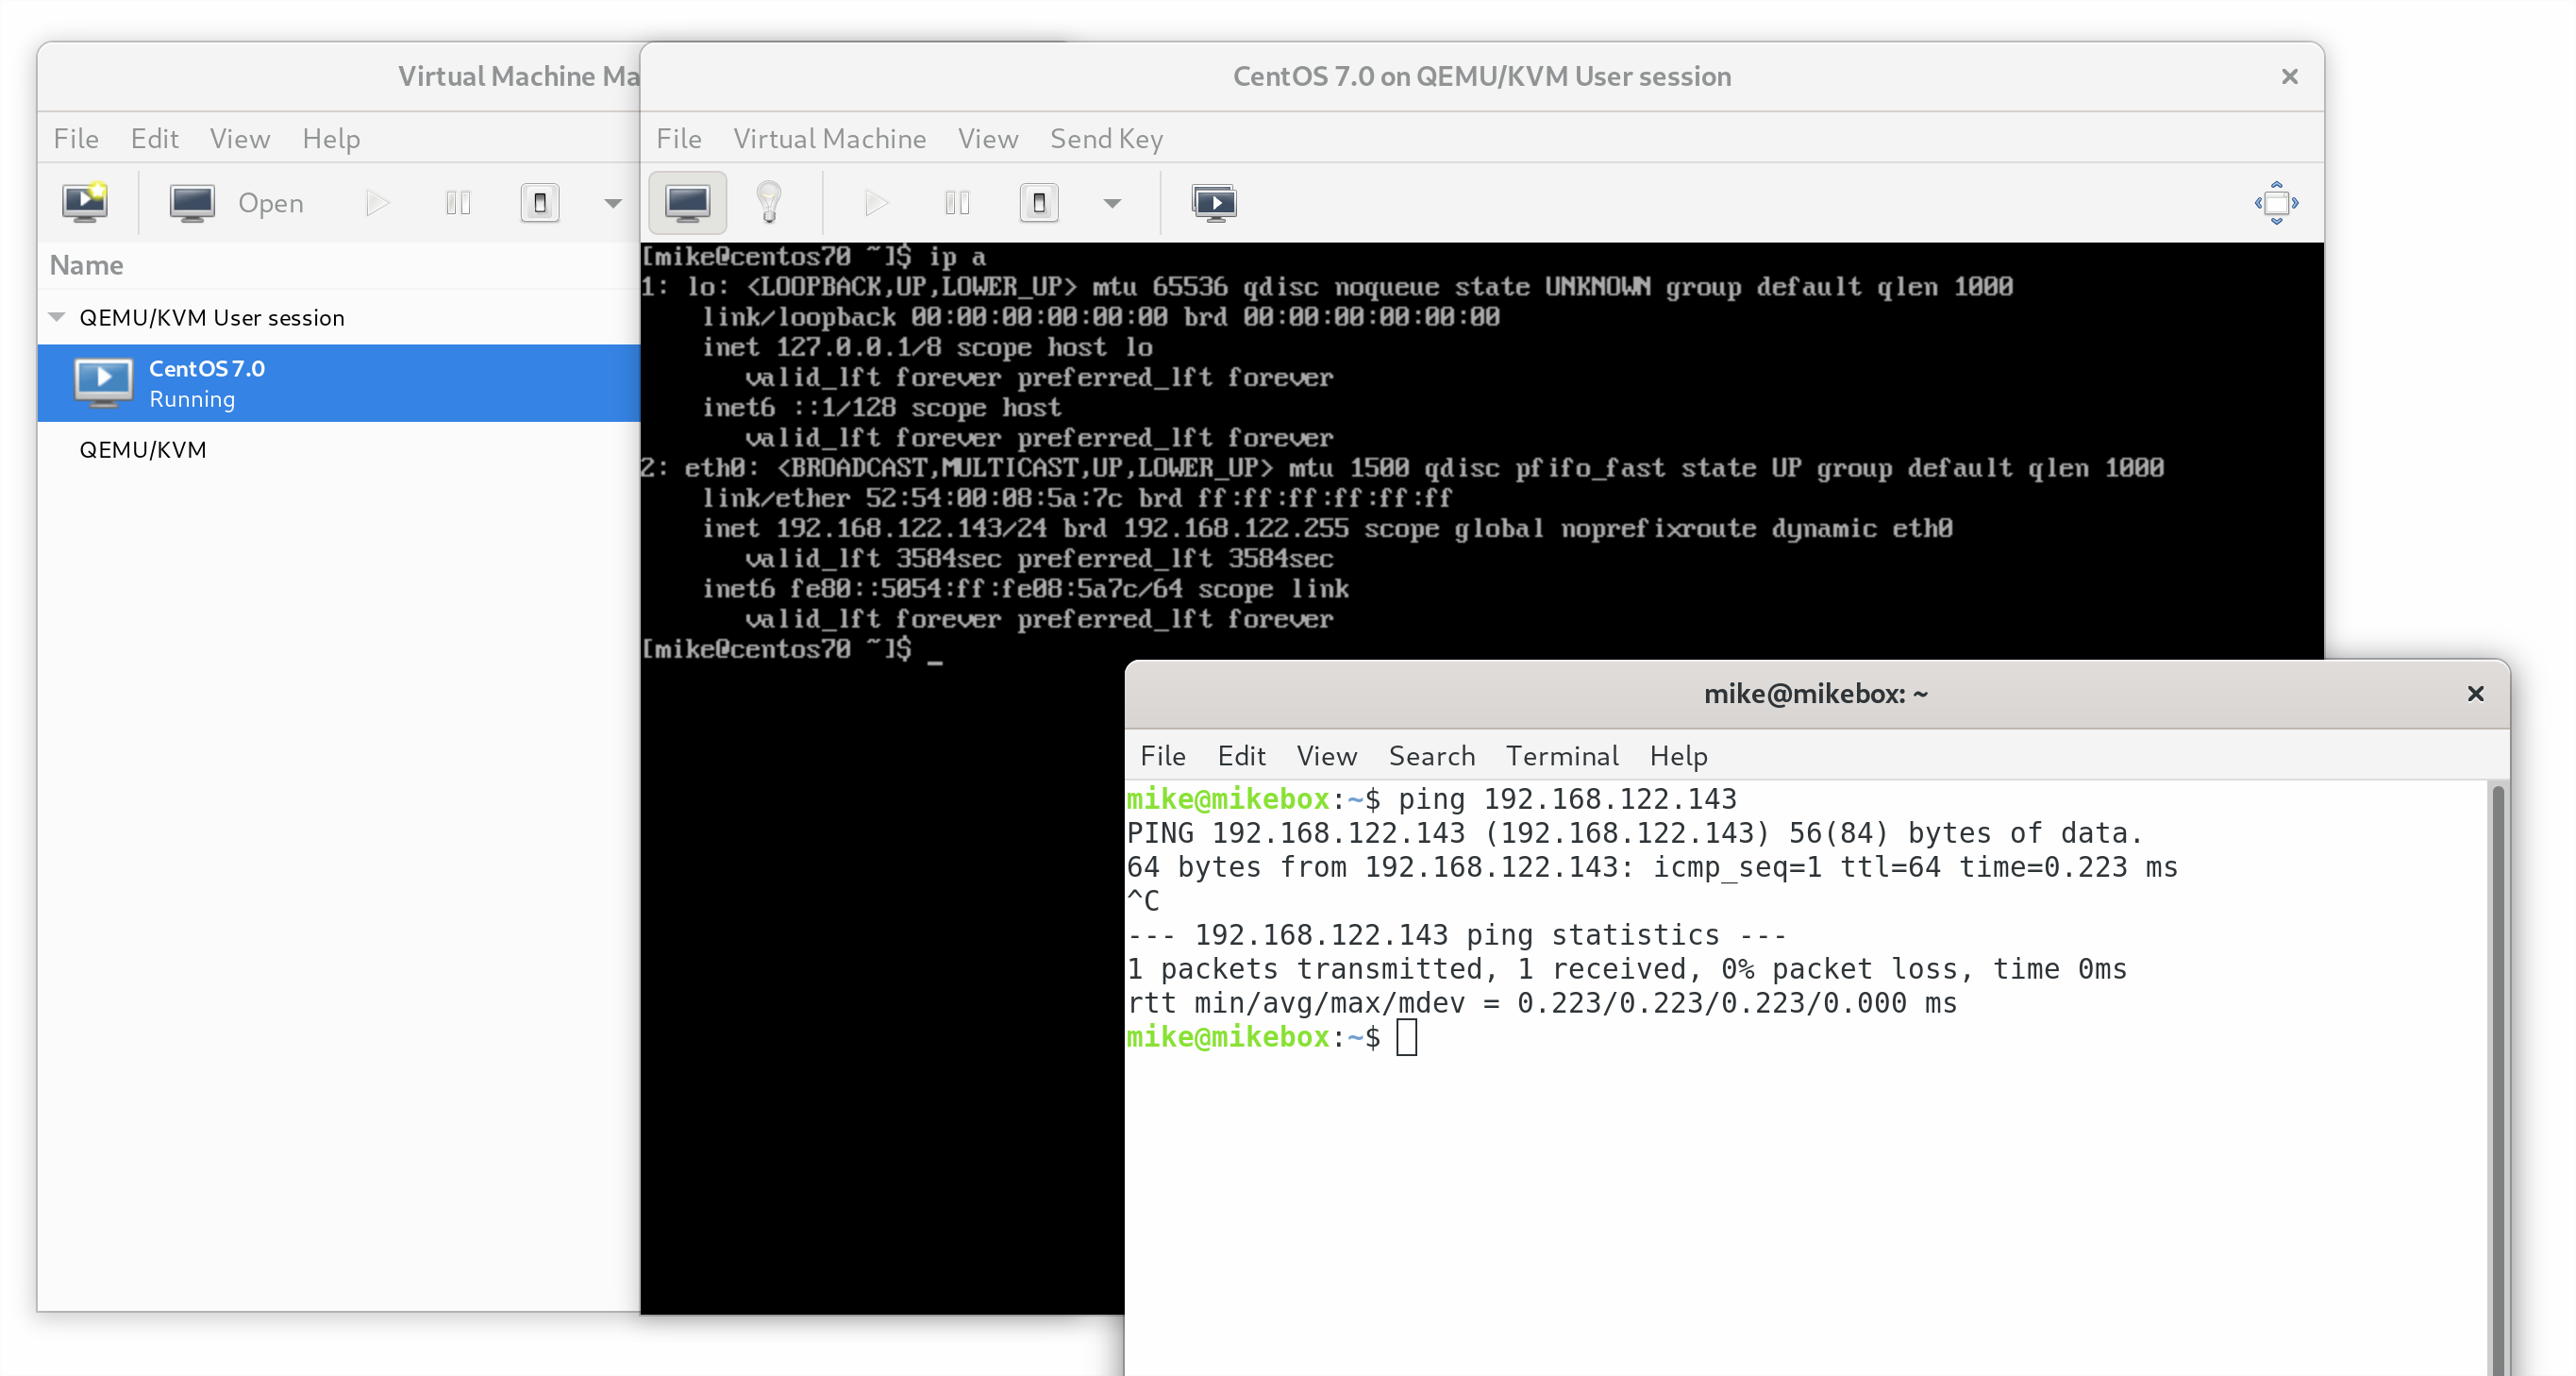
This is a significant improvement from “user-mode” networking, which does not facilitate host-to-guest and guest-to-guest communication.
The default virbr0 bridge uses an internal subnet, so the guest here is still inaccessible from the wider LAN. If this doesn’t match your setup, then you can use the same technique to connect unprivileged virtual machines to another bridge of your choice.
Further reading
I had to adapt some paths, user accounts and package names to get this working on Debian. The sources I used are:
- This answer on Unix StackExchange – found here (thank you Fouad!)
- QEMU Wiki: Features/HelperNetworking