I recently spent some time improving my software development workflow at home, since my previous setup was starting to limit me. I settled on a configuration which uses GPU passthrough with the KVM hypervisor, running Debian as both a host and a guest.
This post aims to show some of the benefits and drawbacks of this more complex setup for my use case, as well as a specific combination of hardware and software which can be made to work.
Background and previous setup
I was using Debian testing as a host system, and provisioning project-specific virtual machines to work in via virt-manager. I use two monitors, and typically had an IDE (in the VM) open on one monitor, and a web browser (on the host) open on the other.
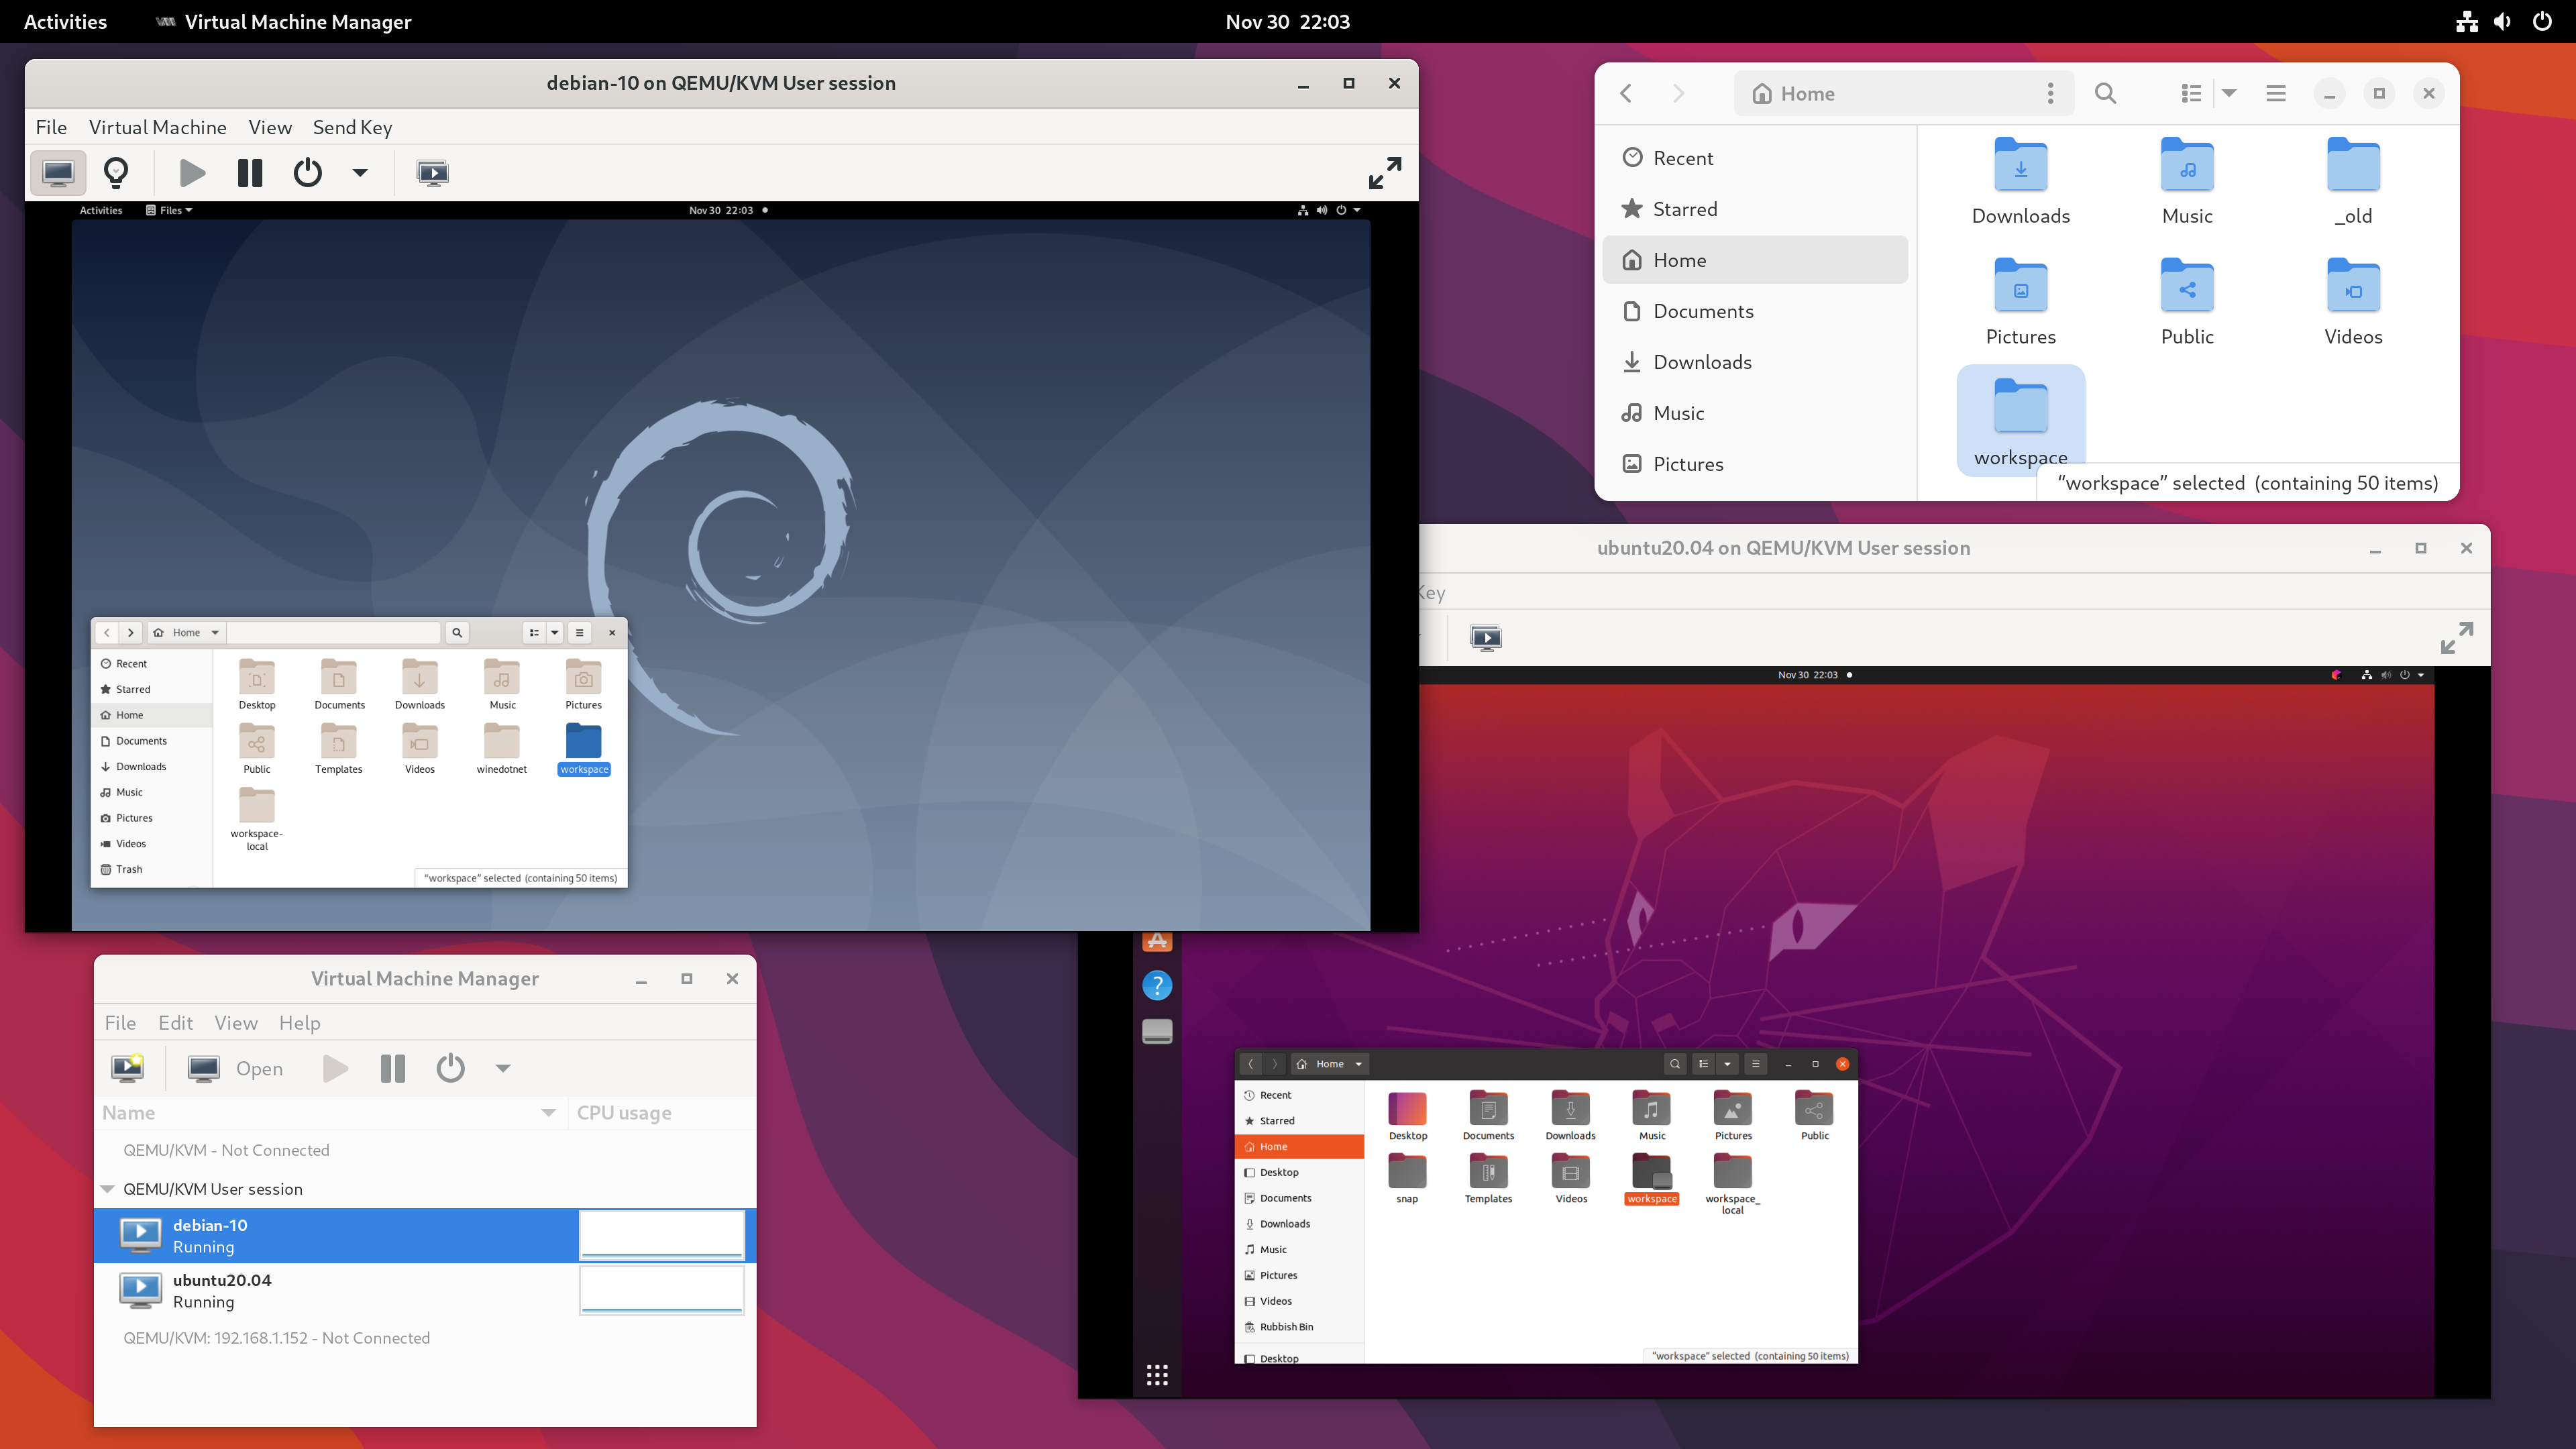
The setup is simple and effective:
- The VMs ran in the QEMU user session - previously blogged about here.
- The path
/home/mike/workspaceon the host was shared with every VM via a 9p fileshare. - Each desktop was set to 1920 x 1080 resolution, with auto-resize disabled. I kept the VM’s at this lower resolution to get acceptable graphical performance on 4K monitors when I set this up.
This allowed me to keep the host operating system uncluttered, which I value for both maintainability and security. Modern software development involves running a lot of code, such as dependencies pulled in via a language-specific package manager, random binaries from GitHub, or tools installed via a sketchy curl ... | sudo sh command. Better to keep that in a VM.
The main drawbacks are with the interface into the VM.
- Due to scaling, I had imperfect image quality. I also had a small but noticeable input lag when working in my IDE.
- Development involving 3D graphics was impractical due to the performance difference. I reported a trivial bug in Blender earlier this year but didn’t have an environment suitable for more extensive development on that codebase.
- There was an audio delay when testing within the VM. I created a NES demo last year and this delay was less than ideal when it came to adding sound.
I was at one point triple-booting Debian, Ubuntu 22.04 and Windows, so that I could also run some software which wouldn’t work well in this setup.
Hardware
GPU passthrough on consumer hardware is highly dependent on motherboard and BIOS support. The most critical components in my setup are:
- Motherboard: ASUS TUF X470-PLUS GAMING
- CPU: AMD Ryzen 7 5800X
- Monitors: 2 x LG 27UD58
- Graphics card: AMD Radeon RX 6950 XT
- Installed at
PCIEX16_1, directly connected to the CPU - Connected to DisplayPort inputs on the two monitors
- Installed at
I added one component specifically for this setup:
- Second graphics card: AMD Radeon RX 6400
- Installed at
PCIEX16_2, connected to chipset - Connected to HDMI inputs on the two monitors (one directly, one via an adapter)
- Installed at
The second graphics card will be used by the host. The RX 6400 is a low-cost, low-power, low-profile card which supports UEFI, Vulkan and the modern amdgpu driver.
In the slot I’ve installed it, it’s limited to PCIE 2.0 x4, and 1920 x 1080 is the highest resolution I can run at 60 Hz on these monitor inputs. I only need to use this to set up the VM’s, or as a recovery interface, so I’m not expecting this to be a major issue.
Inspecting IOMMU groups
On a fresh install of Debian 12, I started walking through the PCI passthrough via OVMF guide on the Arch Wiki, adapting it for my specific setup as necessary.
I verified that I was using UEFI boot, had SVM and IOMMU enabled, and I also enabled resizable BAR. I did not set any IOMMU-related Linux boot options, and also could not find a firmware setting to select which graphics card to use during boot.
Using the script on the Arch Wiki, I then printed out the IOMMU groups on my hardware, which are as follows:
IOMMU Group 0:
	00:01.0 Host bridge [0600]: Advanced Micro Devices, Inc. [AMD] Starship/Matisse PCIe Dummy Host Bridge [1022:1482]
IOMMU Group 1:
	00:01.1 PCI bridge [0604]: Advanced Micro Devices, Inc. [AMD] Starship/Matisse GPP Bridge [1022:1483]
IOMMU Group 2:
	00:01.3 PCI bridge [0604]: Advanced Micro Devices, Inc. [AMD] Starship/Matisse GPP Bridge [1022:1483]
IOMMU Group 3:
	00:02.0 Host bridge [0600]: Advanced Micro Devices, Inc. [AMD] Starship/Matisse PCIe Dummy Host Bridge [1022:1482]
IOMMU Group 4:
	00:03.0 Host bridge [0600]: Advanced Micro Devices, Inc. [AMD] Starship/Matisse PCIe Dummy Host Bridge [1022:1482]
IOMMU Group 5:
	00:03.1 PCI bridge [0604]: Advanced Micro Devices, Inc. [AMD] Starship/Matisse GPP Bridge [1022:1483]
IOMMU Group 6:
	00:04.0 Host bridge [0600]: Advanced Micro Devices, Inc. [AMD] Starship/Matisse PCIe Dummy Host Bridge [1022:1482]
IOMMU Group 7:
	00:05.0 Host bridge [0600]: Advanced Micro Devices, Inc. [AMD] Starship/Matisse PCIe Dummy Host Bridge [1022:1482]
IOMMU Group 8:
	00:07.0 Host bridge [0600]: Advanced Micro Devices, Inc. [AMD] Starship/Matisse PCIe Dummy Host Bridge [1022:1482]
IOMMU Group 9:
	00:07.1 PCI bridge [0604]: Advanced Micro Devices, Inc. [AMD] Starship/Matisse Internal PCIe GPP Bridge 0 to bus[E:B] [1022:1484]
IOMMU Group 10:
	00:08.0 Host bridge [0600]: Advanced Micro Devices, Inc. [AMD] Starship/Matisse PCIe Dummy Host Bridge [1022:1482]
IOMMU Group 11:
	00:08.1 PCI bridge [0604]: Advanced Micro Devices, Inc. [AMD] Starship/Matisse Internal PCIe GPP Bridge 0 to bus[E:B] [1022:1484]
IOMMU Group 12:
	00:14.0 SMBus [0c05]: Advanced Micro Devices, Inc. [AMD] FCH SMBus Controller [1022:790b] (rev 61)
	00:14.3 ISA bridge [0601]: Advanced Micro Devices, Inc. [AMD] FCH LPC Bridge [1022:790e] (rev 51)
IOMMU Group 13:
	00:18.0 Host bridge [0600]: Advanced Micro Devices, Inc. [AMD] Matisse/Vermeer Data Fabric: Device 18h; Function 0 [1022:1440]
	00:18.1 Host bridge [0600]: Advanced Micro Devices, Inc. [AMD] Matisse/Vermeer Data Fabric: Device 18h; Function 1 [1022:1441]
	00:18.2 Host bridge [0600]: Advanced Micro Devices, Inc. [AMD] Matisse/Vermeer Data Fabric: Device 18h; Function 2 [1022:1442]
	00:18.3 Host bridge [0600]: Advanced Micro Devices, Inc. [AMD] Matisse/Vermeer Data Fabric: Device 18h; Function 3 [1022:1443]
	00:18.4 Host bridge [0600]: Advanced Micro Devices, Inc. [AMD] Matisse/Vermeer Data Fabric: Device 18h; Function 4 [1022:1444]
	00:18.5 Host bridge [0600]: Advanced Micro Devices, Inc. [AMD] Matisse/Vermeer Data Fabric: Device 18h; Function 5 [1022:1445]
	00:18.6 Host bridge [0600]: Advanced Micro Devices, Inc. [AMD] Matisse/Vermeer Data Fabric: Device 18h; Function 6 [1022:1446]
	00:18.7 Host bridge [0600]: Advanced Micro Devices, Inc. [AMD] Matisse/Vermeer Data Fabric: Device 18h; Function 7 [1022:1447]
IOMMU Group 14:
	01:00.0 Non-Volatile memory controller [0108]: Samsung Electronics Co Ltd NVMe SSD Controller SM981/PM981/PM983 [144d:a808]
IOMMU Group 15:
	02:00.0 USB controller [0c03]: Advanced Micro Devices, Inc. [AMD] Device [1022:43d0] (rev 01)
	02:00.1 SATA controller [0106]: Advanced Micro Devices, Inc. [AMD] 400 Series Chipset SATA Controller [1022:43c8] (rev 01)
	02:00.2 PCI bridge [0604]: Advanced Micro Devices, Inc. [AMD] 400 Series Chipset PCIe Bridge [1022:43c6] (rev 01)
	03:00.0 PCI bridge [0604]: Advanced Micro Devices, Inc. [AMD] 400 Series Chipset PCIe Port [1022:43c7] (rev 01)
	03:01.0 PCI bridge [0604]: Advanced Micro Devices, Inc. [AMD] 400 Series Chipset PCIe Port [1022:43c7] (rev 01)
	03:02.0 PCI bridge [0604]: Advanced Micro Devices, Inc. [AMD] 400 Series Chipset PCIe Port [1022:43c7] (rev 01)
	03:03.0 PCI bridge [0604]: Advanced Micro Devices, Inc. [AMD] 400 Series Chipset PCIe Port [1022:43c7] (rev 01)
	03:04.0 PCI bridge [0604]: Advanced Micro Devices, Inc. [AMD] 400 Series Chipset PCIe Port [1022:43c7] (rev 01)
	03:09.0 PCI bridge [0604]: Advanced Micro Devices, Inc. [AMD] 400 Series Chipset PCIe Port [1022:43c7] (rev 01)
	04:00.0 Ethernet controller [0200]: Realtek Semiconductor Co., Ltd. RTL8111/8168/8411 PCI Express Gigabit Ethernet Controller [10ec:8168] (rev 15)
	08:00.0 PCI bridge [0604]: Advanced Micro Devices, Inc. [AMD/ATI] Navi 10 XL Upstream Port of PCI Express Switch [1002:1478] (rev c7)
	09:00.0 PCI bridge [0604]: Advanced Micro Devices, Inc. [AMD/ATI] Navi 10 XL Downstream Port of PCI Express Switch [1002:1479]
	0a:00.0 VGA compatible controller [0300]: Advanced Micro Devices, Inc. [AMD/ATI] Navi 24 [Radeon RX 6400/6500 XT/6500M] [1002:743f] (rev c7)
	0a:00.1 Audio device [0403]: Advanced Micro Devices, Inc. [AMD/ATI] Navi 21/23 HDMI/DP Audio Controller [1002:ab28]
	0b:00.0 Non-Volatile memory controller [0108]: Sandisk Corp WD Blue SN550 NVMe SSD [15b7:5009] (rev 01)
IOMMU Group 16:
	0c:00.0 PCI bridge [0604]: Advanced Micro Devices, Inc. [AMD/ATI] Navi 10 XL Upstream Port of PCI Express Switch [1002:1478] (rev c0)
IOMMU Group 17:
	0d:00.0 PCI bridge [0604]: Advanced Micro Devices, Inc. [AMD/ATI] Navi 10 XL Downstream Port of PCI Express Switch [1002:1479]
IOMMU Group 18:
	0e:00.0 VGA compatible controller [0300]: Advanced Micro Devices, Inc. [AMD/ATI] Navi 21 [Radeon RX 6950 XT] [1002:73a5] (rev c0)
IOMMU Group 19:
	0e:00.1 Audio device [0403]: Advanced Micro Devices, Inc. [AMD/ATI] Navi 21/23 HDMI/DP Audio Controller [1002:ab28]
IOMMU Group 20:
	0f:00.0 Non-Essential Instrumentation [1300]: Advanced Micro Devices, Inc. [AMD] Starship/Matisse PCIe Dummy Function [1022:148a]
IOMMU Group 21:
	10:00.0 Non-Essential Instrumentation [1300]: Advanced Micro Devices, Inc. [AMD] Starship/Matisse Reserved SPP [1022:1485]
IOMMU Group 22:
	10:00.1 Encryption controller [1080]: Advanced Micro Devices, Inc. [AMD] Starship/Matisse Cryptographic Coprocessor PSPCPP [1022:1486]
IOMMU Group 23:
	10:00.3 USB controller [0c03]: Advanced Micro Devices, Inc. [AMD] Matisse USB 3.0 Host Controller [1022:149c]
IOMMU Group 24:
	10:00.4 Audio device [0403]: Advanced Micro Devices, Inc. [AMD] Starship/Matisse HD Audio Controller [1022:1487]
Passthrough for an IOMMU group is all-or nothing. For example, all of the chipset-connected devices are grouped together, and I can’t pass any of them through to a VM unless I pass them all through.
I’m mainly interested in a graphics card, an audio device, and a USB controller, and helpfully I have one of each isolated in their own groups, presumably because they are connected to PCIe lanes which go directly to the CPU.
Graphics
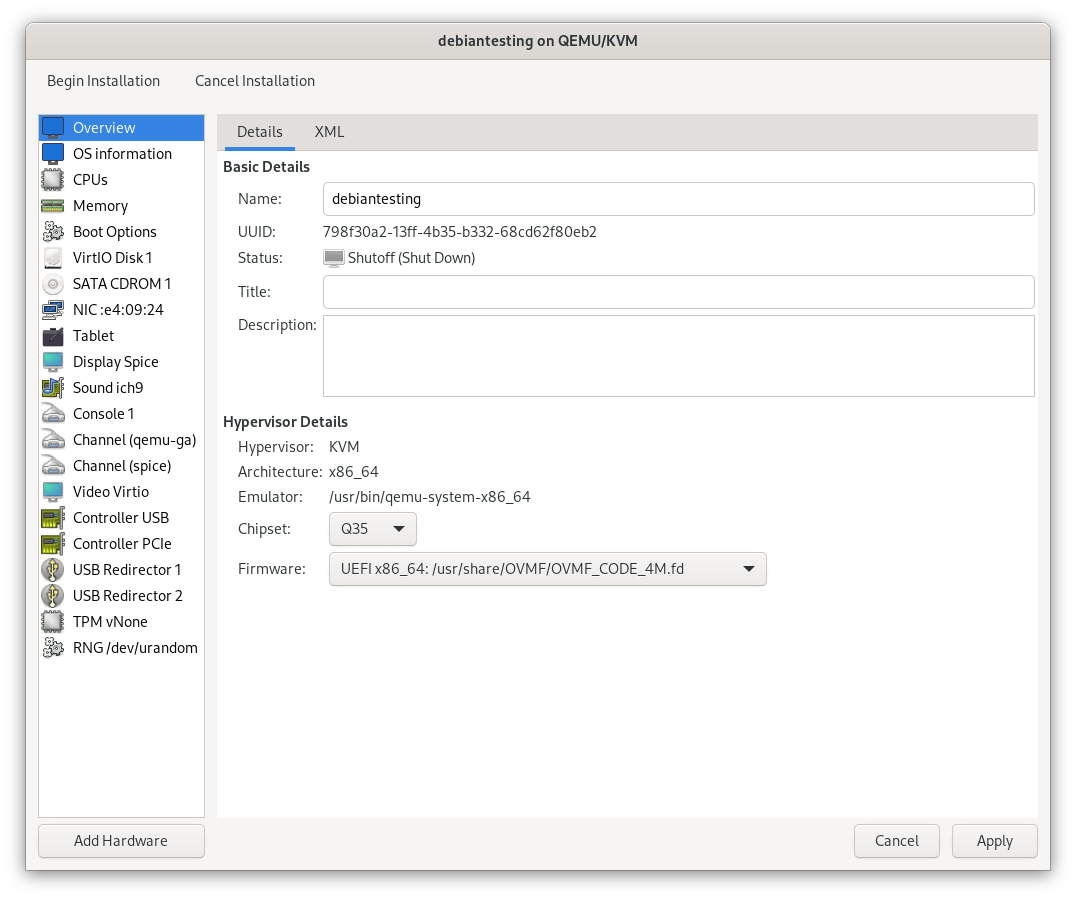
I created a virtual machine, also Debian 12, in the QEMU system session. The only important setting for now is the chipset and firmware, and in my case I selected Q35, and the OVMF UEFI firmware. GPU passthrough will not work if a virtual machine is booting with legacy BIOS.
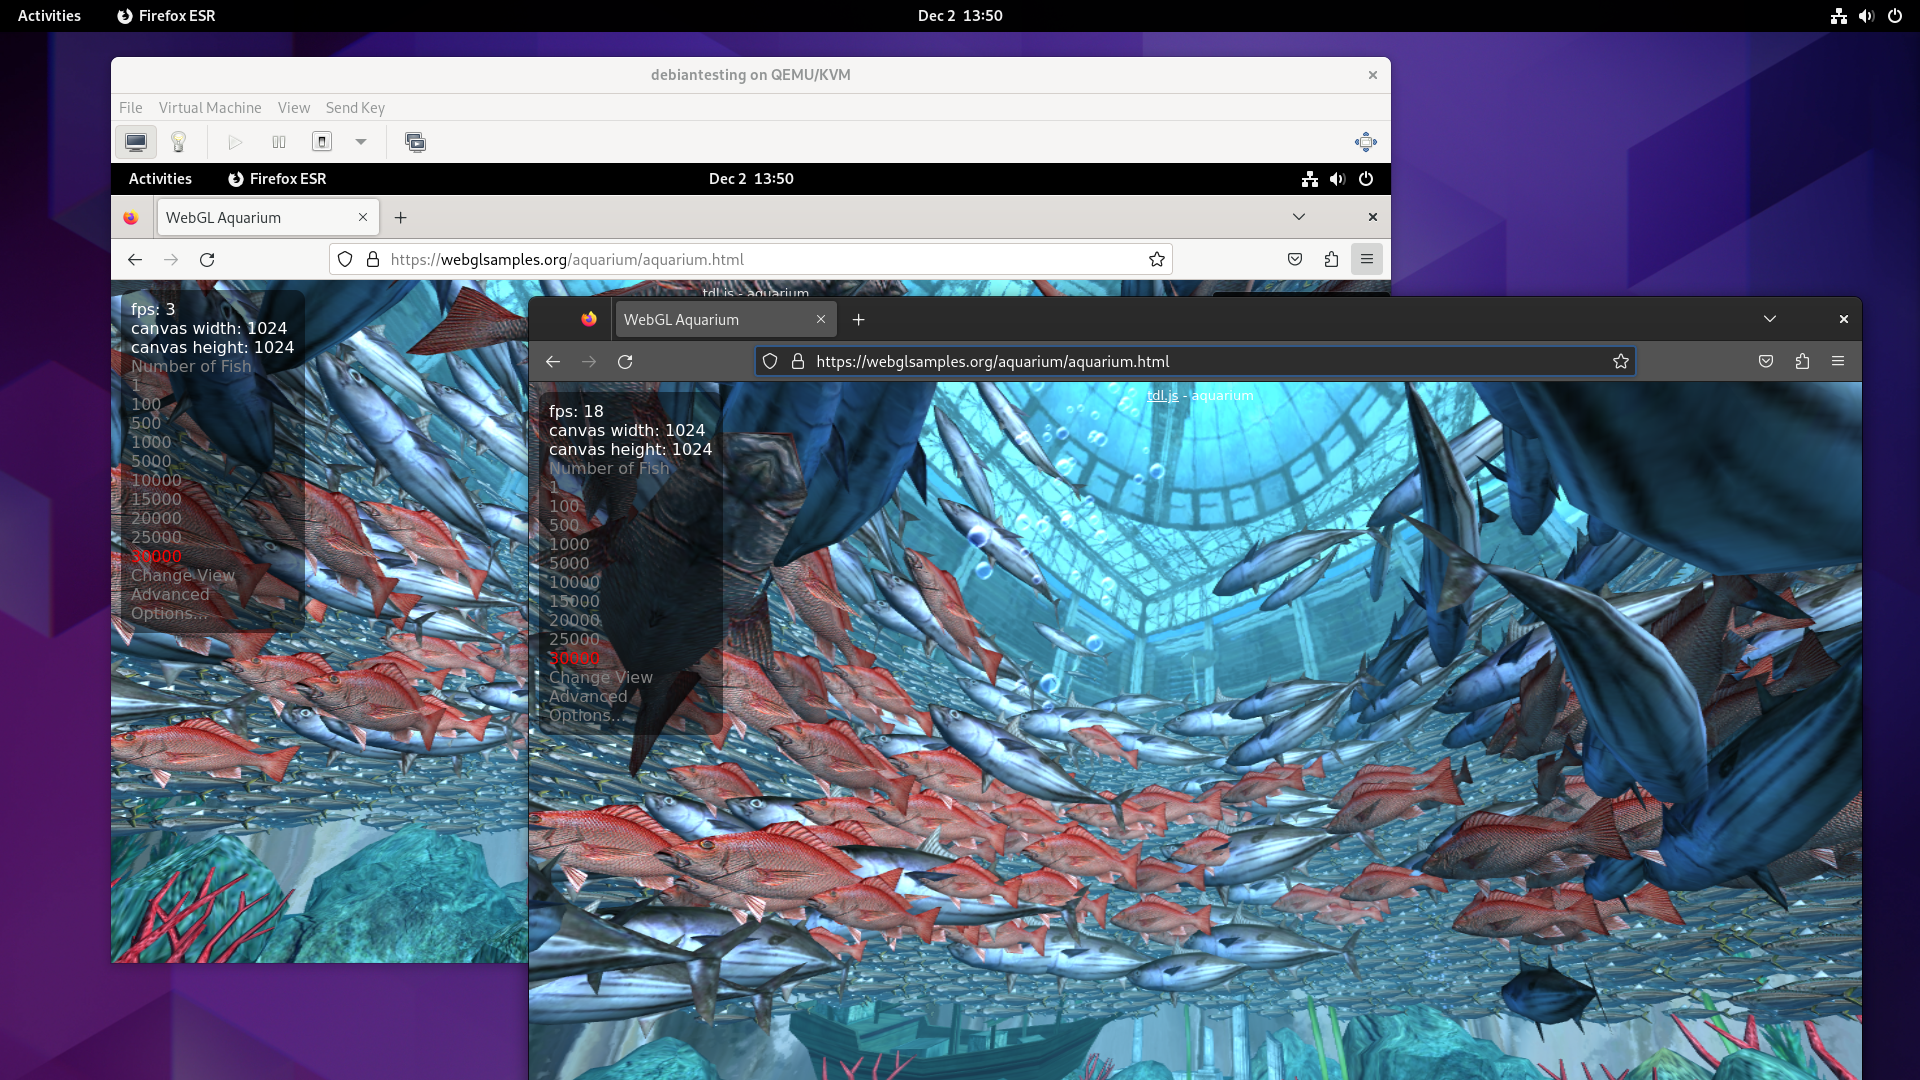
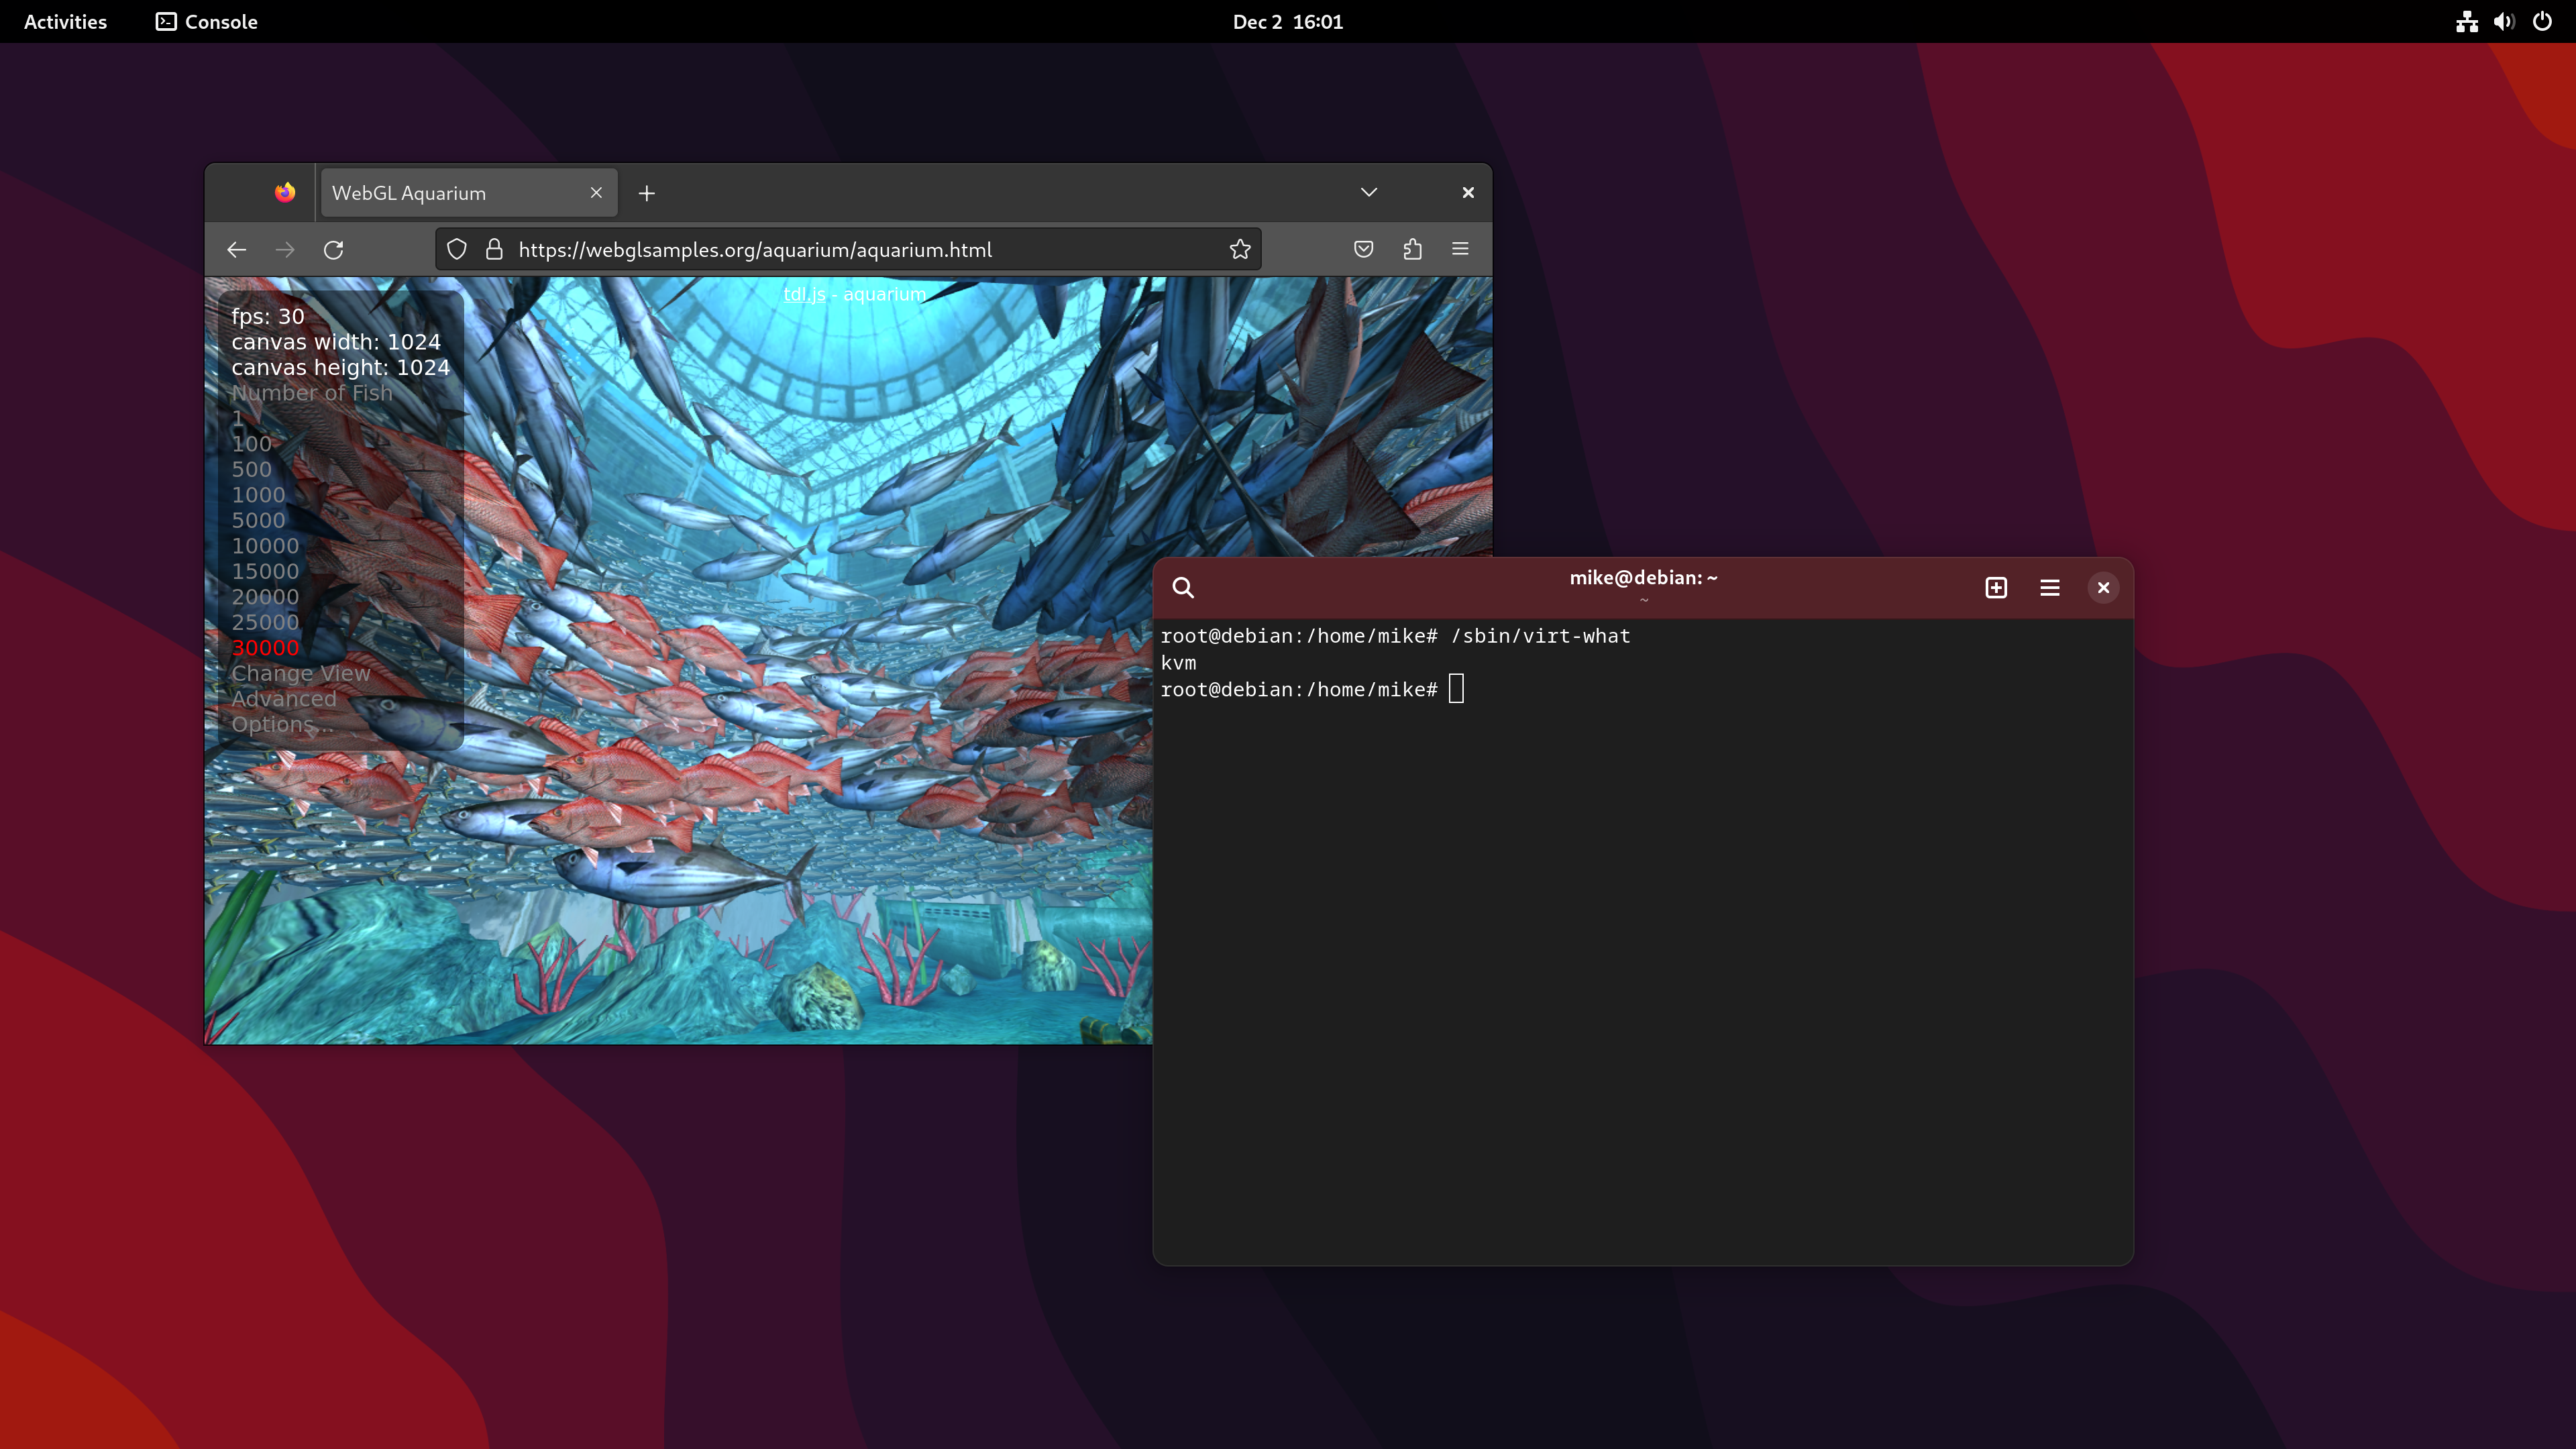
I use the WebGL Aquarium as a simple test for whether 3D acceleration is working. It runs much faster on the host system (this is using the RX 6400). The copy in the VM runs at just 3 frames per second, using SPICE display and virtio virtual GPU at this stage.
The next step was to isolate the GPU from the host. The relevant line from lspci -nn is:
0e:00.0 VGA compatible controller [0300]: Advanced Micro Devices, Inc. [AMD/ATI] Navi 21 [Radeon RX 6950 XT] [1002:73a5] (rev c0)
The vendor and device ID for this card is shown at the end of the line, 1002:73a5.
This needs to be added to the vfio-pci.ids boot option, which in my case involves updating /etc/default/grub.
GRUB_CMDLINE_LINUX="vfio-pci.ids=1002:73a5"
This is then applied by running update-grub2, and rebooting. It’s apparently possible to accomplish this without a reboot, but I’m following the easy path for now.
I verified that it worked by checking that the vfio-pci kernel module is in use for this device.
$ lspci -v
0e:00.0 VGA compatible controller: Advanced Micro Devices, Inc. [AMD/ATI] Navi 21 [Radeon RX 6950 XT] (rev c0) (prog-if 00 [VGA controller])
...
        Kernel driver in use: vfio-pci
        Kernel modules: amdgpu
Before booting up the VM, I added the card as a “Host PCI Device”. It was then visible in lspci output within the VM, but was not being used for video output yet.
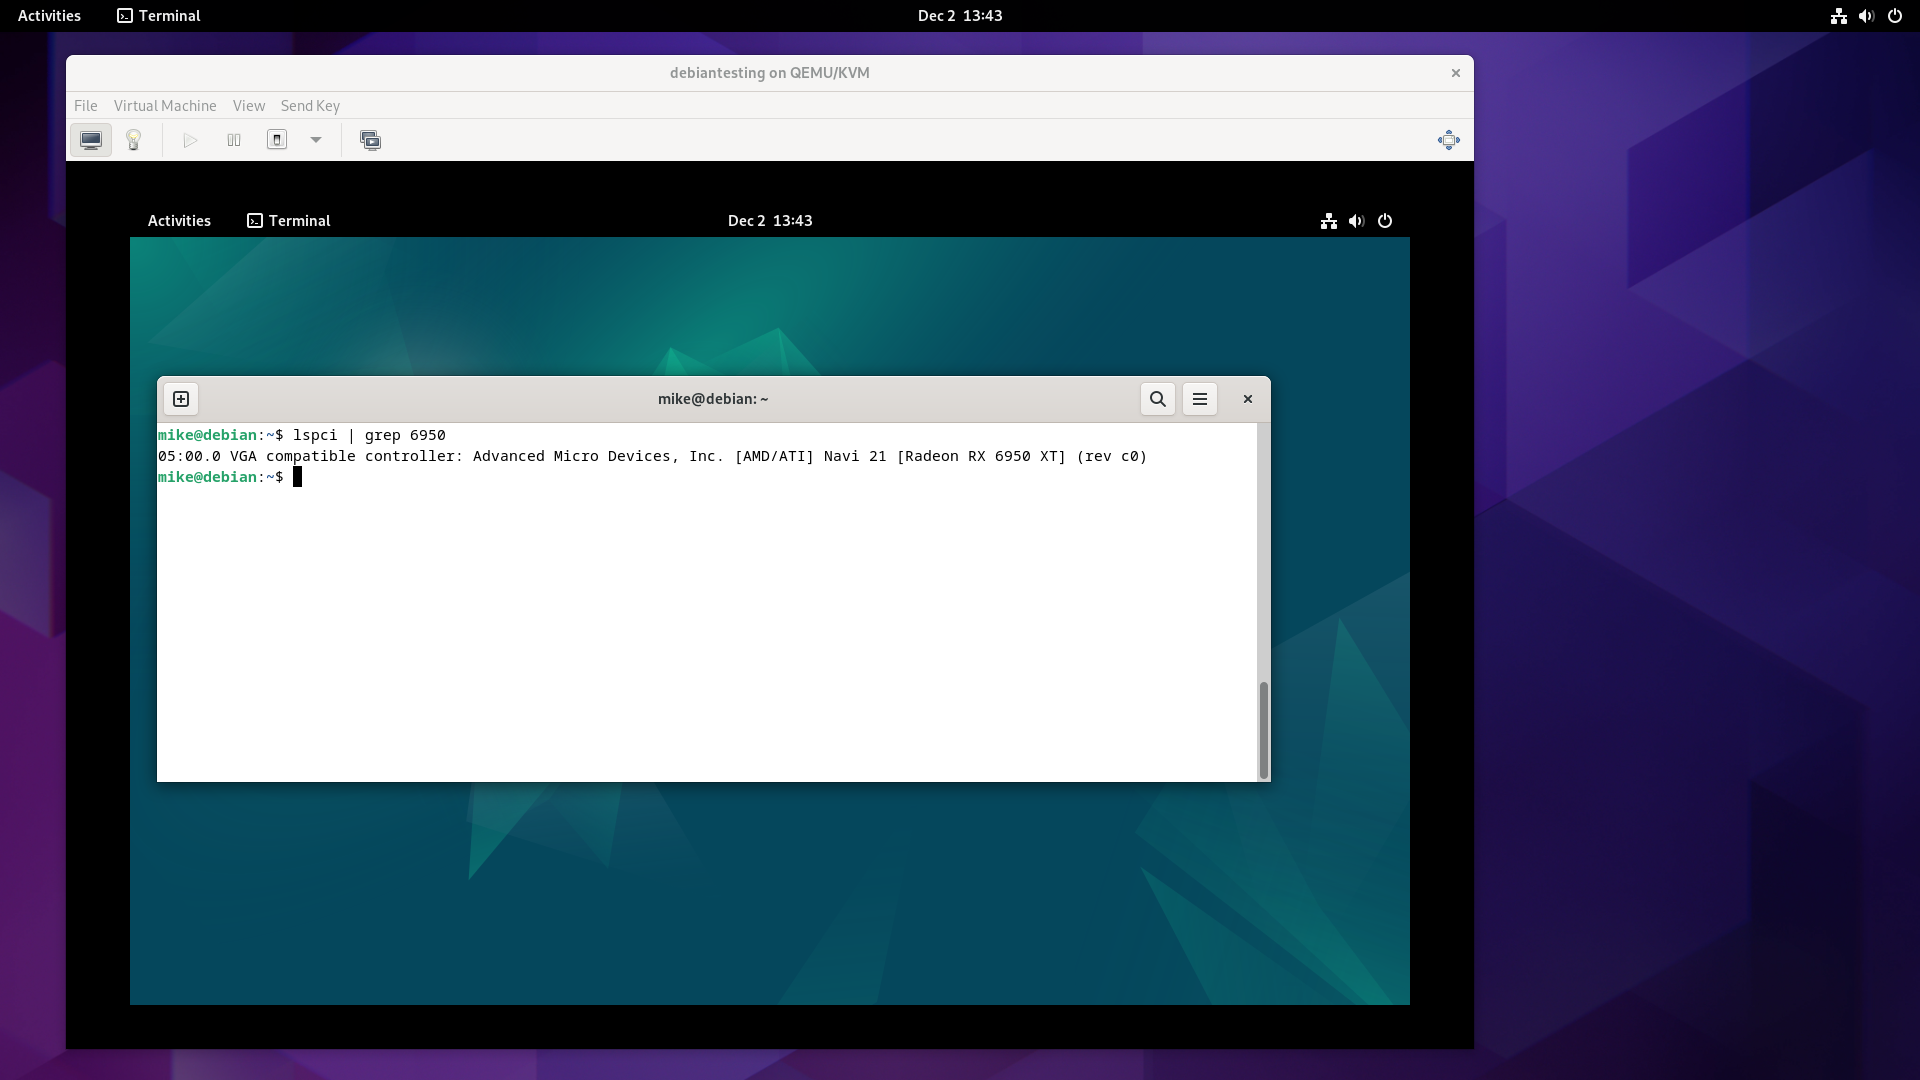
To encourage the VM to output to the physical graphics card, I switched the virtualised video card model from “virtio” to “None”.
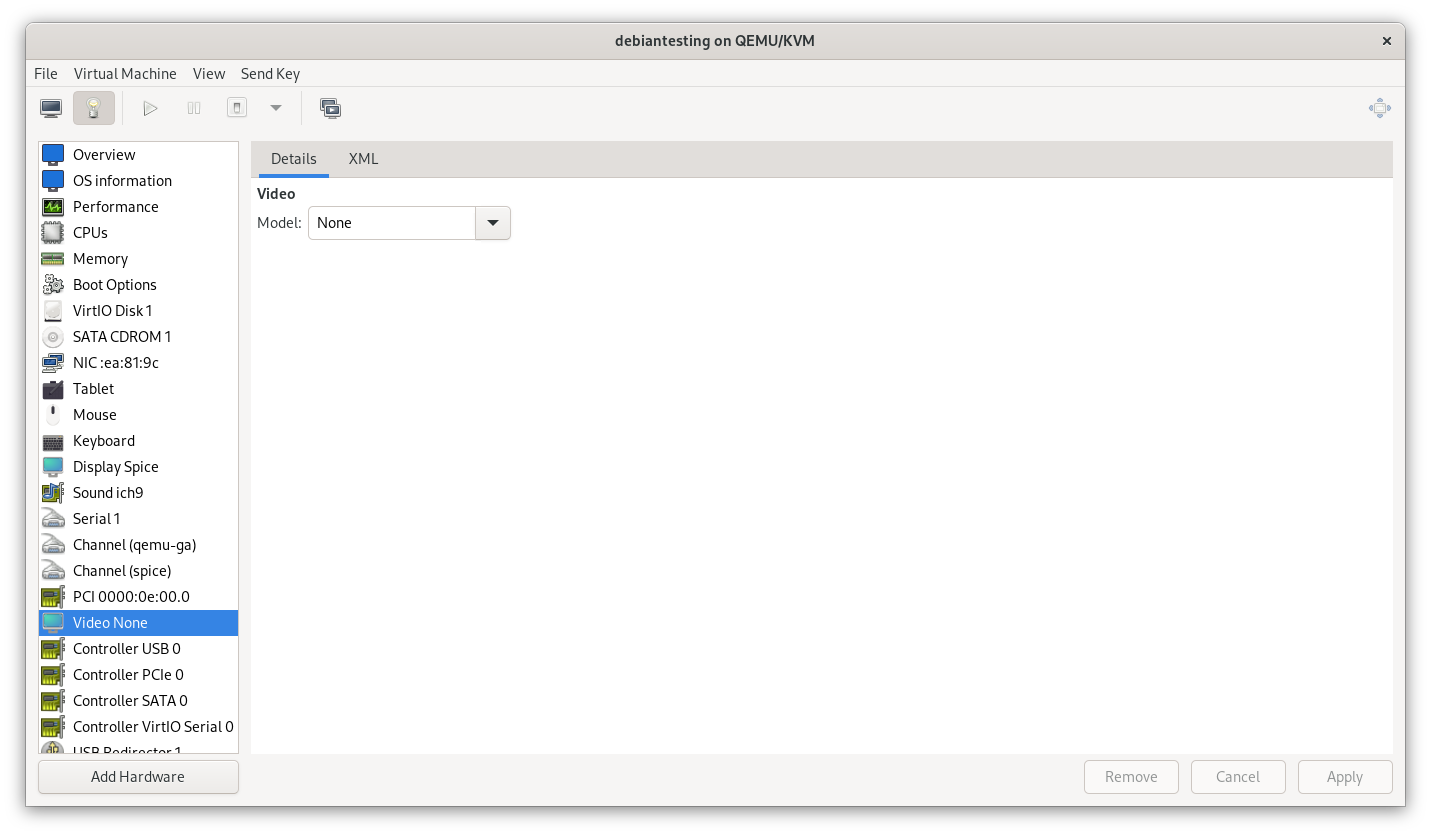
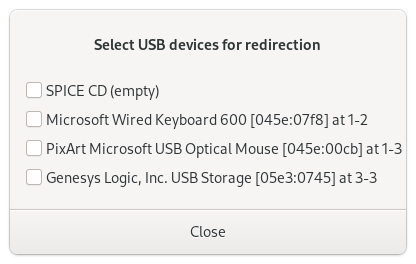
Booting up the VM after this change, the SPICE display no longer produces output, but USB redirection still works. I passed through the keyboard, then the mouse.
I then switched monitor inputs to the VM, now equipped with a graphics card, and the WebGL aquarium test ran at 30 FPS.
Now that I was switching between near-identical Debian systems, I started using different desktop backgrounds to stay oriented.
Audio output
I needed to make sure that audio output worked reliably in the virtual machine.
Sound was working out of the box through the emulated AC97 device, but I checked an online Audio Video Sync Test, and confirmed that there was a significant delay, somewhere in in the 200-300ms range. This is not good enough, so I deleted the emulated device and decided to try some other options.
I first tried passing through the audio device associated with the graphics card, identified as 1002:ab28.
0e:00.1 Audio device [0403]: Advanced Micro Devices, Inc. [AMD/ATI] Navi 21/23 HDMI/DP Audio Controller [1002:ab28]
I took the ID, and added it to the option in /etc/default/grub. Now that there are multiple devices, they are separated by commas.
GRUB_CMDLINE_LINUX="vfio-pci.ids=1002:73a5,1002:ab28"
As before, I ran update-grub2, rebooted, added the device to the VM through virt-manager, booted up the VM, and tried to use the device.
With that change, I could connect headphones to the monitor and the audio was no longer delayed. This environment would now be viable for developing apps with sound, or following along with a video tutorial for example.
Audio input
Next I attempted to pass through the on-board audio controller to see if I could get both audio input and output. Discussions online suggest that this doesn’t always work, but there is no harm in trying.
I’ll skip through the exact process this time, but I again identified the device, isolated it from the host, and passed it through to a VM.
10:00.4 Audio device [0403]: Advanced Micro Devices, Inc. [AMD] Starship/Matisse HD Audio Controller [1022:1487]
Output worked immediately, but the settings app did not show any microphone level, and attempts to capture would immediately stop. I did some basic reading and troubleshooting, but didn’t have a good idea of what was happening.
What worked for me was blindly upgrading my way out of the problem by switching to the Debian testing rolling release in the guest VM.
I was then able to see the input level in settings, and capture the audio with Audacity.
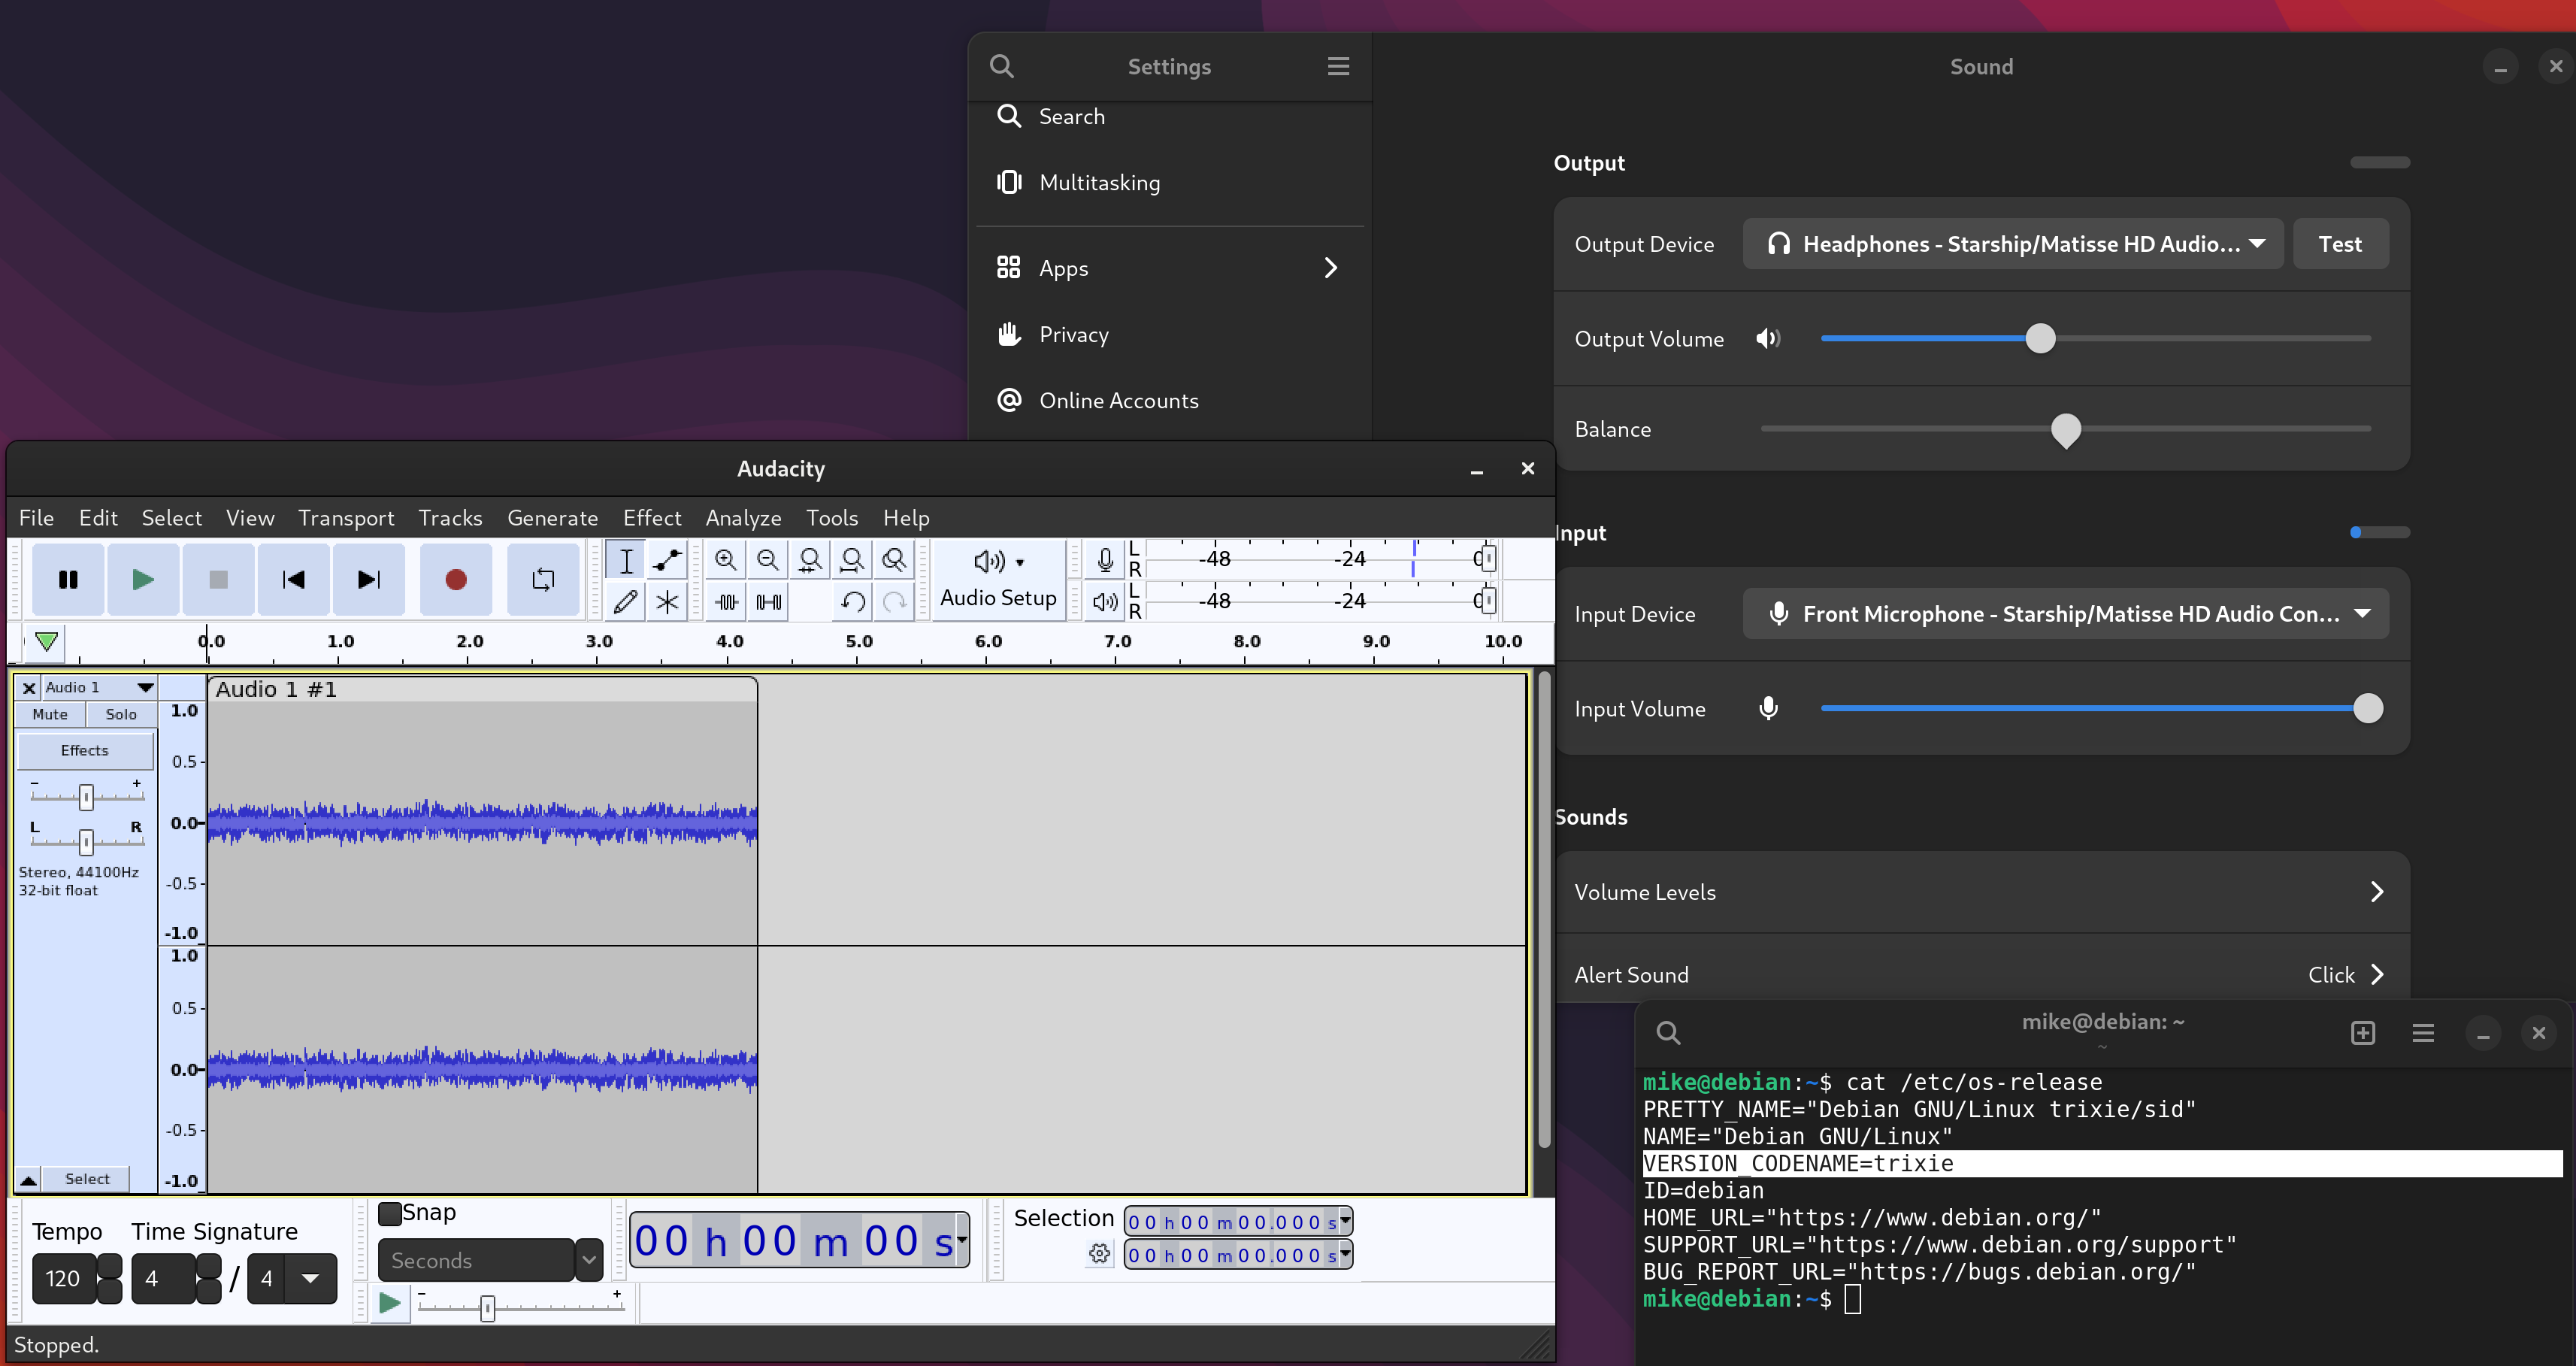
Audio input is not critical for me, but does allow me to move more types of work into virtual machines without switching to a USB sound card.
USB
My computer has two USB controllers. One is available for passthrough, while the other is in the same IOMMU group as all other chipset-attached devices.
02:00.0 USB controller [0c03]: Advanced Micro Devices, Inc. [AMD] Device [1022:43d0] (rev 01)
10:00.3 USB controller [0c03]: Advanced Micro Devices, Inc. [AMD] Matisse USB 3.0 Host Controller [1022:149c]
The controller I passed through is the “Matisse USB 3.0 Host Controller”, device ID 1022:149c, which I initially expected would have plenty of USB 3 ports attached to it.
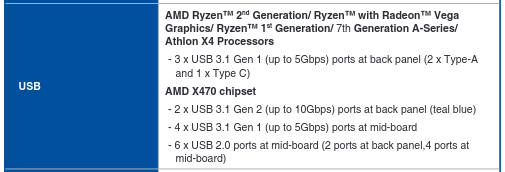
Reading the manual for my motherboard more carefully, I discovered that this controller is only responsible for 2 USB-A ports and 1 USB-C port, or 20% of the USB ports on the system.
I use a lot of USB peripherals for hardware development. More physical USB ports would be ideal, but I can work around this by using a USB hub.
I’ll also continue to use USB passthrough via libvirt to get the keyboard and mouse into the VM. Instead of manually passing these through each time I start the VM, I added each device in the configuration as a “Physical USB Device”.
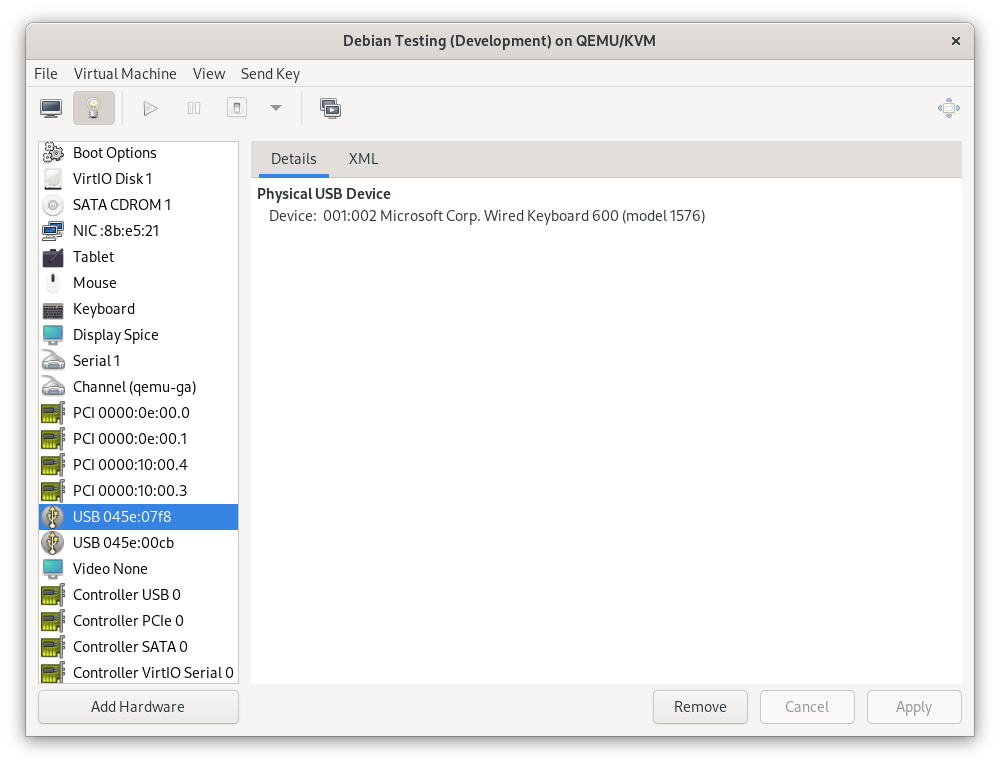
This automatically connects the device when the VM boots, and returns it to the host when the VM shuts down, without the SPICE console needing to be open. If I need to control the host and guest at the same time, I can connect a different mouse and keyboard temporarily - I’ve got plenty of USB ports on the host after all.
If this ever becomes a major issue, it should also be possible to switch this setup around, and pass through the IOMMU group containing all chipset-attached PCIe devices instead of the devices I’ve chosen. This would provide extensive I/O and expansion options to the VM, at the cost of things like on-board networking, SATA ports, and an NVMe slot on the host. The 3 USB ports on the “Matisse USB 3.0 Host Controller”, if left to the host, would be just enough for a mouse, keyboard, and USB-C Ethernet adapter.
File share
On my previous setup, I used a 9p fileshare to map a directory on the host to the same path on every VM, allowing an easy way to exchange files.
The path was /home/mike/workspace - a carry-over from when I used Eclipse. In practice it has been slower to work on a fileshare, so I’ll switch to developing in a local directory.
I’ll still set up a fileshare, but with two changes:
- I’ll map a share to a more generic
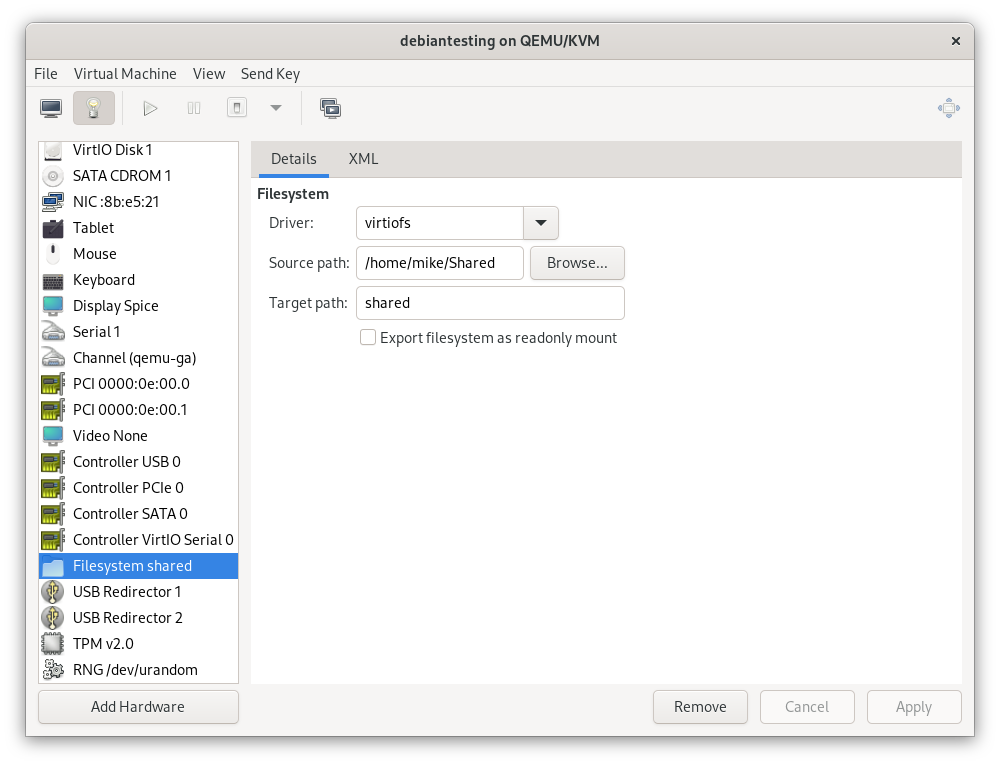
/home/mike/Shared, and start to back up anything that lands there. - I’ll use virtiofs instead of virtio-9p. This claims to be more performant, and it’s apparently possible to get this working on Windows as well.
This is added as a hardware device in virt-manager on the host.
In the guest, I added the following line to /etc/fstab.
shared /home/mike/Shared/ virtiofs
To activate this change, I would previously have created the mount-point and run mount -a. I recently learned that systemd creates mount-points automatically on modern systems, so I instead ran the correct incantation to trigger this process, which is:
$ sudo systemctl daemon-reload
$ sudo systemctl restart local-fs.target
Power management
In my current setup, sleep/wake causes instability. I initially disabled idle suspend on the host in GNOME:
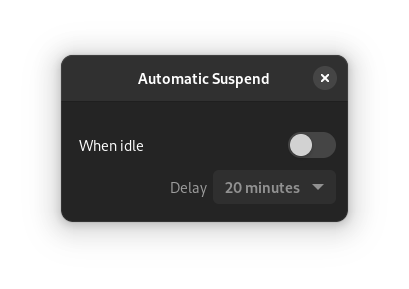
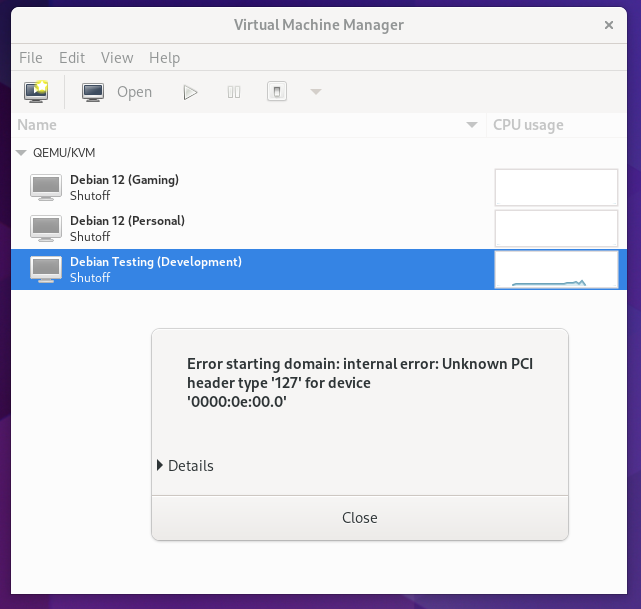
While testing a VM which I had configured to start on boot, the system decided to go to sleep while I was using it. In hindsight this makes complete sense: as far as the host could tell, it was sitting on the login page with no mouse or keyboard input, and had been configured to go to sleep after an idle time-out (the setting within GNOME only applies after login).
Dec 05 16:24:43 mike-kvm systemd-logind[706]: The system will suspend now!
To avoid this, I additionally disabled relevant systemd units (source of this command).
$ sudo systemctl mask sleep.target suspend.target hibernate.target hybrid-sleep.target
Created symlink /etc/systemd/system/sleep.target → /dev/null.
Created symlink /etc/systemd/system/suspend.target → /dev/null.
Created symlink /etc/systemd/system/hibernate.target → /dev/null.
Created symlink /etc/systemd/system/hybrid-sleep.target → /dev/null.
I’ve also configured each VM to simply blank the screen when idle, since allowing a guest to suspend causes its own problems.
Recap of unexpected issues
Despite my efforts to plan around the limitations of my hardware, I did hit four unanticipated problems, mostly highlighted above.
- I assumed that there would be a setting in my BIOS to change which graphics card to use during boot, but I couldn’t find one.
- The audio devices associated with both of my graphics cards had the same vendor and device ID. The way I have it configured, no audio output is available on the host as a result.
- Microphone input didn’t work on the HD Audio Controller until I upgraded the guest operating system. The usual workaround for this is apparently to use a USB sound card.
- I misunderstood the limitations of my USB setup, so I have fewer USB ports directly available in the VM than I had hoped for.
Wrap-up and future ideas
I really like the idea of switching into an environment which only has the tools I need for the task at hand. Compared with my previous setup for developing in a VM, GPU passthrough (and sound controller passthrough, and USB controller passthrough) is a huge improvement.
I’ve manually provisioned 3 VM’s, including a general-purpose development VM which has a mix of basic tools so that I can get started.
Since I can only have one VM using the graphics card at a time, this setup works similarly to having multiple operating systems installed as a multi-boot setup. It does however have far better separation between the systems - they can’t read and write each others’ disks for example.
The next steps for me will be to streamline the process of switching VM’s and shutting down the system. Both of these currently require me to manually switch monitor inputs to interact with the host, which I would prefer to avoid.