I have recently been working with some low-resolution bitmap fonts for a few projects, which needed to be re-sized for different uses.
I’ll share here a few tricks that I use to get the detail out of each letter as a vector, so that it can be rendered at a higher resolution.
Example
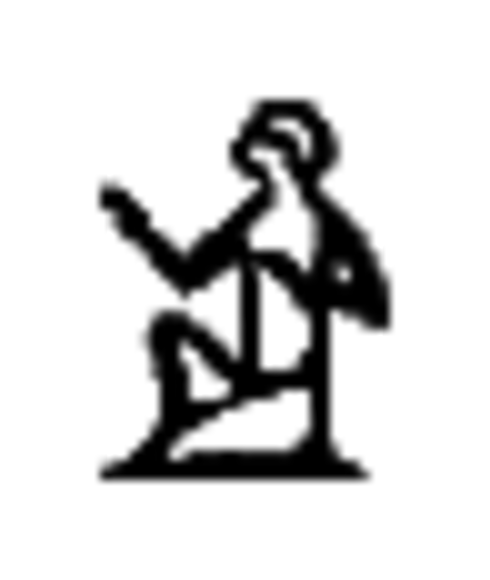
A good example might be this picture of a hieroglyph from the WikiHiero MediaWiki extension, which is 28 pixels wide:
![]()
Scaled up, it looks like this:

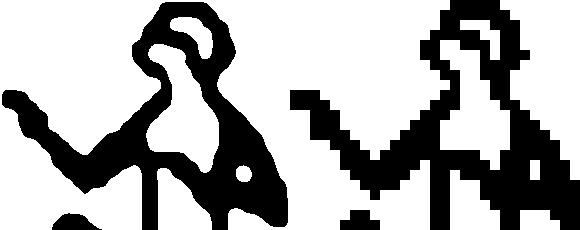
So small images become very pixelated when you resize them. The good news is that even from a small image, there is quite a lot of detail which we can use. If we’re smart about it, the glyph can be rendered like this:

You can still see some artifacts because of the low resolution of the input, but it’s clearly an improvement.
You will need
- ImageMagick for raster operations.
- potrace to trace the image.
- Inkscape to produce a high-quality raster.
Steps
Prepare
The tracing program will convert the image to pure black & white as its first step. These transformations make sure that the detail is preserved for tracing.
- Padding by 10px on every side to reduce distortion around the edges.
- Scaling by 10x with interpolation
- Convert transparency to white
convert hiero_A1.png -bordercolor white -border 10x10 \
    -resize 1000% -flatten hiero_A1.pnm
The 29x38 grey+alpha input becomes a blurry 490 x 580 greymap surrounded by whitespace.

This preparation is important, because a large blurry graymap will retain a lot more detail than the original image when a threshold is applied to convert it pure black and white:

Trace
The potrace program will threshold and trace the input image. Here, we will produce an SVG so that we can make it transparent.
The k value affects the threshold operation. It can be increased for a bolder, darker glyph, or reduced for a finer one.
potrace hiero_A1.pnm -k 0.30 --svg
This gives you an SVG with padding:
If you only want a vector, then you can stop here. The next steps will reproduce a smaller PNG with transparency and the correct padding.
I couldn’t find a reliable way to programmatically crop the image back to its original padding as an SVG, but in my case I needed to convert it back to a bitmap anyway, so I cropped it later.
Render
Use Inkscape to convert the SVG back to a large PNG. The output size here is twice as large as the file we traced, just to leave plenty of pixels to work with.
inkscape -z -e hiero_A1_big.png hiero_A1.svg -w 980
Like the SVG, there is still a lot of empty space surrounding the image here. The image is now a PNG with a transparent background, and unlike the file we traced, the edges of the curves are now anti-aliased.

Crop
Everything is 20x its original size, to get the image, we need to drop 200px of padding from the left and top, then read 580x760 pixels (20 times the 29x38 start).
convert hiero_A1_big.png -crop 580x760+200+200 hiero_A1_cropped.png
This produces a 580x760 image in the same aspect ratio as the original input file.

Scale down
In my case, I only needed to double the resolution of the input file, so I scaled this file down from there.
hiero_A1_cropped.png -resize 58x76 hiero_A1_outp1.png

Success!
As a script
These steps are a breakdown of a script that I wrote for doubling the size of a PNG image so that it would look better on newer high-DPI displays.
Usage:
./tracepng.sh foo.png
Where tracepng.sh is:
#!/bin/bash
# A script to upscale small bitmaps in PNG format.
# Pad, upscale, trace, render, crop then downscale.
if [ $# != 1 ]; then
  echo "Usage $0 input.png"
  exit
fi
set -exu
# Names of all the files we will produce
INP_FILE=$1
SVG_FILE="${INP_FILE%.*}.svg"
PNM_FILE="${INP_FILE%.*}.pnm"
LARGE_FILE="${INP_FILE%.*}_big.png"
LARGE_FILE_CROPPED="${INP_FILE%.*}_cropped.png"
OUTP_FILE="${INP_FILE%.*}_outp1.png"
COMPARISON_FILE="${INP_FILE%.*}_outp2.png"

# Width originally
# https://stackoverflow.com/questions/4670013/fast-way-to-get-image-dimensions-not-filesize
IMG_WIDTH=$(identify -format "%w" "$INP_FILE")
IMG_HEIGHT=$(identify -format "%h" "$INP_FILE")
TARGET_WIDTH=$((IMG_WIDTH * 2))
TARGET_HEIGHT=$((IMG_HEIGHT * 2))

# Make huge raster w/ border (whitespace is your friend for black/white interpolation and tracing), then convert to SVG
convert ${INP_FILE} -bordercolor white -border 10x10 -resize 1000% -flatten ${PNM_FILE}

# https://en.wikipedia.org/wiki/Potrace
potrace ${PNM_FILE} -k 0.30 --svg > ${SVG_FILE}

# Target width for intermediate file
EXPANDED_WIDTH=$(((IMG_WIDTH + 20) * 20))
EXPANDED_HEIGHT=$(((IMG_HEIGHT + 20) * 20))
INNER_WIDTH=$((IMG_WIDTH * 20))
INNER_HEIGHT=$((IMG_HEIGHT * 20))
# https://stackoverflow.com/questions/9853325/how-to-convert-a-svg-to-a-png-with-image-magick
inkscape -z -e ${LARGE_FILE} ${SVG_FILE} -w ${EXPANDED_WIDTH}

# Cut new edges off
# http://www.imagemagick.org/Usage/crop/
convert ${LARGE_FILE} -crop ${INNER_WIDTH}x${INNER_HEIGHT}+200+200 ${LARGE_FILE_CROPPED}
convert ${LARGE_FILE_CROPPED} -resize ${TARGET_WIDTH}x${TARGET_HEIGHT} ${OUTP_FILE}
Acknowledgment
The images here are from WikiHiero, and can be remixed under the GNU General Public License 2.0.