Recovering text from a receipt with escpos-tools

I have written previously about how to generate receipts for printers which understand ESC/POS. Today, I thought I would write about the opposite process.

Unlike PostScript, the ESC/POS binary language is not commonly understood by software. I wrote a few utilities last year to help change that, called escpos-tools.

In this post, I’ll step through an example ESC/POS binary file that an escpos-tools user sent to me, and show how we can turn it back into a usable format. The tools we are using are:

You might need this sort of process if you need to email a copy of your receipts, or to archive them for audit use.

Printing the file

Binary print files are generated from drivers. I can feed this one back to my printer like this:

cat receipt.bin > /dev/usb/lp0

My Epson TM-T20 receipt printer understands ESC/POS, and prints this out:

Installing escpos-tools

escpos-tools is not packaged yet, so you need git and composer (from the PHP eco-system) to use it.

$ git clone https://github.com/receipt-print-hq/escpos-tools
$ cd escpos-tools
$ composer install

Inspecting the file

There is text in the file, so the first thing you should try to do is esc2text. In this case, which works like this:

$ php esc2text.php receipt.bin

In this case, I got no output, so I switch to -v to show the commands being found.

$ php esc2text.php receipt.bin  -v
[DEBUG] SetRelativeVerticalPrintPositionCmd 
[DEBUG] GraphicsDataCmd 
[DEBUG] GraphicsDataCmd 
[DEBUG] SetRelativeVerticalPrintPositionCmd 
...

This indicates that there is no text being sent to the receipt, only images. We know from the print-out that the images contain text, so we need a few more utilities.

Recovering images from the receipt

To extract the images, use escimages. It runs like this:

$ php escimages.php --file receipt.bin
[ Image 1: 576x56 ]
[ Image 2: 576x56 ]
[ Image 3: 576x56 ]
[ Image 4: 576x56 ]
[ Image 5: 576x56 ]
[ Image 6: 576x56 ]
[ Image 7: 576x56 ]
[ Image 8: 576x52 ]

This gave us 8 narrow images:

Using ImageMagick’s convert command, these can be combined into one image like this:

convert -append receipt-*.png -density 70 -units PixelsPerInch receipt.png

The result is now the same as what our printer would output:

Recovering text from the receipt

Lastly, tesseract is an open source OCR engine which can recover text from images. This image is a lossless copy of what we sent to the printer, which is an “easy” input for OCR.

$ tesseract receipt.png -
Estimating resolution as 279
Test Receipt for USB Printer 1

Mar 17, 2018
10:12 PM


Ticket: 01


Item $0,00

Total $0.00

This quality of output is fairly accurate for an untrained reader.

Conclusion

The escpos-tools family of utilities gives some visibility into the contents of ESC/POS binary files.

If you have a use case which requires working with this type of file, then I would encourage you to consider contributing code or example files to the project, so that the utilities can be improved over time.

Get the code

View on GitHub →

How to print the characters in an ESC/POS printer code page

I’ve been working on software that interacts with ESC/POS receipt printers for some time, and a constant source of trouble is the archaic character encoding scheme used on these printers.

Most commonly, non-ASCII characters are accessed by swapping the extended range to a different 128-character code page. The main open source drivers (escpos-php and python-escpos) are both capable of auto-selecting an encoding, but they need a good database of known encodings to power this feature for each individual printer.

Today, I’ll share a small utility that can print out the contents of a code page, like this:

A printer’s documentation vaguely labeled this encoding as “[1] Katakana”. By printing it out, I can see that if I map single-byte half-width Katakana from Code Page 932, it will appear correctly in this code page. That’s type of information you need when you’re asked about it on an issue tracker!

Usage

You will generally find a list of code pages with a corresponding number for each one (0-255) in an ESC/POS printer’s documentation.

This command-line tool then takes a list of code pages to inspect, and will output raw binary that generates a table like the one above when sent to the printer:

php escpos-caracter-table.php NUMBER ...

So to print the code pages 1, 2 and 3 to a binary file, the command would be:

php escpos-character-tables.php 1 2 3 > code-page-1.bin

Next, you need to know how to do raw printing. Raw USB printing on Linux typically works like this:

cat code-page-1.bin > /dev/usb/lp0

For other platforms, it will be different! You will need to do a bit of research on raw printing for your platform if you haven’t tried it before.

The code: escpos-character-tables.php

<?php
/**
 * This standalone script can be used to print the contents of a code page
 * for troubleshooting.
 *
 * Usage: php escpos-caracter-table.php NUMBER ...
 *
 * Code pages are numbered 0-255.
 *
 * The ESC/POS binary will be send to stdout, and should be redirected to a
 * file or printer:
 *
 *   php escpos-caracter-table.php 20 > /dev/usb/lp0
 *
 * @author Michael Billington < michael.billington@gmail.com >
 * @license MIT
 */

/* Sanity check */
if(php_sapi_name() !== "cli") {
    die("This is a command-line script, invoke via php.exen");
}
if(count($argv) < 2) {
    die("At least one code page number must be specifiedn");
}
array_shift($argv);
foreach($argv as $codePage) {
    if(!is_numeric($codePage) || $codePage < 0 || $codePage > 255) {
        die("Code pages must be numbered 0-255");
    }
}

/* Reset */
$str = "\x1b@";
foreach($argv as $codePage) {
    /* Print header, switch code page */
    $str .= "\x1bt" . chr($codePage);
    $str .= "\x1bE\x01Code page $codePage\x1bE\x00\n";
    $str .= "\x1bE\x01  0123456789ABCDEF0123456789ABCDEF\x1bE\x00\n";
    $chars = str_repeat(' ', 128);
    for ($i = 0; $i < 128; $i++) {
        $chars[$i] = chr($i + 128);
    }
    for ($y = 0; $y < 4; $y++) {
        $row = "" . " ";
        $rowHeader = "\x1bE\x01" . strtoupper(dechex($y + 8)) . "\x1bE\x00";
        $row = substr($chars, $y * 32, 32);
        $str .= "$rowHeader $row\n";
    }
}

/* Cut */
$str .= "\x1dV\x41\x03";

/* Output to STDOUT */
file_put_contents("php://stdout", $str);

How to communicate with USB and networked devices from in-browser Javascript

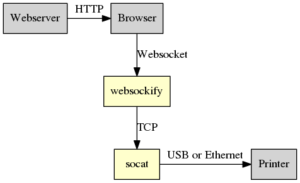
I recently combined a few tools on Linux to create a local Websocket listener, which could forward raw data to a USB printer, so that it could be accessed using Javascript in a web browser.

Why would you want this? I have point of sale applications (POS) in mind, which need to send raw data to a printer. For these applications, the browser and operating system print systems are not appropriate, since they prompt, spool, and badly render pages by converting them to low-fidelity raster images.

Web interfaces are becoming common for point-of-sale applications. The web page could be served from somewhere outside your local network, which is why we need to get the client-side Javascript involved.

The tools

To run on the client computer:

And to generate the print data on the webserver:

We will use these tools to provide some plumbing, so that we can retrieve the print data, and send it off to the printer from client-side Javascript.

Client computer

The client computer was a Linux desktop system. Both of the tools we need are available in the Debian repositories:

sudo apt-get install websockify socat

Listen for websocket connections on port 5555 and pass them to localhost:7000:

websockify 5555 localhost:7000

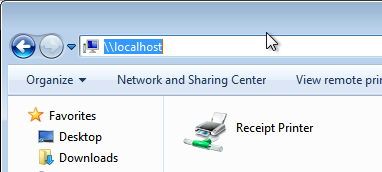
Listen for TCP connections on localhost port 7000 and pass them to the USB device (more advanced version of this previous post):

socat -u TCP-LISTEN:7000,fork,reuseaddr,bind=127.0.0.1 OPEN:/dev/usb/lp0

Web page

I made a self-contained web-page to provide a button which requested a print file from the network and passed it to the local websocket.

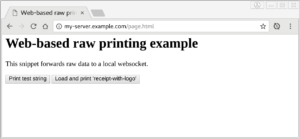
This is slightly modified from a similar example that I used for a previous project.

<html>
<head>
    <meta charset="UTF-8">
    <title>Web-based raw printing example</title>
</head>
<body>
<h1>Web-based raw printing example</h1>

<p>This snippet forwards raw data to a local websocket.</p>

<form>
  <input type="button" onclick="directPrintBytes(printSocket, [0x1b, 0x40, 0x48, 0x65, 0x6c, 0x6c, 0x6f, 0x20, 0x77, 0x6f, 0x72, 0x6c, 0x64, 0x0a, 0x1d, 0x56, 0x41, 0x03]);" value="Print test string"/>
  <input type="button" onclick="directPrintFile(printSocket, 'receipt-with-logo.bin');" value="Load and print 'receipt-with-logo'" />
</form>

<script type="text/javascript">
/**
 * Retrieve binary data via XMLHttpRequest and print it.
 */
function directPrintFile(socket, path) {
  // Get binary data
  var req = new XMLHttpRequest();
  req.open("GET", path, true);
  req.responseType = "arraybuffer";
  console.log("directPrintFile(): Making request for binary file");
  req.onload = function (oEvent) {
    console.log("directPrintFile(): Response received");
    var arrayBuffer = req.response; // Note: not req.responseText
    if (arrayBuffer) {
      var result = directPrint(socket, arrayBuffer);
      if(!result) {
        alert('Failed, check the console for more info.');
      }
    }
  };
  req.send(null);
}

/**
 * Extract binary data from a byte array print it.
 */
function directPrintBytes(socket, bytes) {
  var result = directPrint(socket, new Uint8Array(bytes).buffer);
  if(!result) {
    alert('Failed, check the console for more info.');
  }
}

/**
 * Send ArrayBuffer of binary data.
 */
function directPrint(socket, printData) {
  // Type check
  if (!(printData instanceof ArrayBuffer)) {
    console.log("directPrint(): Argument type must be ArrayBuffer.")
    return false;
  }
  if(printSocket.readyState !== printSocket.OPEN) {
    console.log("directPrint(): Socket is not open!");
    return false;
  }
  // Serialise, send.
  console.log("Sending " + printData.byteLength + " bytes of print data.");
  printSocket.send(printData);
  return true;
}

/**
 * Connect to print server on startup.
 */
var printSocket = new WebSocket("ws://localhost:5555", ["binary"]);
printSocket.binaryType = 'arraybuffer';
printSocket.onopen = function (event) {
  console.log("Socket is connected.");
}
printSocket.onerror = function(event) {
  console.log('Socket error', event);
};
printSocket.onclose = function(event) {
  console.log('Socket is closed');
}
</script>
</body>
</html>

Webserver

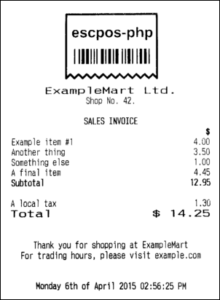
On a Apache HTTP webserver, I uploaded the above webpage, and a file with some raw print data, called receipt-with-logo.bin. This file was generated with escpos-php and is available in the repository:

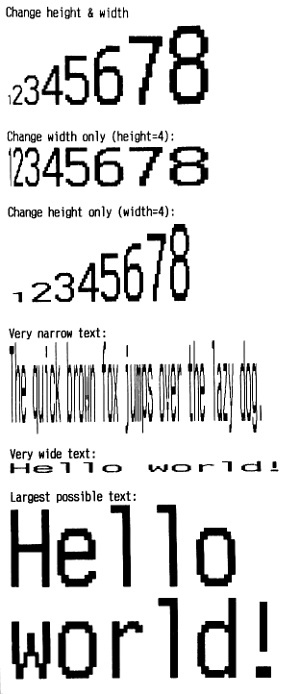
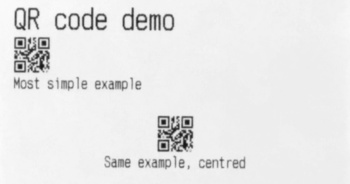
For reference, the test file receipt-with-logo.bin contains this content:

Test

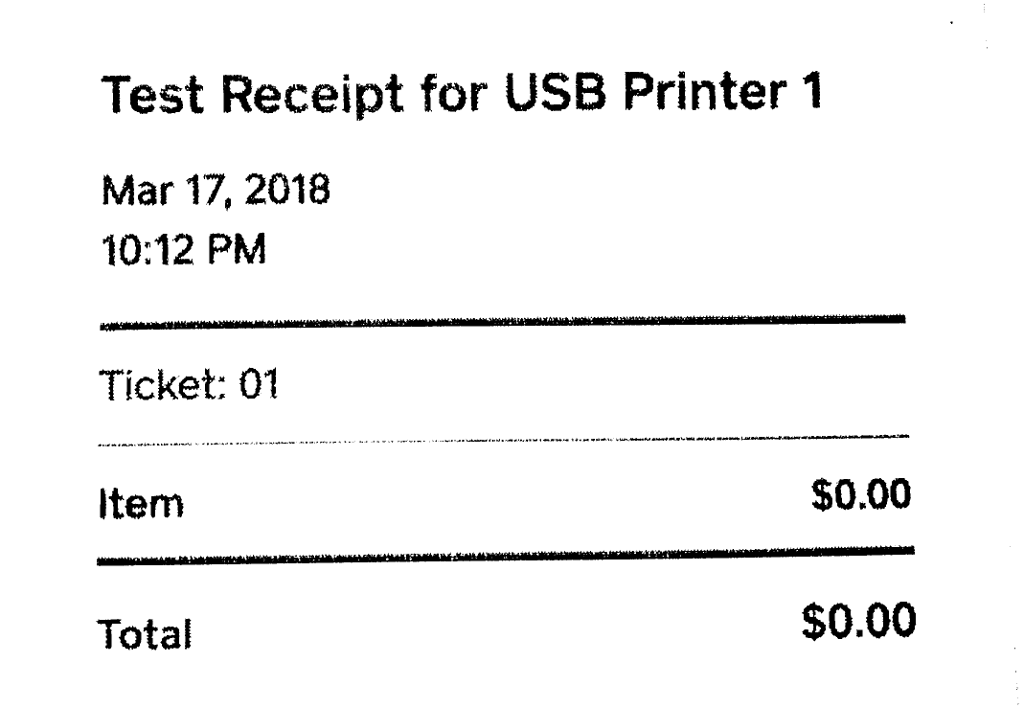
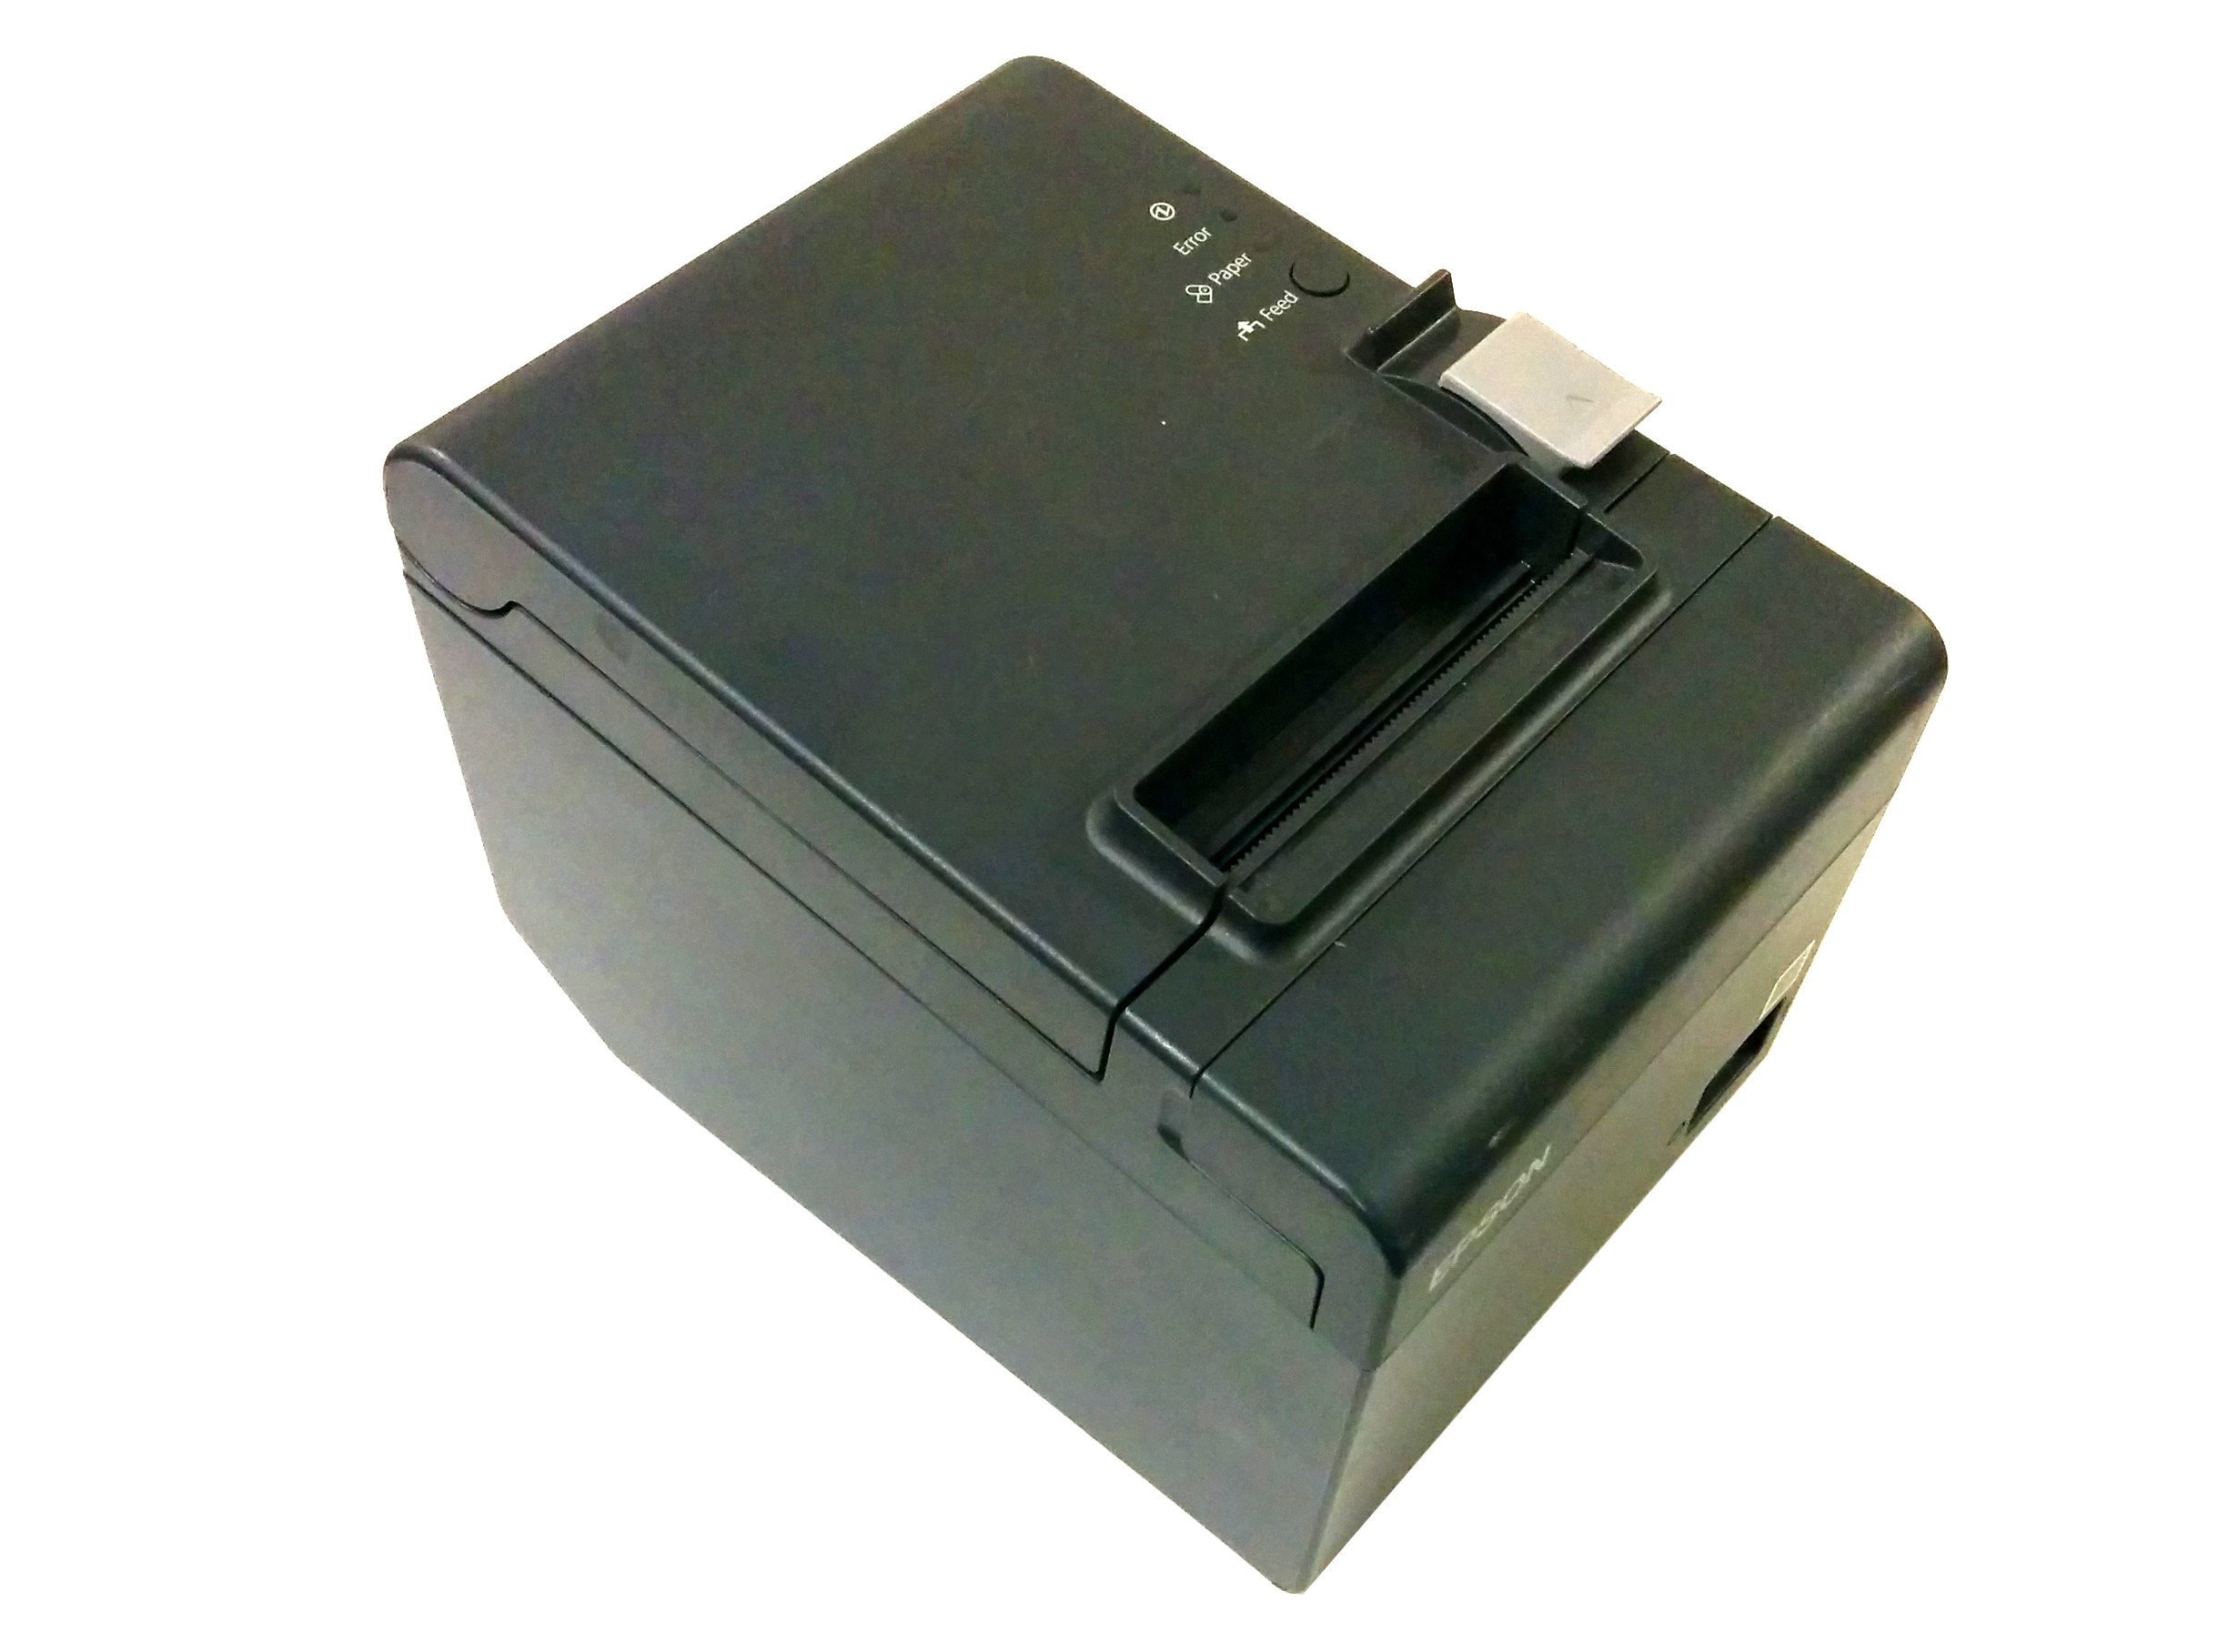
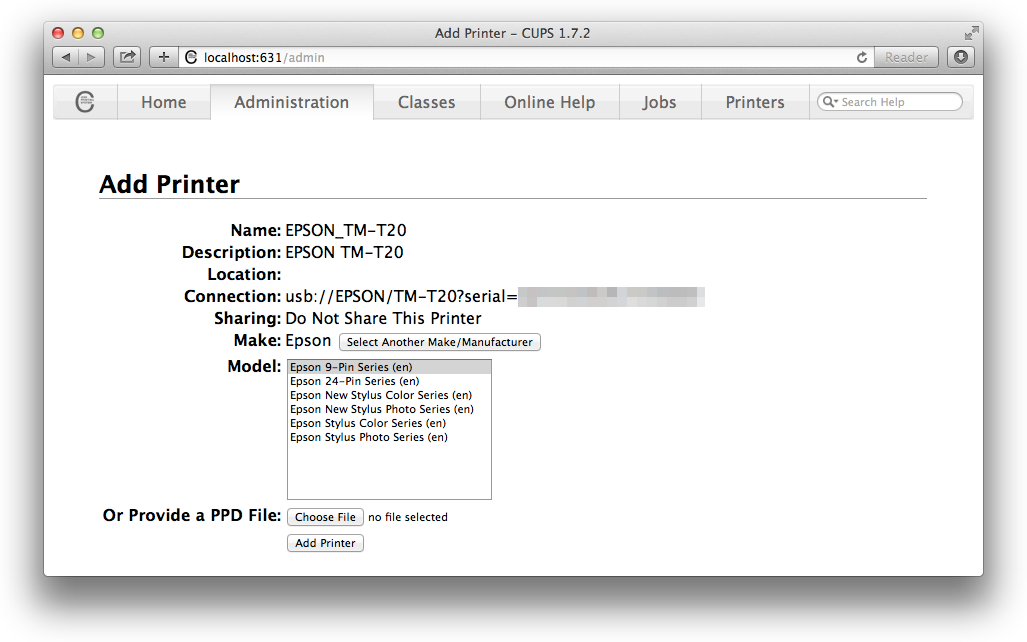
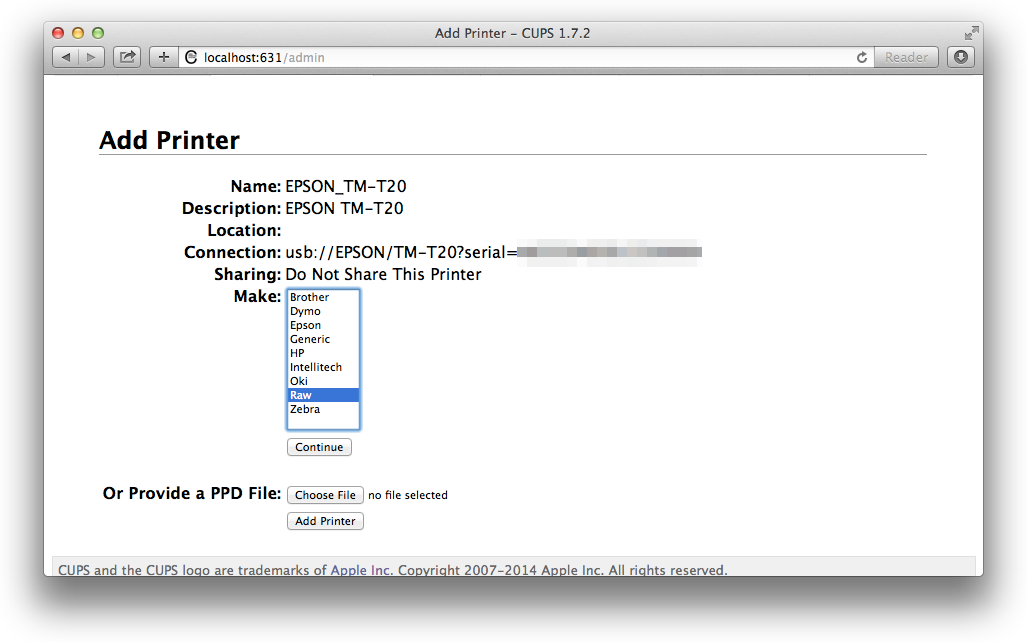
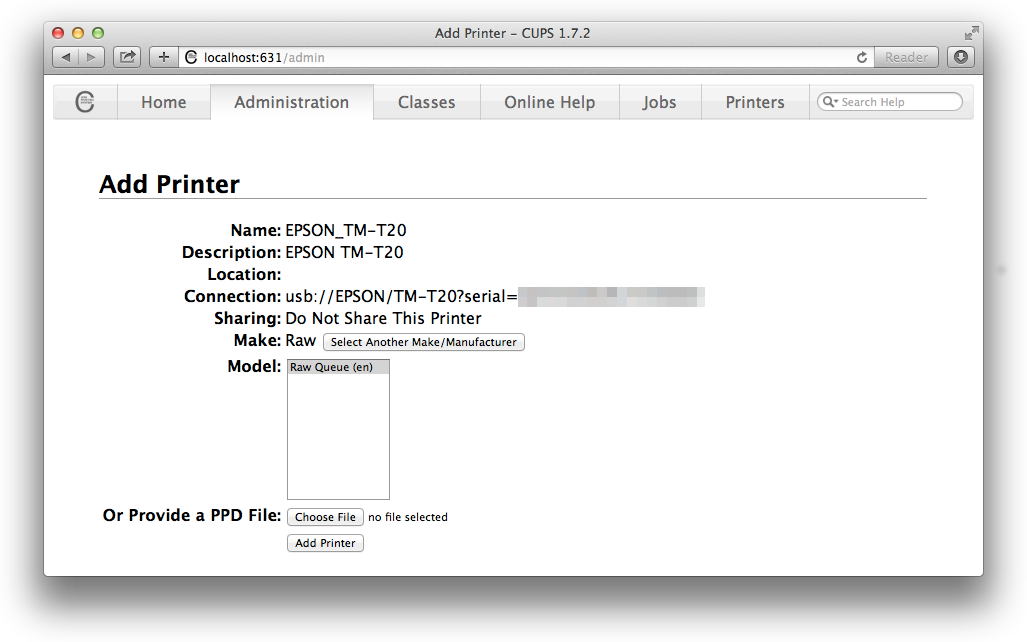
I opened up the web page on the client computer with socat, websockify and an Epson TM-T20II connected. After clicking the “Print” button, the file was sent to my printer. Success!

Because I wasn’t closing the websocket connection, only one browser window could access the printer at a time. Still, it’s a good demo of the basic idea.

To take this from an example to something you might deploy, you would basically just need to keep socat and websockify running in the background as a service (via systemd), close the socket when it’s not being used, and integrate it into a real app.

Different printers, different forwarding

The socat tool can connect to USB, Serial, or Ethernet printers fairly easily.

USB

Forward TCP connections from port 7000 to the receipt printer at /dev/usb/lp0:

socat TCP4-LISTEN:7000,fork /dev/usb/lp0

You can also access the device files directly under /sys/bus/usb/devices/

Serial

Forward TCP connections from port 7000 to the receipt printer at /dev/usb/ttyS0:

socat TCP4-LISTEN:7000,fork /dev/usb/ttyS0

Network

Forward TCP connections from port 7000 to the receipt printer at 10.1.2.3:9100:

socat -u TCP-LISTEN:7000,fork,reuseaddr,bind=127.0.0.1 TCP4-CONNECT:10.1.2.3:9100

You can forward websocket connections directly to an Ethernet printer with websockify:

socat -u TCP-LISTEN:7000,fork,reuseaddr,bind=127.0.0.1 localhost:7000

Other types of printer

If you have another type of printer, such as one accessible only via smbclient or lpr, then you will need to write a helper script.

Direct printing is faster, so I don’t use this method. Check the socat EXEC documentation or man socat if you want to try this.

Future

I’ve had a lot of questions on the escpos-php bug tracker from users who are attempting to print from cloud-hosted apps, which is why I tried this setup.

The browser is a moving target. I have previously written receipt-print-hq/chrome-raw-print, a dedicated app for forwarding WebSocket connections to USB, but that will stop working in a few months when Chrome apps are discontinued. Some time later, WebUSB should become available to make this type of printer available in the browser, which should be infinitely useful for connecting to accessories in point-of-sale setups.

The available tools for generating ESC/POS (receipt printer) binary from the browser are a long way off reaching feature parity with the likes of escpos-php and python-escpos. If you are looking for a side-project, then this a good choice.

Lastly, the socat -u flag makes this all unidirectional, but many types of devices (not just printers) can respond to commands. I couldn’t the end-to-end path to work without this flag, so don’t expect to be able to read from the printer without doing some extra work.

Useful links

Some links that I found while setting this up-

Get the code

View on GitHub →

How to print PDF417 codes with escpos-php

This post is a reference for printing PDF417 2-dimensional codes to a receipt printer, using the escpos-php.

I’ve got an older post about printing QR codes with escpos-php, which follows the same format and has some more background and links if you haven’t printed receipts from PHP before.

Straight from the documentation, the syntax for the command that I’m demonstrating is:

pdf417Code($content, $width, $heightMultiplier, $dataColumnCount, $ec, $options)

Print a two-dimensional data code using the PDF417 standard.

  • string $content: Text or numbers to store in the code
  • number $width: Width of a module (pixel) in the printed code. Default is 3 dots.
  • number $heightMultiplier: Multiplier for height of a module. Default is 3 times the width.
  • number $dataColumnCount: Number of data columns to use. 0 (default) is to auto-calculate. Smaller numbers will result in a narrower code, making larger pixel sizes possible. Larger numbers require smaller pixel sizes.
  • real $ec: Error correction ratio, from 0.01 to 4.00. Default is 0.10 (10%).
  • number $options: Standard code Printer::PDF417_STANDARD with start/end bars, or truncated code Printer::PDF417_TRUNCATED with start bars only.

These PDF417 snippets above appear in the examples of escpos-php.

Simple example

A basic code that just says ‘testing 123’, and a demonstration of a narrower code that has been aligned:

2016-09-escpos-pdf417-01-demo
// Most simple example
title($printer, "PDF417 code demo\n");
$testStr = "Testing 123";
$printer -> pdf417Code($testStr);
$printer -> text("Most simple example\n");
$printer -> feed();

// Demo that alignment is the same as text
$printer -> setJustification(Printer::JUSTIFY_CENTER);
$printer -> pdf417Code($testStr, 3, 3, 2);
$printer -> text("Same content, narrow and centred\n");
$printer -> setJustification();
$printer -> feed();

Error correction

This implementation accepts an error correction ratio as a percentage. The minimum is 1%, the highest is 400%, expressed as a decimal (0.01 – 4.00).

Higher error correction settings create lager codes that are more resilient to scanning errors due to damage.

2016-09-escpos-pdf417-02-ec
// Demo of error correction
title($printer, "Error correction\n");
$testStr = "Testing 123";
$ec = array(0.1, 0.5, 1.0, 2.0, 4.0);
foreach ($ec as $level) {
    $printer -> pdf417Code($testStr, 3, 3, 0, $level);
    $printer -> text("Error correction ratio $level\n");
    $printer -> feed();
}

Pixel size (width)

The same example string, with some different module widths. Note that the blocks in the code scale in bot directions when the width is changed.

Larger print is easier for a scanner to read, but takes up more paper.

2016-09-escpos-pdf417-02-pixel
// Change size
title($printer, "Pixel size\n");
$testStr = "Testing 123";
$sizes = array(
    2 => "(minimum)",
    3 => "(default)",
    4 => "",
    8 => "(maximum)");
foreach ($sizes as $size => $label) {
    $printer -> pdf417Code($testStr, $size);
    $printer -> text("Module width $size dots $label\n");
    $printer -> feed();
}

Height multiplier

The height of the modules in the code can also be changed, stretching it do a different degree. PDF417 that are too vertically squashy are more prone to scanning errors.

2016-09-escpos-pdf417-03-height
// Change height
title($printer, "Height multiplier\n");
$testStr = "Testing 123";
$sizes = array(
    2 => "(minimum)",
    3 => "(default)",
    4 => "",
    8 => "(maximum)");
foreach ($sizes as $size => $label) {
    $printer -> pdf417Code($testStr, 3, $size);
    $printer -> text("Height multiplier $size $label\n");
    $printer -> feed();
}

Data column count

The of data columns to print in the code can be customised to produce a narrower code. But beware, if you request a code that’s too big for the paper, nothing will be printed!

2016-09-escpos-pdf417-04-datacol
// Change data column count
title($printer, "Data column count\n");
$testStr = "Testing 123";
$columnCounts = array(
    0 => "(auto, default)",
    1 => "",
    2 => "",
    3 => "",
    4 => "",
    5 => "",
    30 => "(maximum, doesnt fit!)");
foreach ($columnCounts as $columnCount => $label) {
    $printer -> pdf417Code($testStr, 3, 3, $columnCount);
    $printer -> text("Column count $columnCount $label\n");
    $printer -> feed();
}

Truncated code option

Use this setting to select the alternative, ‘truncated’ code format.

2016-09-escpos-pdf417-05-options
// Change options
title($printer, "Options\n");
$testStr = "Testing 123";
$models = array(
    Printer::PDF417_STANDARD => "Standard",
    Printer::PDF417_TRUNCATED => "Truncated");
foreach ($models as $model => $name) {
    $printer -> pdf417Code($testStr, 3, 3, 0, 0.10, $model);
    $printer -> text("$name\n");
    $printer -> feed();
}

Notes

To run the snippets, you need to initialise the printer, and define a title() function to print headings, like so:

<?php
/* Demonstration of available options on the qrCode() command */
require __DIR__ . '/autoload.php';
use Mike42\Escpos\Printer;
use Mike42\Escpos\PrintConnectors\FilePrintConnector;
$connector = new FilePrintConnector("/dev/usb/lp0");
$printer = new Printer($connector);

// ....

// Cut & close
$printer -> cut();
$printer -> close();

function title(Escpos $printer, $str) {
    $printer -> selectPrintMode(Printer::MODE_DOUBLE_HEIGHT | Printer::MODE_DOUBLE_WIDTH);
    $printer -> text($str);
    $printer -> selectPrintMode();
}

In the QR code post, I posted a fallback which used software rendering. As I don’t have a PHP-based PDF417 code library, you will need a printer which supports them to be blue to use these examples.

Good luck!

Print larger or smaller text on a thermal receipt printer

If you print to a thermal receipt printer which support the ESC/POS protocol, then you can format the receipts to make larger or smaller text. If this is your first time reading about ESC/POS, have a read of What is ESC/POS, and how do I use it?. Some of these text size examples are borrowed from there, while some are new.

Smaller text

Receipt fonts example
require __DIR__ . '/autoload.php';
use Mike42\Escpos\Printer;
use Mike42\Escpos\PrintConnectors\FilePrintConnector;
$connector = new FilePrintConnector("/dev/usb/lp0");
$printer = new Printer($connector);

/* Fonts (many printers do not have a 'Font C') */
$fonts = array(
    Printer:::FONT_A,
    Printer:::FONT_B,
    Printer:::FONT_C);
for($i = 0; $i < count($fonts); $i++) {
    $printer -> setFont($fonts[$i]);
    $printer -> text("The quick brown fox jumps over the lazy dog\n");
}
$printer -> setFont(); // Reset
$printer -> cut();
$printer -> close();
00000000  1b 40 1b 4d 00 54 68 65  20 71 75 69 63 6b 20 62  |.@.M.The quick b|
00000010  72 6f 77 6e 20 66 6f 78  20 6a 75 6d 70 73 20 6f  |rown fox jumps o|
00000020  76 65 72 20 74 68 65 20  6c 61 7a 79 20 64 6f 67  |ver the lazy dog|
00000030  0a 1b 4d 01 54 68 65 20  71 75 69 63 6b 20 62 72  |..M.The quick br|
00000040  6f 77 6e 20 66 6f 78 20  6a 75 6d 70 73 20 6f 76  |own fox jumps ov|
00000050  65 72 20 74 68 65 20 6c  61 7a 79 20 64 6f 67 0a  |er the lazy dog.|
00000060  1b 4d 02 54 68 65 20 71  75 69 63 6b 20 62 72 6f  |.M.The quick bro|
00000070  77 6e 20 66 6f 78 20 6a  75 6d 70 73 20 6f 76 65  |wn fox jumps ove|
00000080  72 20 74 68 65 20 6c 61  7a 79 20 64 6f 67 0a 1b  |r the lazy dog..|
00000090  4d 00 1d 56 41 03                                 |M..VA.|
00000096

Change height & width

2016-06-textsize-00
require __DIR__ . '/autoload.php';
use Mike42\Escpos\Printer;
use Mike42\Escpos\PrintConnectors\FilePrintConnector;
$connector = new FilePrintConnector("/dev/usb/lp0");
$printer = new Printer($connector);

/* Text of various (in-proportion) sizes */
title($printer, "Change height & width\n");
for ($i = 1; $i <= 8; $i++) {
    $printer -> setTextSize($i, $i);
    $printer -> text($i);
}
$printer -> text("\n");

$printer -> cut();
$printer -> close();

function title(Printer $printer, $text)
{
    $printer -> selectPrintMode(Printer::MODE_EMPHASIZED);
    $printer -> text("\n" . $text);
    $printer -> selectPrintMode(); // Reset
}
00000000  1b 40 1b 21 08 0a 43 68  61 6e 67 65 20 68 65 69  |.@.!..Change hei|
00000010  67 68 74 20 26 20 77 69  64 74 68 0a 1b 21 00 1d  |ght & width..!..|
00000020  21 00 31 1d 21 11 32 1d  21 22 33 1d 21 33 34 1d  |!.1.!.2.!"3.!34.|
00000030  21 44 35 1d 21 55 36 1d  21 66 37 1d 21 77 38 0a  |!D5.!U6.!f7.!w8.|
00000040  1d 56 41 03                                       |.VA.|
00000044

Change width only (height=4)

2016-06-textsize-01
require __DIR__ . '/autoload.php';
use Mike42\Escpos\Printer;
use Mike42\Escpos\PrintConnectors\FilePrintConnector;
$connector = new FilePrintConnector("/dev/usb/lp0");
$printer = new Printer($connector);

/* Width changing only */
title($printer, "Change width only (height=4):\n");
for ($i = 1; $i <= 8; $i++) {
    $printer -> setTextSize($i, 4);
    $printer -> text($i);
}
$printer -> text("\n");

$printer -> cut();
$printer -> close();

function title(Printer $printer, $text)
{
    $printer -> selectPrintMode(Printer::MODE_EMPHASIZED);
    $printer -> text("\n" . $text);
    $printer -> selectPrintMode(); // Reset
}
00000000  1b 40 1b 21 08 0a 43 68  61 6e 67 65 20 77 69 64  |.@.!..Change wid|
00000010  74 68 20 6f 6e 6c 79 20  28 68 65 69 67 68 74 3d  |th only (height=|
00000020  34 29 3a 0a 1b 21 00 1d  21 03 31 1d 21 13 32 1d  |4):..!..!.1.!.2.|
00000030  21 23 33 1d 21 33 34 1d  21 43 35 1d 21 53 36 1d  |!#3.!34.!C5.!S6.|
00000040  21 63 37 1d 21 73 38 0a  1d 56 41 03              |!c7.!s8..VA.|
0000004c

Change height only (width=4)

2016-06-textsize-02
require __DIR__ . '/autoload.php';
use Mike42\Escpos\Printer;
use Mike42\Escpos\PrintConnectors\FilePrintConnector;
$connector = new FilePrintConnector("/dev/usb/lp0");
$printer = new Printer($connector);

/* Height changing only */
title($printer, "Change height only (width=4):\n");
for ($i = 1; $i <= 8; $i++) {
    $printer -> setTextSize(4, $i);
    $printer -> text($i);
}
$printer -> text("\n");

$printer -> cut();
$printer -> close();

function title(Printer $printer, $text)
{
    $printer -> selectPrintMode(Printer::MODE_EMPHASIZED);
    $printer -> text("\n" . $text);
    $printer -> selectPrintMode(); // Reset
}
00000000  1b 40 1b 21 08 0a 43 68  61 6e 67 65 20 68 65 69  |.@.!..Change hei|
00000010  67 68 74 20 6f 6e 6c 79  20 28 77 69 64 74 68 3d  |ght only (width=|
00000020  34 29 3a 0a 1b 21 00 1d  21 30 31 1d 21 31 32 1d  |4):..!..!01.!12.|
00000030  21 32 33 1d 21 33 34 1d  21 34 35 1d 21 35 36 1d  |!23.!34.!45.!56.|
00000040  21 36 37 1d 21 37 38 0a  1d 56 41 03              |!67.!78..VA.|
0000004c

Very narrow font

2016-06-textsize-03
require __DIR__ . '/autoload.php';
use Mike42\Escpos\Printer;
use Mike42\Escpos\PrintConnectors\FilePrintConnector;
$connector = new FilePrintConnector("/dev/usb/lp0");
$printer = new Printer($connector);

/* Very narrow text */
title($printer, "Very narrow text:\n");
$printer -> setTextSize(1, 8);
$printer -> text("The quick brown fox jumps over the lazy dog.\n");

$printer -> cut();
$printer -> close();

function title(Printer $printer, $text)
{
    $printer -> selectPrintMode(Printer::MODE_EMPHASIZED);
    $printer -> text("\n" . $text);
    $printer -> selectPrintMode(); // Reset
}
00000000  1b 40 1b 21 08 0a 56 65  72 79 20 6e 61 72 72 6f  |.@.!..Very narro|
00000010  77 20 74 65 78 74 3a 0a  1b 21 00 1d 21 07 54 68  |w text:..!..!.Th|
00000020  65 20 71 75 69 63 6b 20  62 72 6f 77 6e 20 66 6f  |e quick brown fo|
00000030  78 20 6a 75 6d 70 73 20  6f 76 65 72 20 74 68 65  |x jumps over the|
00000040  20 6c 61 7a 79 20 64 6f  67 2e 0a 1d 56 41 03     | lazy dog...VA.|
0000004f

Very tall font

2016-06-textsize-04
require __DIR__ . '/autoload.php';
use Mike42\Escpos\Printer;
use Mike42\Escpos\PrintConnectors\FilePrintConnector;
$connector = new FilePrintConnector("/dev/usb/lp0");
$printer = new Printer($connector);

/* Very flat text */
title($printer, "Very wide text:\n");
$printer -> setTextSize(4, 1);
$printer -> text("Hello world!\n");

$printer -> cut();
$printer -> close();

function title(Printer $printer, $text)
{
    $printer -> selectPrintMode(Printer::MODE_EMPHASIZED);
    $printer -> text("\n" . $text);
    $printer -> selectPrintMode(); // Reset
}
00000000  1b 40 1b 21 08 0a 56 65  72 79 20 77 69 64 65 20  |.@.!..Very wide |
00000010  74 65 78 74 3a 0a 1b 21  00 1d 21 30 48 65 6c 6c  |text:..!..!0Hell|
00000020  6f 20 77 6f 72 6c 64 21  0a 1d 56 41 03           |o world!..VA.|
0000002d

Largest possible font

2016-06-textsize-05
require __DIR__ . '/autoload.php';
use Mike42\Escpos\Printer;
use Mike42\Escpos\PrintConnectors\FilePrintConnector;
$connector = new FilePrintConnector("/dev/usb/lp0");
$printer = new Printer($connector);

/* Very large text */
title($printer, "Largest possible text:\n");
$printer -> setTextSize(8, 8);
$printer -> text("Hello\nworld!\n");

$printer -> cut();
$printer -> close();

function title(Printer $printer, $text)
{
    $printer -> selectPrintMode(Printer::MODE_EMPHASIZED);
    $printer -> text("\n" . $text);
    $printer -> selectPrintMode(); // Reset
}
00000000  1b 40 1b 21 08 0a 4c 61  72 67 65 73 74 20 70 6f  |.@.!..Largest po|
00000010  73 73 69 62 6c 65 20 74  65 78 74 3a 0a 1b 21 00  |ssible text:..!.|
00000020  1d 21 77 48 65 6c 6c 6f  0a 77 6f 72 6c 64 21 0a  |.!wHello.world!.|
00000030  1d 56 41 03                                       |.VA.|
00000034

Double-height and doule-width

There are also commands which specifically double the width and height. These overlap with the commands covered here, but you can find them in the escpos-php documentation.

Full example

These examples were authored for escpos-php, a PHP printer driver for thermal receipt printers. The full file ships as an example with the driver, and outputs a block of ESC/POS code which can be sent a printer to give this output:

Receipt

f4218f44-395a-11e5-8079-25472c5ad340

PHP code

<?php
/**
 * This print-out shows how large the available font sizes are. It is included
 * separately due to the amount of text it prints.
 */
require __DIR__ . '/autoload.php';
use Mike42\Escpos\Printer;
use Mike42\Escpos\PrintConnectors\FilePrintConnector;

$connector = new FilePrintConnector("php://stdout");
$printer = new Printer($connector);

/* Initialize */
$printer -> initialize();

/* Text of various (in-proportion) sizes */
title($printer, "Change height & width\n");
for ($i = 1; $i <= 8; $i++) {
    $printer -> setTextSize($i, $i);
    $printer -> text($i);
}
$printer -> text("\n");

/* Width changing only */
title($printer, "Change width only (height=4):\n");
for ($i = 1; $i <= 8; $i++) {
    $printer -> setTextSize($i, 4);
    $printer -> text($i);
}
$printer -> text("\n");

/* Height changing only */
title($printer, "Change height only (width=4):\n");
for ($i = 1; $i <= 8; $i++) {
    $printer -> setTextSize(4, $i);
    $printer -> text($i);
}
$printer -> text("\n");

/* Very narrow text */
title($printer, "Very narrow text:\n");
$printer -> setTextSize(1, 8);
$printer -> text("The quick brown fox jumps over the lazy dog.\n");

/* Very flat text */
title($printer, "Very wide text:\n");
$printer -> setTextSize(4, 1);
$printer -> text("Hello world!\n");

/* Very large text */
title($printer, "Largest possible text:\n");
$printer -> setTextSize(8, 8);
$printer -> text("Hello\nworld!\n");

$printer -> cut();
$printer -> close();

function title(Printer $printer, $text)
{
    $printer -> selectPrintMode(Printer::MODE_EMPHASIZED);
    $printer -> text("\n" . $text);
    $printer -> selectPrintMode(); // Reset
}

Other formatting?

If text size is not what you’re after, then you can find similar examples in other posts I’ve tagged escpos.

How to print red/black on an impact receipt printer

I recently deployed an Epson TM-U220 impact receipt printer. These printers work by striking a ribbon onto the paper, like a type-writer. One of the up-sides to using these intead of a thermal printer is the ability to install a red/black ribbon in place of the default (black) one:

2015-10-colour-receipt-printing-1

2015-10-colour-receipt-printing-2

I connected up my printer using a USB-parallel cable, so my previous posts (Linux, Windows) apply for the connector setup.

Using the escpos-php driver on GitHub, a line of red text is printed like this:

<?php
/*
 * Example of two-color printing, tested on an epson TM-U220 with two-color ribbon installed.
 */
require __DIR__ . '/autoload.php';
use Mike42\Escpos\Printer;
use Mike42\Escpos\PrintConnectors\FilePrintConnector;
$connector = new FilePrintConnector("php://stdout");
$printer = new Printer($connector);

try {
    $printer = new Escpos($connector);
    $printer -> text("Hello World!\n");
    $printer -> setColor(Printer::COLOR_2);
    $printer -> text("Red?!\n");
    $printer -> setColor(Printer::COLOR_1);
    $printer -> text("Default color again?!\n");
    $printer -> cut();
} finally {
    /* Always close the printer! */
    $printer -> close();
}

With this result:

2015-10-colour-receipt-printing-3

How to connect a USB receipt printer up on Mac OS X

This post will show you how to set up a USB receipt printer on Max OS X. These steps were written on Yosemite, but should work on 10.6 onwards (ie, also Snow Leopard through to El Capitan).

This is another post in a series, which has so far covered direct USB printing on Windows and Linux. The printer tested here is this Epson TM-T20:

2015-03-printer-back
2015-03-printer-top

CUPS is the printing system that’s used on Mac, but most users would be more familiar with the system print dialog:

2015-11-mac-usb-epson-12

In our case, we need to set up the printer via the CUPS web interface. This is accessed via a web browser at this address:

http://localhost:631

At first, you will get knocked back:

2015-11-mac-usb-epson-0

To fix this up, open up Applications → Utilities → Terminal and type in:

cupsctl WebInterface=yes

You can then reload the browser and click through to Administration:

2015-11-mac-usb-epson-1

Click Add Printer and log in:

2015-11-mac-usb-epson-2

2015-11-mac-usb-epson-3

Select the USB printer from the list, and optionally share it:

2015-11-mac-usb-epson-4

2015-11-mac-usb-epson-5

Click Select Another Make/Manufacturer, and select Raw → Raw Queue:

2015-11-mac-usb-epson-6

2015-11-mac-usb-epson-7

2015-11-mac-usb-epson-8

Use the defaults for the other options:

2015-11-mac-usb-epson-9

Test print

Type some junk into a file called foo.txt and attempt to print it, using the CUPS printer name:

nano foo.txt
lpr -o raw -H localhost -P EPSON_TM-T20 foo.txt

The prints will be delayed for a few moments, as CUPS spools the jobs.

Disable CUPS web

Once you’re done, for security reasons you should reset this option from before, to disable the web interface to CUPS:

cupsctl WebInterface=no

Howto: QR Codes on receipts with escpos-php

ESC/POS is a binary protocol for speaking to receipt printers. It contains a command for printing QR Codes on compatible printers. The PHP library escpos-php is used for generating these commands in PHP. This post will show you how to use it to generate QR codes on your receipt printer.

For printers which don’t support this command, a second option is available: sending the QR code as an image.

Getting started

First up, you need your receipt printer to be working with escpos-php. Here are some resources about how to go about that:

Option 1: Direct printing

This method sends QR codes directly. From the documentation, the syntax for this command is:

qrCode($content, $ec, $size, $model)

Print the given data as a QR code on the printer.

  • string $content: The content of the code. Numeric data will be more efficiently compacted.
  • int $ec Error-correction level to use. One of Printer::QR_ECLEVEL_L (default), Printer::QR_ECLEVEL_M, Printer::QR_ECLEVEL_Q or Printer::QR_ECLEVEL_H. Higher error correction results in a less compact code.
  • int $size: Pixel size to use. Must be 1-16 (default 3)
  • int $model: QR code model to use. Must be one of Printer::QR_MODEL_1, Printer::QR_MODEL_2 (default) or Printer::QR_MICRO (not supported by all printers).

The below code snippets are directly from the QR code printing demo, showing how the output changes with the options given.

Simple example

This is the simplest use, with all default options. QR codes can be aligned in the same way as text or images on the page:

2015-04-escposqr-01-demo
// Most simple example
title($printer, "QR code demo\n");
$testStr = "Testing 123";
$printer -> qrCode($testStr);
$printer -> text("Most simple example\n");
$printer -> feed();

// Demo that alignment is the same as text
$printer -> setJustification(Printer::JUSTIFY_CENTER);
$printer -> qrCode($testStr);
$printer -> text("Same example, centred\n");
$printer -> setJustification();
$printer -> feed();

Data encoding

This is a demonstration of saving different types of data in a code. Numeric data is packed more efficiently than text. Binary data can also be stored.

2015-04-escposqr-02-dataencoding
// Demo of numeric data being packed more densly
title($printer, "Data encoding\n");
$test = array(
	"Numeric"      => "0123456789012345678901234567890123456789",
	"Alphanumeric" => "abcdefghijklmnopqrstuvwxyzabcdefghijklmn",
	"Binary"       => str_repeat("\0", 40));
foreach($test as $type => $data) {
	$printer -> qrCode($data);
	$printer -> text("$type\n");
	$printer -> feed();
}

Error correction levels

QR codes support fout levels of error correction. More error correction results in larger, but more durable codes:

2015-04-escposqr-03-errorcorrection
// Demo of error correction
title($printer, "Error correction\n");
$ec = array(
	Printer::QR_ECLEVEL_L => "L",
	Printer::QR_ECLEVEL_M => "M",
	Printer::QR_ECLEVEL_Q => "Q",
	Printer::QR_ECLEVEL_H => "H");
foreach($ec as $level => $name) {
	$printer -> qrCode($testStr, $level);
	$printer -> text("Error correction $name\n");
	$printer -> feed();
}

Code size

The defauly codes are quite small. Each pixel can be blown up, up to 16x, using the size option:

2015-04-escposqr-04-pizelsize
// Change size
title($printer, "Pixel size\n");
$sizes = array(
	1 => "(minimum)",
	2 => "",
	3 => "(default)",
	4 => "",
	5 => "",
	10 => "",
	16 => "(maximum)");
foreach($sizes as $size => $label) {
	$printer -> qrCode($testStr, Printer::QR_ECLEVEL_L, $size);
	$printer -> text("Pixel size $size $label\n");
	$printer -> feed();
}

QR models

QR models have different appearances, storage parameters and physical sizes. The default (Model 2) is most common. The printer used here does not support micro QR codes, and used Model 2 as a fallback.

2015-04-escposqr-05-qrmodel
// Change model
title($printer, "QR model\n");
$models = array(
	Printer::QR_MODEL_1 => "QR Model 1",
	Printer::QR_MODEL_2 => "QR Model 2 (default)",
	Printer::QR_MICRO => "Micro QR code\n(not supported on all printers)");
foreach($models as $model => $name) {
	$printer -> qrCode($testStr, Printer::QR_ECLEVEL_L, 3, $model);
	$printer -> text("$name\n");
	$printer -> feed();
}

Note

To run the snippets, you need to initialise the printer, and define a title() function to print headings, like so:

<?php
/* Demonstration of available options on the qrCode() command */
require __DIR__ . '/autoload.php';
use Mike42\Escpos\Printer;
use Mike42\Escpos\PrintConnectors\FilePrintConnector;
$connector = new FilePrintConnector("/dev/usb/lp0");
$printer = new Printer($connector);

// ....

// Cut & close
$printer -> cut();
$printer -> close();

function title(Escpos $printer, $str) {
	$printer -> selectPrintMode(Printer::MODE_DOUBLE_HEIGHT | Printer::MODE_DOUBLE_WIDTH);
	$printer -> text($str);
	$printer -> selectPrintMode();
}

Option 2: Printing codes as images

Not all printers can generate QR codes natively. The work-around is to generate a QR code as an image on the computer, and then send that image to the printer. This is slightly slower, so if you print a lot of codes, you should consider upgrading your printer.

First up, fetch a copy of phpqrcode and generate some codes. I wont attempt to document the whole library here, but in short, it supports most of the same features as the native QR command. To generate a code, you simply use QRcode::png:

require_once("phpqrcode/qrlib.php");
QRcode::png("testing123", "test.png", 'L', 10, 0);

To print a PNG image, use the bitImage() command (the graphics command is also only available on newer printers):

require __DIR__ . '/autoload.php';
use Mike42\Escpos\EscposImage;
use Mike42\Escpos\PrintConnectors\FilePrintConnector;
$img = EscposImage::load("test.png"); // Load image
$connector = new FilePrintConnector("/dev/usb/lp0"); // Add connector to your printer here
$printer = new Printer($connector);
$printer -> bitImage($img);
$printer -> feed();
$printer -> text("Code printed from image\n");

$printer -> cut();
$printer -> close();

A more sophisticated way to hack in phpqrcode would be to add this new code as a different implementaton of the qrCode function. Other improvements are:

  • Use temporary files to avoid concurrency issues:
  • Where possible, expand the code on the printer, to send less data
<?php
require __DIR__ . '/autoload.php';
use Mike42\Escpos\Printer;

require_once("phpqrcode/qrlib.php");

class EscposQrImgPrinter extends Printer {
	function qrCode($content, $ec = self::QR_ECLEVEL_L, $size = 3, $model = self::QR_MODEL_2) {
		// Validate inputs
		self::validateString($content, __FUNCTION__);
		self::validateInteger($ec, 0, 3, __FUNCTION__);
		self::validateInteger($size, 1, 16, __FUNCTION__);
		$model = self::QR_MODEL_2; // Only Model 2 supported in phpqrcode, change back to it.
		$sizeMod = 0;
		if($size % 2 == 0) { // Optimisation to enlarge codes on the priner, sending 1/4 of the data.
			$size /= 2;
			$sizeMod = self::IMG_DOUBLE_HEIGHT | self::IMG_DOUBLE_WIDTH;
		}
		// Map error-correction to phpqrcode levels
		$ecMap = array(QR_ECLEVEL_L => 'L',
			QR_ECLEVEL_M => 'M',
			QR_ECLEVEL_Q => 'Q',
			QR_ECLEVEL_H => 'H');
		// Create QR code in temp file, and print it.
		$tmpfname = tempnam(sys_get_temp_dir(), "escpos-php");
		QRcode::png("testing123", $tmpfname, $ecMap[$ec], $size, 0);
		$img = new EscposImage($tmpfname);
		$this -> bitImage($img, $sizeMod);
		unlink($tmpfname);
	}
}

This new class uses phpqrcode in the background instead, and can be accessed with the same function calls as the parent class:


require __DIR__ . '/autoload.php';
use Mike42\Escpos\Printer;
use Mike42\Escpos\PrintConnectors\FilePrintConnector;
$connector = new FilePrintConnector("/dev/usb/lp0");
$printer = new EscposQrImgPrinter($connector);

$testStr = "Testing 123";
$printer -> qrCode($testStr);
$printer -> text("Most simple example\n");
$printer -> feed();
$printer -> cut();

$printer -> close();

The only visible difference between the implementations is a few pixels of spacing below the image.

Getting a USB receipt printer working on Windows

Note:This post is a Windows adaptation of an earlier post, Getting a USB receipt printer working on Linux, mainly in response to these questions.

In this post, I’ll step through how to get a USB thermal receipt printer appearing on Windows. The aim of this is to be able to send raw text to the printer, so that we can point a driver such as escpos-php at it. The printer tested here is once again this Epson TM-T20:

2015-03-printer-back
2015-03-printer-top

The directions below are for Windows 7, so your mileage may vary if you are on an older or newer version.

If you have issues following these steps, make sure you can locate your printer in Device Manager, and that it has “USB Print Support”.

Add the printer

Find Devices and Printers and click Add a Printer.
2015-04-windowsusb-01

2015-04-windowsusb-02

Add it as a Local printer, using the USB virtual port, probably USB0001:

2015-04-windowsusb-03
2015-04-windowsusb-04

Use the Generic / Text Only driver.

2015-04-windowsusb-05

Name the printer whatever you like, and then share it under the same name:

2015-04-windowsusb-06
2015-04-windowsusb-07

At this point, it should pop up in the window in the background, and also prompt you to Print a test page.

2015-04-windowsusb-08
2015-04-windowsusb-09

The test print is plain-text, and depending on your printer, will look something like this:

2015-04-windowsusb-10

Finally, you need to verify that your printer can be accessed locally, by typing \\localhost into Windows Explorer. If all goes to plan, you will see the new printer there too:

2015-04-windowsusb-11

Run a command-line test print

We now know that your printer is working, and can be accessed via its share name (even locally).

Test printing from the command-line. Fire up cmd.exe and try to send it some text to verify that it’s working:

echo "Hello World" > testfile
print /D:"\\%COMPUTERNAME%\Receipt Printer" testfile
del testfile

Printing something useful

This is where you start to see real results. Receipt printers are not just for printing plain-text. Many of them support a standard called ESC/POS, which contains formatting commands.

The snippet below, from this earlier post, generates some basic ESC/POS commands.

Install PHP if you don’t have it already, and call the below code foo.php:

<?php
/* ASCII constants */
const ESC = "\x1b";
const GS="\x1d";
const NUL="\x00";

/* Output an example receipt */
echo ESC."@"; // Reset to defaults
echo ESC."E".chr(1); // Bold
echo "FOO CORP Ltd.\n"; // Company
echo ESC."E".chr(0); // Not Bold
echo ESC."d".chr(1); // Blank line
echo "Receipt for whatever\n"; // Print text
echo ESC."d".chr(4); // 4 Blank lines

/* Bar-code at the end */
echo ESC."a".chr(1); // Centered printing
echo GS."k".chr(4)."987654321".NUL; // Print barcode
echo ESC."d".chr(1); // Blank line
echo "987654321\n"; // Print number
echo GS."V\x41".chr(3); // Cut
exit(0);

You would send generated commands to the printer like this:

php foo.php > testfile
print /D:"\\%COMPUTERNAME%\Receipt Printer" testfile
rm testfile

Scaling this up

The correct ESC/POS codes are quite tricky to generate with manually, which is why I put together the escpos-php driver. You can find more information on that at:

A simple “Hello World” receipt to your Windows shared printer would be scripted as (call this one foo2.php):

<?php
require __DIR__ . '/autoload.php';
use Mike42\Escpos\Printer;
use Mike42\Escpos\PrintConnectors\WindowsPrintConnector;

try {
	// Enter the share name for your USB printer here
	$connector = new WindowsPrintConnector("Receipt Printer");
	$printer = new Printer($connector);

	/* Print a "Hello world" receipt" */
	$printer -> text("Hello World!\n");
	$printer -> cut();
	
	/* Close printer */
	$printer -> close();
} catch(Exception $e) {
	echo "Couldn't print to this printer: " . $e -> getMessage() . "\n";
}

This would be sent to the printer by loading it from the web, or running the script on the command-line:

php foo2.php

The full ESC/POS snippet with formatting, coded up with escpos-php, would look like this (call this one foo3.php):

<?php
require __DIR__ . '/autoload.php';
use Mike42\Escpos\Printer;
use Mike42\Escpos\PrintConnectors\WindowsPrintConnector;
try {
	// Enter the share name for your USB printer here
	$connector = new WindowsPrintConnector("Receipt Printer");
	$printer = new Printer($connector);

	/* Print some bold text */
	$printer -> setEmphasis(true);
	$printer -> text("FOO CORP Ltd.\n");
	$printer -> setEmphasis(false);
	$printer -> feed();
	$printer -> text("Receipt for whatever\n");
	$printer -> feed(4);

	/* Bar-code at the end */
	$printer -> setJustification(Printer::JUSTIFY_CENTER);
	$printer -> barcode("987654321");
	
	/* Close printer */
	$printer -> close();
} catch(Exception $e) {
	echo "Couldn't print to this printer: " . $e -> getMessage() . "\n";
}

And again, this could be executed by loading the page through the web, or invoking the command directly:

php foo3.php