Switching between VFIO-enabled virtual machines

For the past few months, I’ve been using a setup for software development where I pass the mouse, keyboard and graphics card to a virtual machine via Linux VFIO. The setup is described in detail in its own blog post.

In short though, the idea is to provision a separate virtual machine for each project, so that I can install whatever tools I need to solve the problem at hand, with no real consequences if I break my install.

The problem

I have multiple virtual machines which are configured to use the same hardware, so I can only run one at a time. Before making the changes outlined in this blog post, the method I used to switch to a different VM was unwieldy: I needed is to shut down the current VM, switch monitor inputs to the host graphics, start a different VM, then switch monitor inputs back the the VM graphics.

I intend to do all of my work in VM’s, so my basic goal was to make a ‘switch VM’ mechanism available from within a VM, to remove any need to interact with the host operating system directly.

Creating an API

My plan for this was to run an agent on the host, which will accept a request to switch VM’s. It would then shut down the current VM, and start up a different one instead.

This was the first time I tried using the libvirt Python bindings before, and I was able to quickly make a proof of concept which toggled between two VM’s, which are nested within the VM I’m using for development, because of course they are.

Toggling which VM is active, using the Python libvirt API in PyCharm.

I then extended this to use an orderly shutdown, and to work with an arbitrary number of VM’s. CirrOS was not completing its boot in this environment, so I switched the test VM’s to Debian, and also passed through a USB device to each of them so that I would get an error if I ever tried to boot both VM’s simultaneously.

Last, I exposed this over HTTP as a simple API.

For the first iteration, I installed this on the host, and placed some scripts in a folder which is shared between all of the VM’s. The scripts use curl commands to call the API. To trigger a VM switch (or a shutdown of the host), I could go to a folder, and run one of these scripts.

Web UI

With that proof-of-concept out of the way, I made a web interface, so that I can use this instead of some bash scripts in a folder. This is a very simple Angular app.

GNOME extension

For the most part, I’m working on Debian using the GNOME desktop environment, which gives me some options for integrating this further into my desktop.

I first considered making a search provider, but settled instead for making a simple standalone extension to display an indicator instead, based on the example app shown running here.

As if nested virtualization was not mind-bending enough, I started testing this using a GNOME session within a GNOME session.

The extension is written in JavaScript, though the JavaScript API for GNOME extensions was very unfamiliar to me. There some obvious quality issues in the code, but it’s not being published to a repository, and it fires off the correct HTTP requests, so I’ll call it a success.

Deploying a GNOME extension manually is as simple as placing some files my home directory.

Result and next steps

I’ve bookmarked this URL in each of my VM’s.

And I’ve also installed this GNOME extension on the VM that runs on boot.

The idea of this setup is to have one virtual machine per project, so a good next step would be to make it easier to kick of the install process.

I’ve put the code for this project online at mike42/vfio-vm-switcher on GitHub.

Going all-in on GPU passthrough for software development

I recently spent some time improving my software development workflow at home, since my previous setup was starting to limit me. I settled on a configuration which uses GPU passthrough with the KVM hypervisor, running Debian as both a host and a guest.

This post aims to show some of the benefits and drawbacks of this more complex setup for my use case, as well as a specific combination of hardware and software which can be made to work.

Background and previous setup

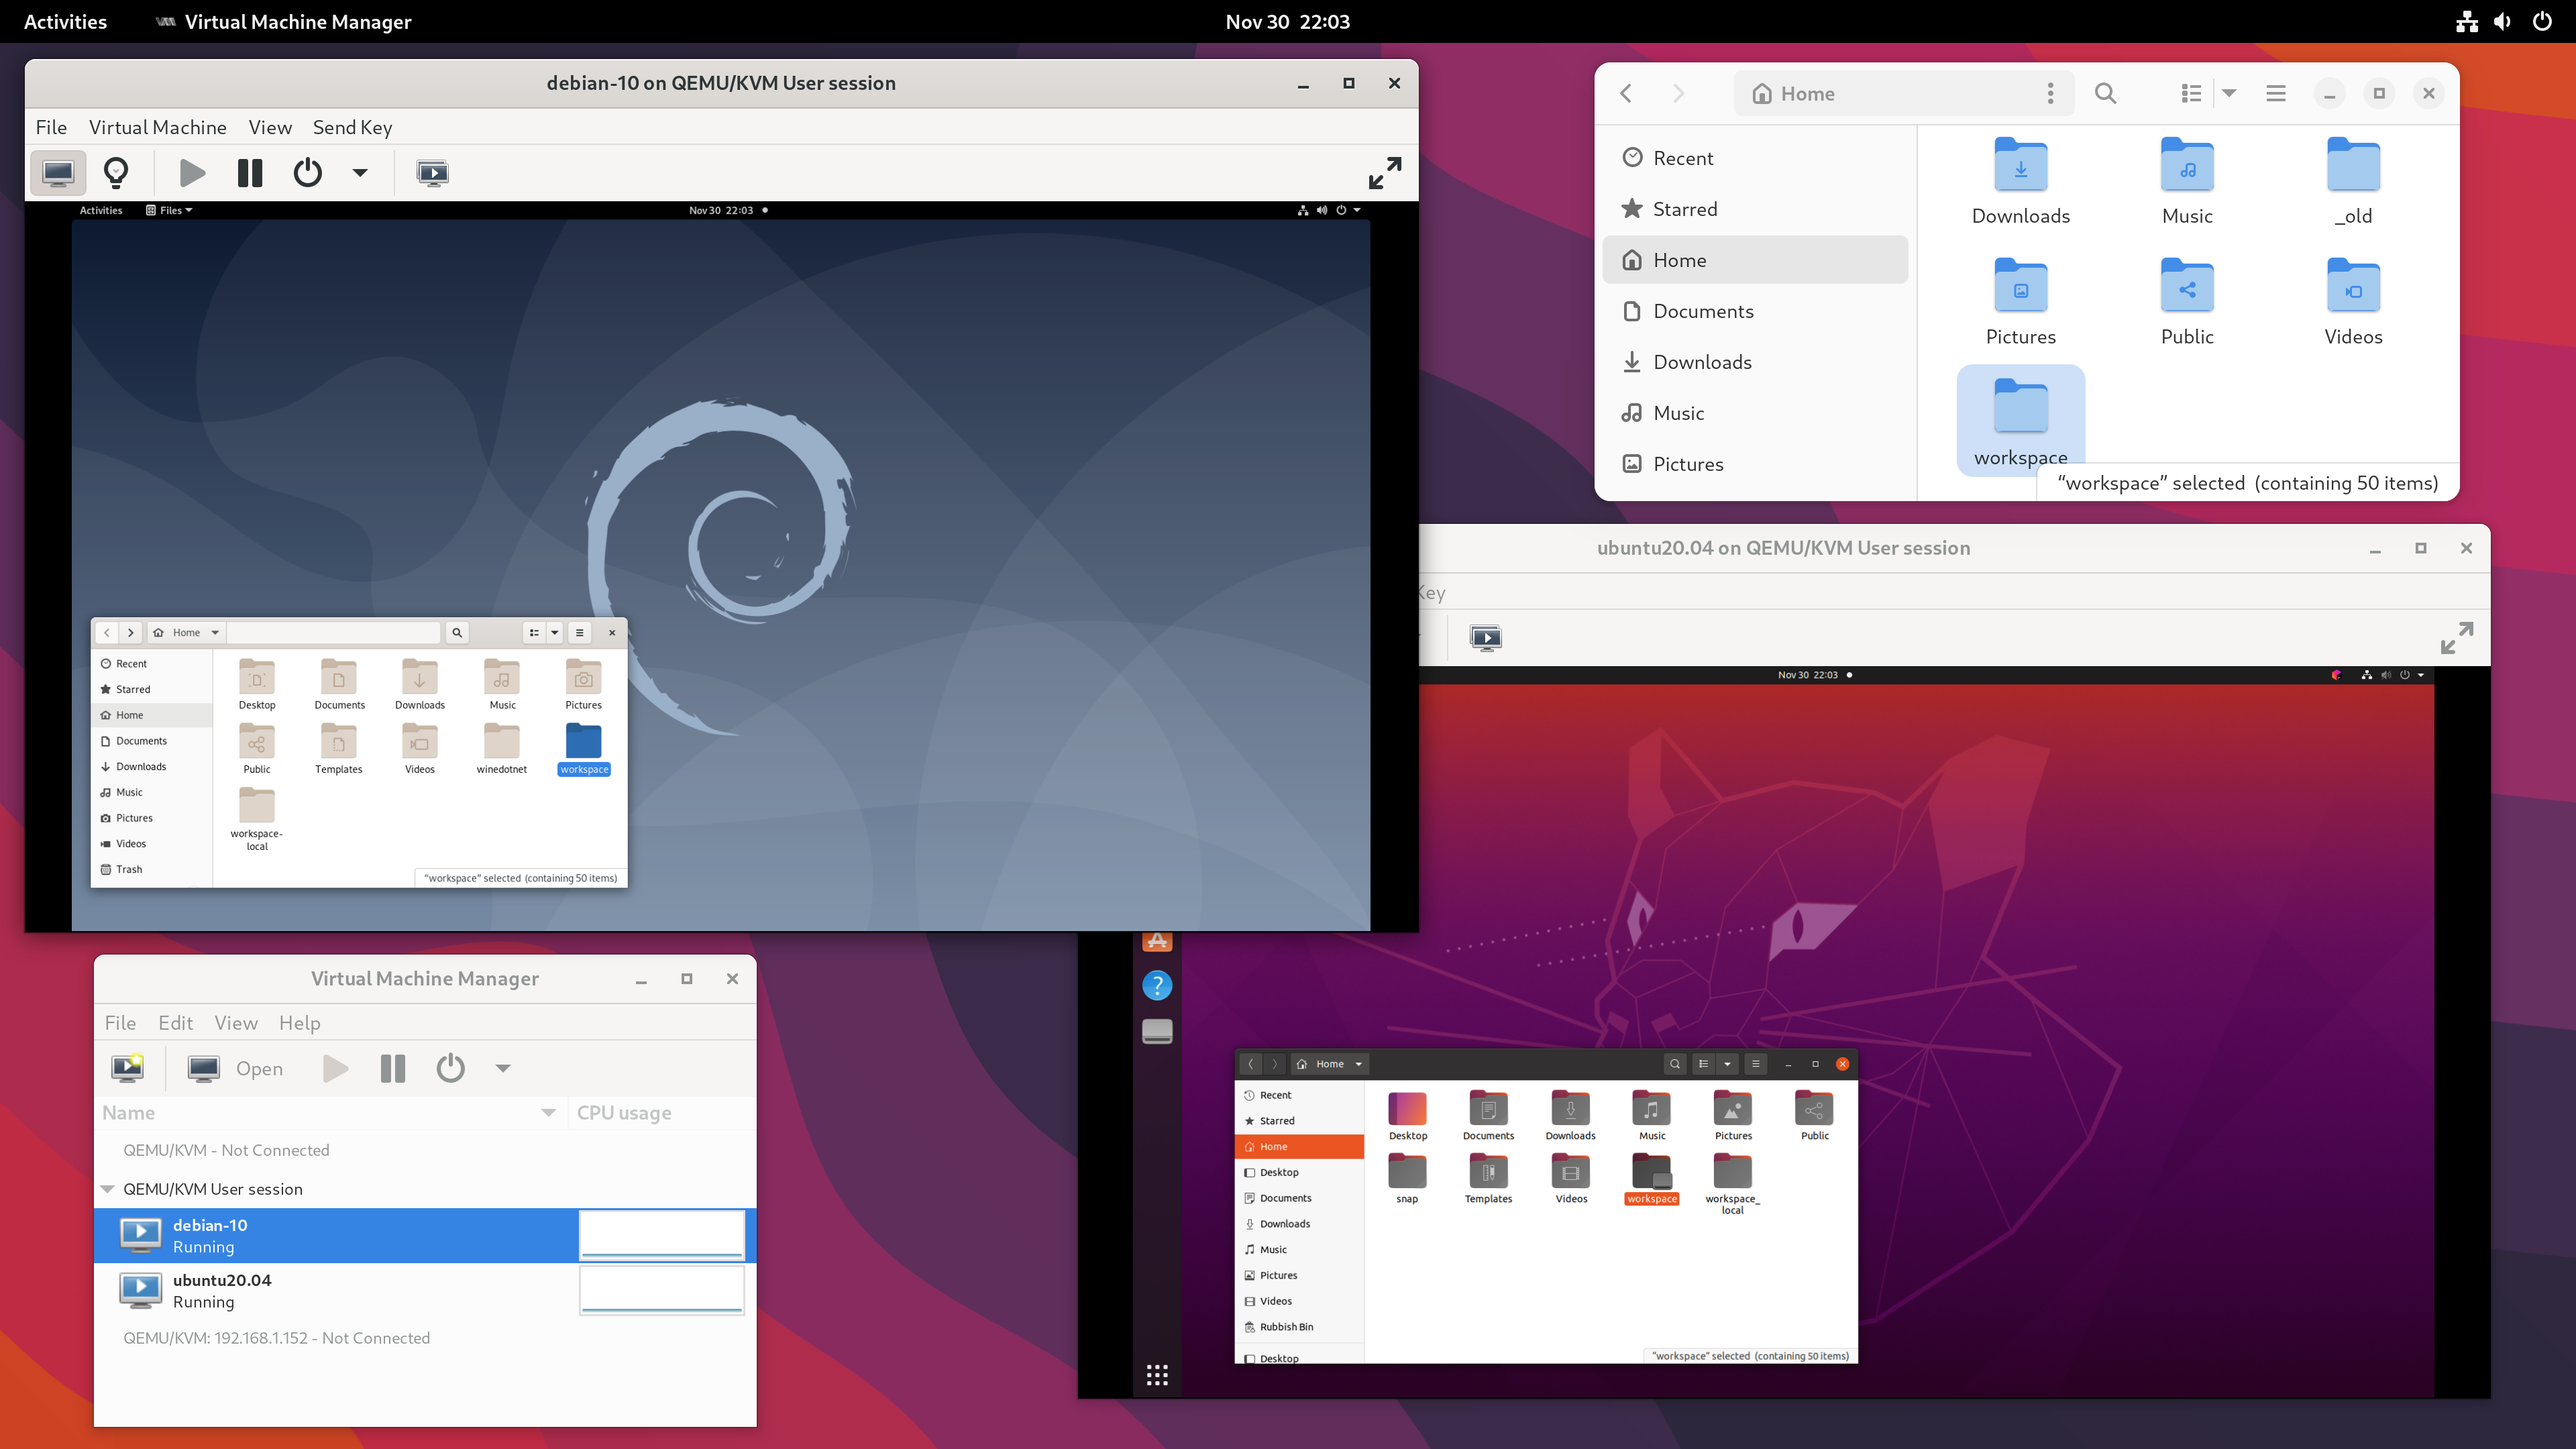
I was using Debian testing as a host system, and provisioning project-specific virtual machines to work in via virt-manager. I use two monitors, and typically had an IDE (in the VM) open on one monitor, and a web browser (on the host) open on the other.

The setup is simple and effective:

  • The VMs ran in the QEMU user session – previously blogged about here.
  • The path /home/mike/workspace on the host was shared with every VM via a 9p fileshare.
  • Each desktop was set to 1920 x 1080 resolution, with auto-resize disabled. I kept the VM’s at this lower resolution to get acceptable graphical performance on 4K monitors when I set this up.

This allowed me to keep the host operating system uncluttered, which I value for both maintainability and security. Modern software development involves running a lot of code, such as dependencies pulled in via a language-specific package manager, random binaries from GitHub, or tools installed via a sketchy curl ... | sudo sh command. Better to keep that in a VM.

The main drawbacks are with the interface into the VM.

  • Due to scaling, I had imperfect image quality. I also had a small but noticeable input lag when working in my IDE.
  • Development involving 3D graphics was impractical due to the performance difference. I reported a trivial bug in Blender earlier this year but didn’t have an environment suitable for more extensive development on that codebase.
  • There was an audio delay when testing within the VM. I created a NES demo last year and this delay was less than ideal when it came to adding sound.

I was at one point triple-booting Debian, Ubuntu 22.04 and Windows, so that I could also run some software which wouldn’t work well in this setup.

Hardware

GPU passthrough on consumer hardware is highly dependent on motherboard and BIOS support. The most critical components in my setup are:

  • Motherboard: ASUS TUF X470-PLUS GAMING
  • CPU: AMD Ryzen 7 5800X
  • Monitors: 2 x LG 27UD58
  • Graphics card: AMD Radeon RX 6950 XT
    • Installed at PCIEX16_1, directly connected to the CPU
    • Connected to DisplayPort inputs on the two monitors

I added one component specifically for this setup:

  • Second graphics card: AMD Radeon RX 6400
    • Installed at PCIEX16_2, connected to chipset
    • Connected to HDMI inputs on the two monitors (one directly, one via an adapter)

The second graphics card will be used by the host. The RX 6400 is a low-cost, low-power, low-profile card which supports UEFI, Vulkan and the modern amdgpu driver.

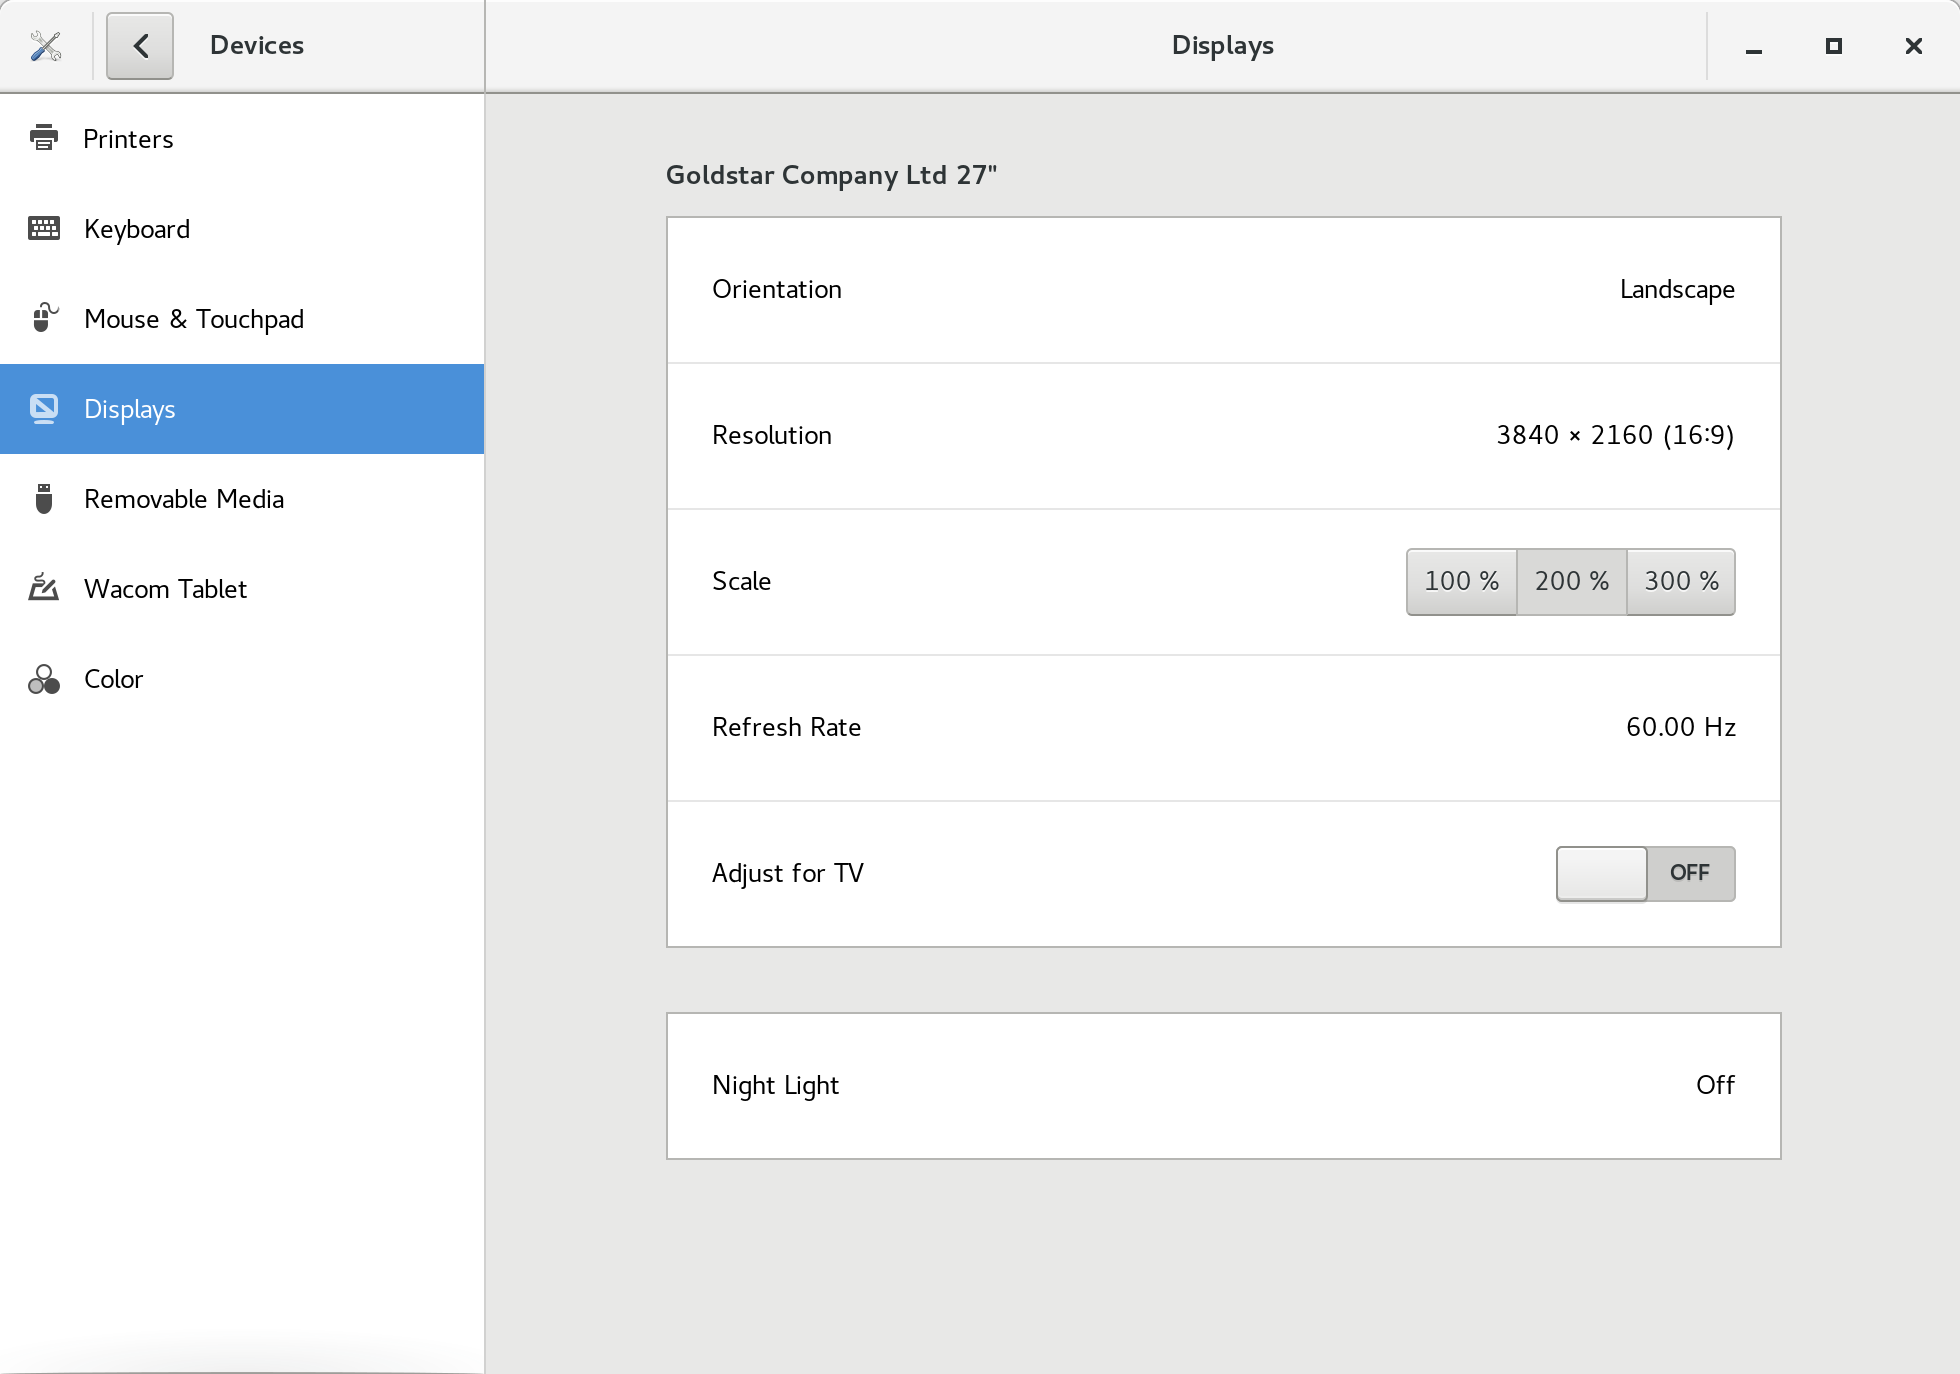
In the slot I’ve installed it, it’s limited to PCIE 2.0 x4, and 1920 x 1080 is the highest resolution I can run at 60 Hz on these monitor inputs. I only need to use this to set up the VM’s, or as a recovery interface, so I’m not expecting this to be a major issue.

Inspecting IOMMU groups

On a fresh install of Debian 12, I started walking through the PCI passthrough via OVMF guide on the Arch Wiki, adapting it for my specific setup as necessary.

I verified that I was using UEFI boot, had SVM and IOMMU enabled, and I also enabled resizable BAR. I did not set any IOMMU-related Linux boot options, and also could not find a firmware setting to select which graphics card to use during boot.

Using the script on the Arch Wiki, I then printed out the IOMMU groups on my hardware, which are as follows:

IOMMU Group 0:
    00:01.0 Host bridge [0600]: Advanced Micro Devices, Inc. [AMD] Starship/Matisse PCIe Dummy Host Bridge [1022:1482]
IOMMU Group 1:
    00:01.1 PCI bridge [0604]: Advanced Micro Devices, Inc. [AMD] Starship/Matisse GPP Bridge [1022:1483]
IOMMU Group 2:
    00:01.3 PCI bridge [0604]: Advanced Micro Devices, Inc. [AMD] Starship/Matisse GPP Bridge [1022:1483]
IOMMU Group 3:
    00:02.0 Host bridge [0600]: Advanced Micro Devices, Inc. [AMD] Starship/Matisse PCIe Dummy Host Bridge [1022:1482]
IOMMU Group 4:
    00:03.0 Host bridge [0600]: Advanced Micro Devices, Inc. [AMD] Starship/Matisse PCIe Dummy Host Bridge [1022:1482]
IOMMU Group 5:
    00:03.1 PCI bridge [0604]: Advanced Micro Devices, Inc. [AMD] Starship/Matisse GPP Bridge [1022:1483]
IOMMU Group 6:
    00:04.0 Host bridge [0600]: Advanced Micro Devices, Inc. [AMD] Starship/Matisse PCIe Dummy Host Bridge [1022:1482]
IOMMU Group 7:
    00:05.0 Host bridge [0600]: Advanced Micro Devices, Inc. [AMD] Starship/Matisse PCIe Dummy Host Bridge [1022:1482]
IOMMU Group 8:
    00:07.0 Host bridge [0600]: Advanced Micro Devices, Inc. [AMD] Starship/Matisse PCIe Dummy Host Bridge [1022:1482]
IOMMU Group 9:
    00:07.1 PCI bridge [0604]: Advanced Micro Devices, Inc. [AMD] Starship/Matisse Internal PCIe GPP Bridge 0 to bus[E:B] [1022:1484]
IOMMU Group 10:
    00:08.0 Host bridge [0600]: Advanced Micro Devices, Inc. [AMD] Starship/Matisse PCIe Dummy Host Bridge [1022:1482]
IOMMU Group 11:
    00:08.1 PCI bridge [0604]: Advanced Micro Devices, Inc. [AMD] Starship/Matisse Internal PCIe GPP Bridge 0 to bus[E:B] [1022:1484]
IOMMU Group 12:
    00:14.0 SMBus [0c05]: Advanced Micro Devices, Inc. [AMD] FCH SMBus Controller [1022:790b] (rev 61)
    00:14.3 ISA bridge [0601]: Advanced Micro Devices, Inc. [AMD] FCH LPC Bridge [1022:790e] (rev 51)
IOMMU Group 13:
    00:18.0 Host bridge [0600]: Advanced Micro Devices, Inc. [AMD] Matisse/Vermeer Data Fabric: Device 18h; Function 0 [1022:1440]
    00:18.1 Host bridge [0600]: Advanced Micro Devices, Inc. [AMD] Matisse/Vermeer Data Fabric: Device 18h; Function 1 [1022:1441]
    00:18.2 Host bridge [0600]: Advanced Micro Devices, Inc. [AMD] Matisse/Vermeer Data Fabric: Device 18h; Function 2 [1022:1442]
    00:18.3 Host bridge [0600]: Advanced Micro Devices, Inc. [AMD] Matisse/Vermeer Data Fabric: Device 18h; Function 3 [1022:1443]
    00:18.4 Host bridge [0600]: Advanced Micro Devices, Inc. [AMD] Matisse/Vermeer Data Fabric: Device 18h; Function 4 [1022:1444]
    00:18.5 Host bridge [0600]: Advanced Micro Devices, Inc. [AMD] Matisse/Vermeer Data Fabric: Device 18h; Function 5 [1022:1445]
    00:18.6 Host bridge [0600]: Advanced Micro Devices, Inc. [AMD] Matisse/Vermeer Data Fabric: Device 18h; Function 6 [1022:1446]
    00:18.7 Host bridge [0600]: Advanced Micro Devices, Inc. [AMD] Matisse/Vermeer Data Fabric: Device 18h; Function 7 [1022:1447]
IOMMU Group 14:
    01:00.0 Non-Volatile memory controller [0108]: Samsung Electronics Co Ltd NVMe SSD Controller SM981/PM981/PM983 [144d:a808]
IOMMU Group 15:
    02:00.0 USB controller [0c03]: Advanced Micro Devices, Inc. [AMD] Device [1022:43d0] (rev 01)
    02:00.1 SATA controller [0106]: Advanced Micro Devices, Inc. [AMD] 400 Series Chipset SATA Controller [1022:43c8] (rev 01)
    02:00.2 PCI bridge [0604]: Advanced Micro Devices, Inc. [AMD] 400 Series Chipset PCIe Bridge [1022:43c6] (rev 01)
    03:00.0 PCI bridge [0604]: Advanced Micro Devices, Inc. [AMD] 400 Series Chipset PCIe Port [1022:43c7] (rev 01)
    03:01.0 PCI bridge [0604]: Advanced Micro Devices, Inc. [AMD] 400 Series Chipset PCIe Port [1022:43c7] (rev 01)
    03:02.0 PCI bridge [0604]: Advanced Micro Devices, Inc. [AMD] 400 Series Chipset PCIe Port [1022:43c7] (rev 01)
    03:03.0 PCI bridge [0604]: Advanced Micro Devices, Inc. [AMD] 400 Series Chipset PCIe Port [1022:43c7] (rev 01)
    03:04.0 PCI bridge [0604]: Advanced Micro Devices, Inc. [AMD] 400 Series Chipset PCIe Port [1022:43c7] (rev 01)
    03:09.0 PCI bridge [0604]: Advanced Micro Devices, Inc. [AMD] 400 Series Chipset PCIe Port [1022:43c7] (rev 01)
    04:00.0 Ethernet controller [0200]: Realtek Semiconductor Co., Ltd. RTL8111/8168/8411 PCI Express Gigabit Ethernet Controller [10ec:8168] (rev 15)
    08:00.0 PCI bridge [0604]: Advanced Micro Devices, Inc. [AMD/ATI] Navi 10 XL Upstream Port of PCI Express Switch [1002:1478] (rev c7)
    09:00.0 PCI bridge [0604]: Advanced Micro Devices, Inc. [AMD/ATI] Navi 10 XL Downstream Port of PCI Express Switch [1002:1479]
    0a:00.0 VGA compatible controller [0300]: Advanced Micro Devices, Inc. [AMD/ATI] Navi 24 [Radeon RX 6400/6500 XT/6500M] [1002:743f] (rev c7)
    0a:00.1 Audio device [0403]: Advanced Micro Devices, Inc. [AMD/ATI] Navi 21/23 HDMI/DP Audio Controller [1002:ab28]
    0b:00.0 Non-Volatile memory controller [0108]: Sandisk Corp WD Blue SN550 NVMe SSD [15b7:5009] (rev 01)
IOMMU Group 16:
    0c:00.0 PCI bridge [0604]: Advanced Micro Devices, Inc. [AMD/ATI] Navi 10 XL Upstream Port of PCI Express Switch [1002:1478] (rev c0)
IOMMU Group 17:
    0d:00.0 PCI bridge [0604]: Advanced Micro Devices, Inc. [AMD/ATI] Navi 10 XL Downstream Port of PCI Express Switch [1002:1479]
IOMMU Group 18:
    0e:00.0 VGA compatible controller [0300]: Advanced Micro Devices, Inc. [AMD/ATI] Navi 21 [Radeon RX 6950 XT] [1002:73a5] (rev c0)
IOMMU Group 19:
    0e:00.1 Audio device [0403]: Advanced Micro Devices, Inc. [AMD/ATI] Navi 21/23 HDMI/DP Audio Controller [1002:ab28]
IOMMU Group 20:
    0f:00.0 Non-Essential Instrumentation [1300]: Advanced Micro Devices, Inc. [AMD] Starship/Matisse PCIe Dummy Function [1022:148a]
IOMMU Group 21:
    10:00.0 Non-Essential Instrumentation [1300]: Advanced Micro Devices, Inc. [AMD] Starship/Matisse Reserved SPP [1022:1485]
IOMMU Group 22:
    10:00.1 Encryption controller [1080]: Advanced Micro Devices, Inc. [AMD] Starship/Matisse Cryptographic Coprocessor PSPCPP [1022:1486]
IOMMU Group 23:
    10:00.3 USB controller [0c03]: Advanced Micro Devices, Inc. [AMD] Matisse USB 3.0 Host Controller [1022:149c]
IOMMU Group 24:
    10:00.4 Audio device [0403]: Advanced Micro Devices, Inc. [AMD] Starship/Matisse HD Audio Controller [1022:1487]

Passthrough for an IOMMU group is all-or nothing. For example, all of the chipset-connected devices are grouped together, and I can’t pass any of them through to a VM unless I pass them all through.

I’m mainly interested in a graphics card, an audio device, and a USB controller, and helpfully I have one of each isolated in their own groups, presumably because they are connected to PCIe lanes which go directly to the CPU.

Diagram illustrating that a graphics card, audio device, and USB controller are connected to PCIe lanes which go directly to the CPU, while a number of other devices are connected to the chipset.

Graphics

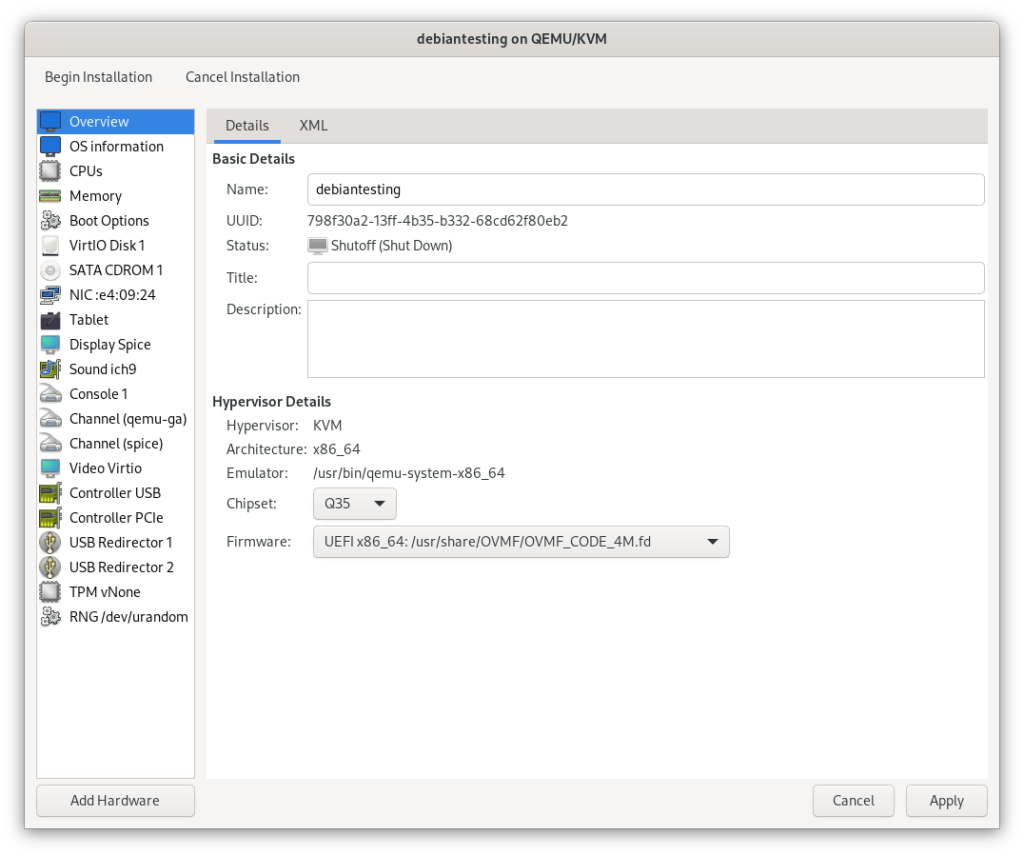
I created a virtual machine, also Debian 12, in the QEMU system session. The only important setting for now is the chipset and firmware, and in my case I selected Q35, and the OVMF UEFI firmware. GPU passthrough will not work if a virtual machine is booting with legacy BIOS.

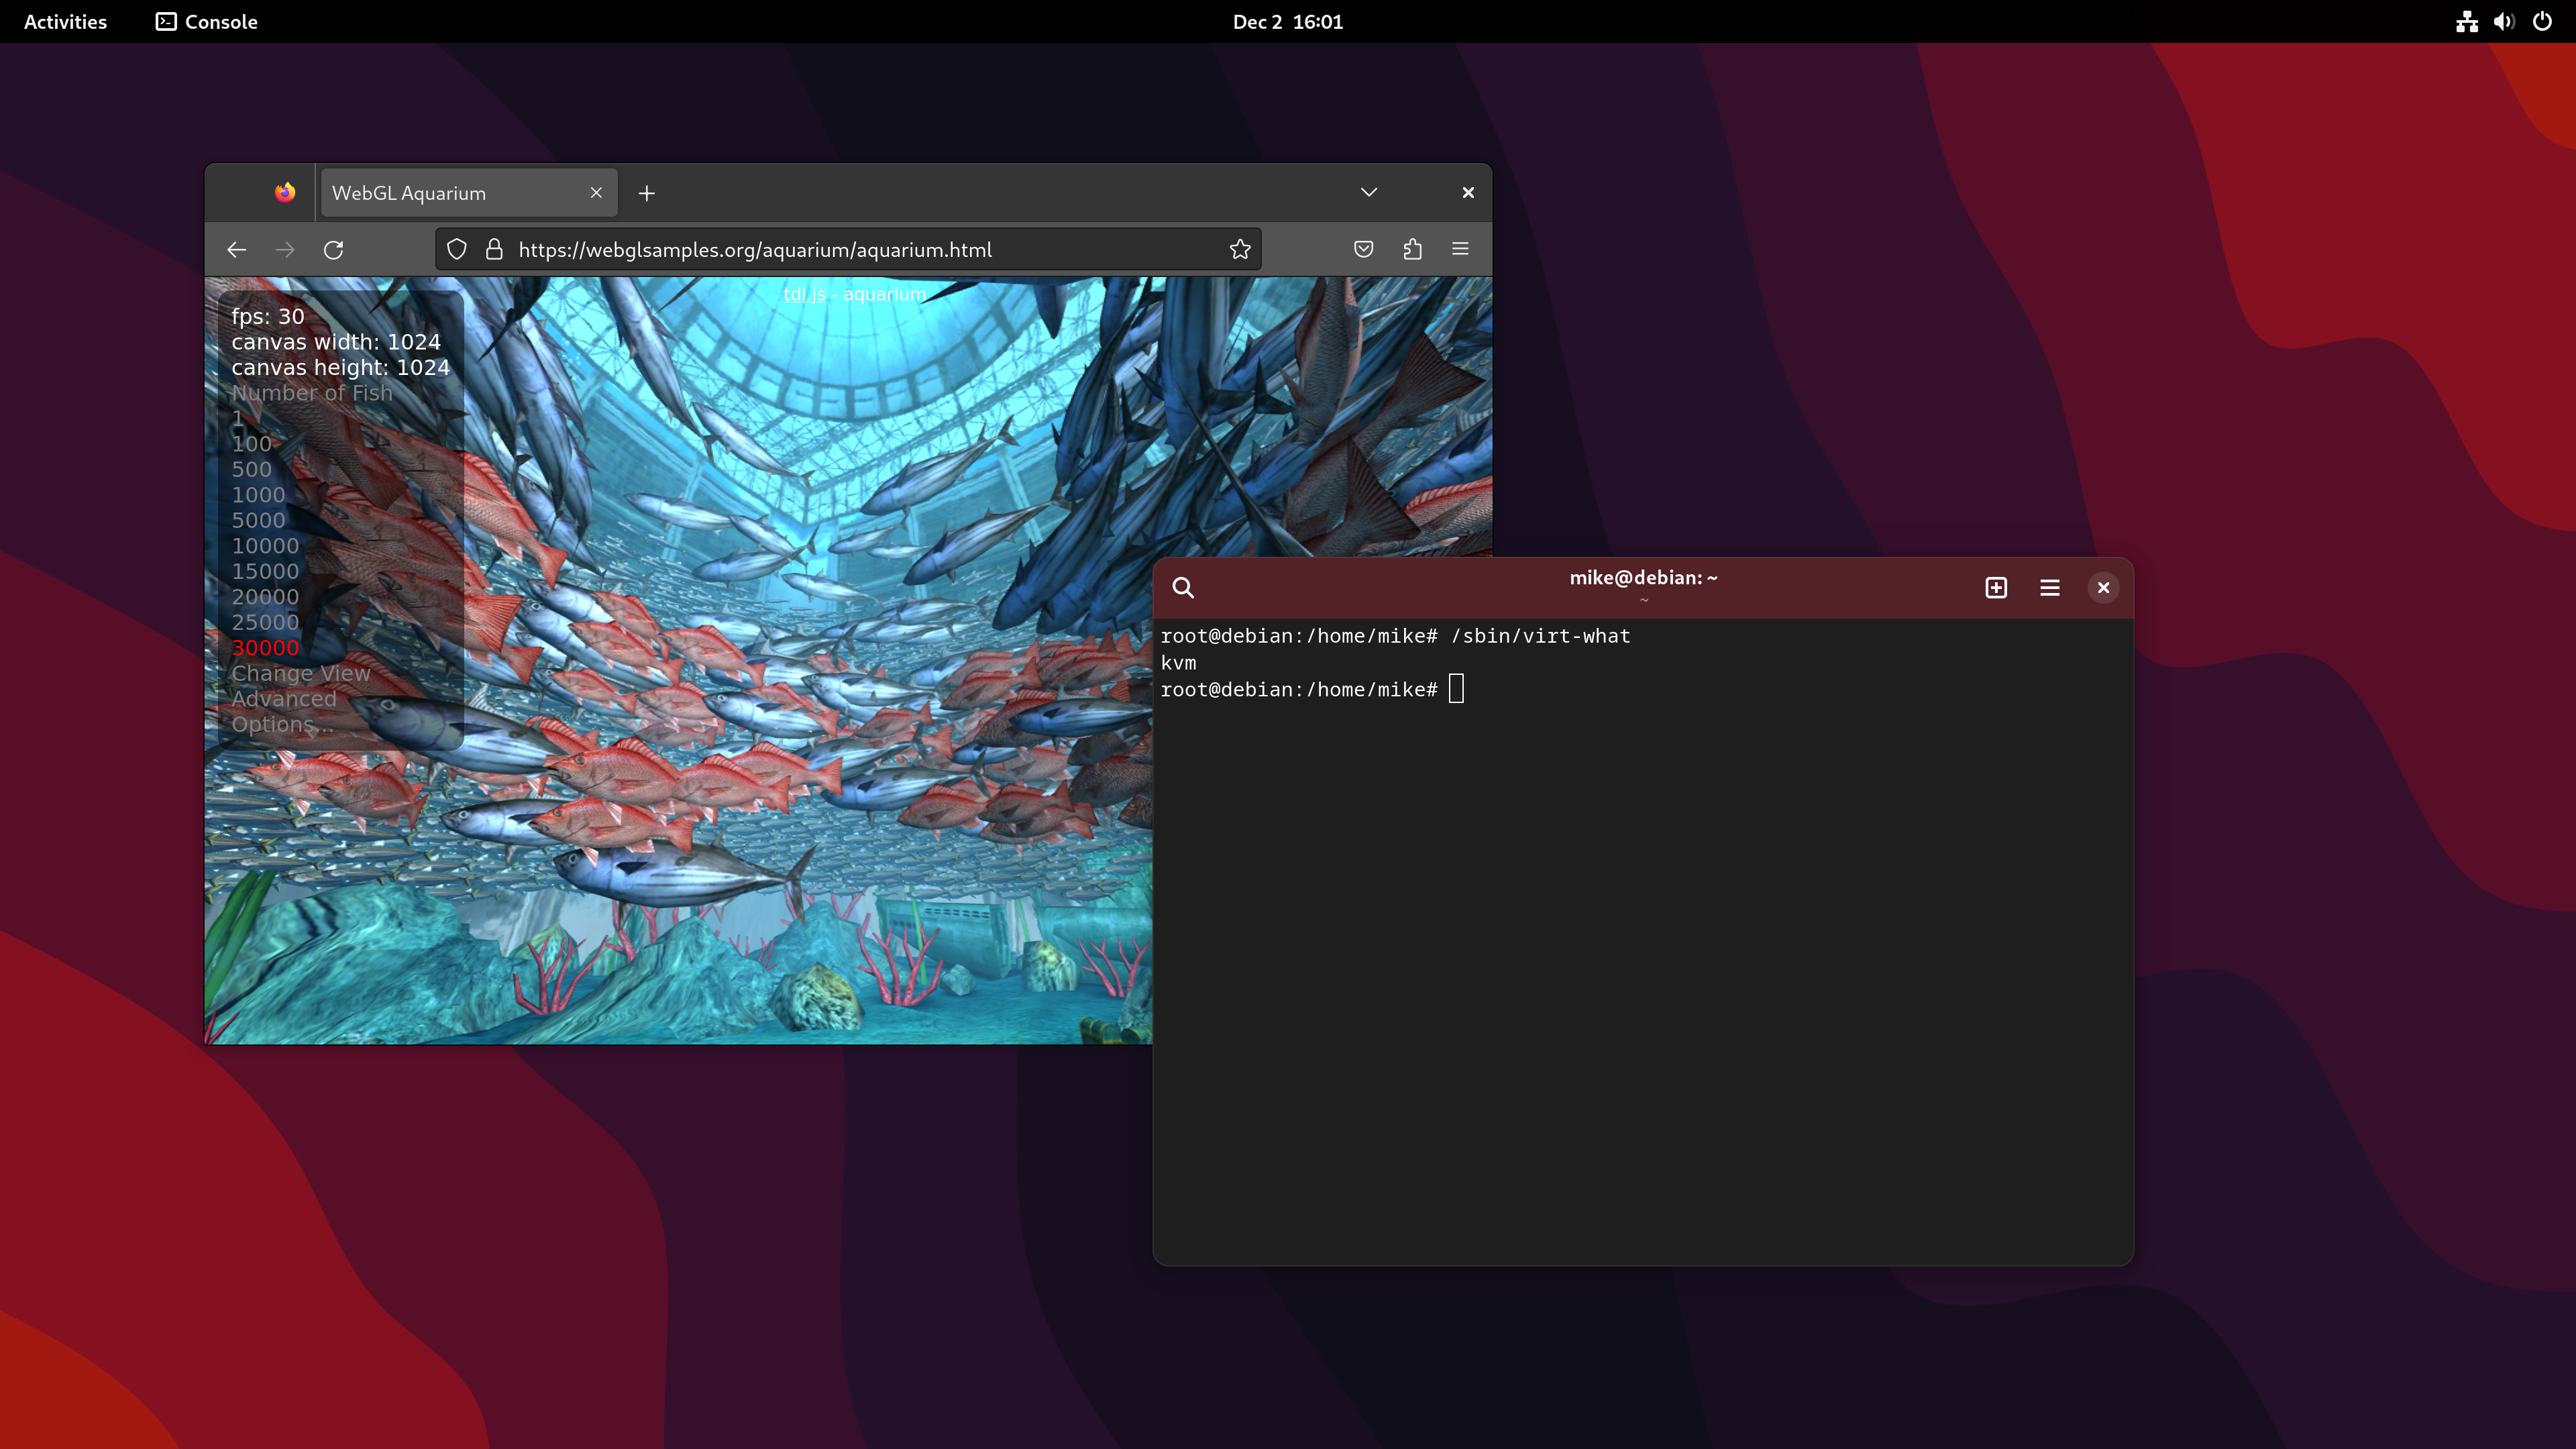
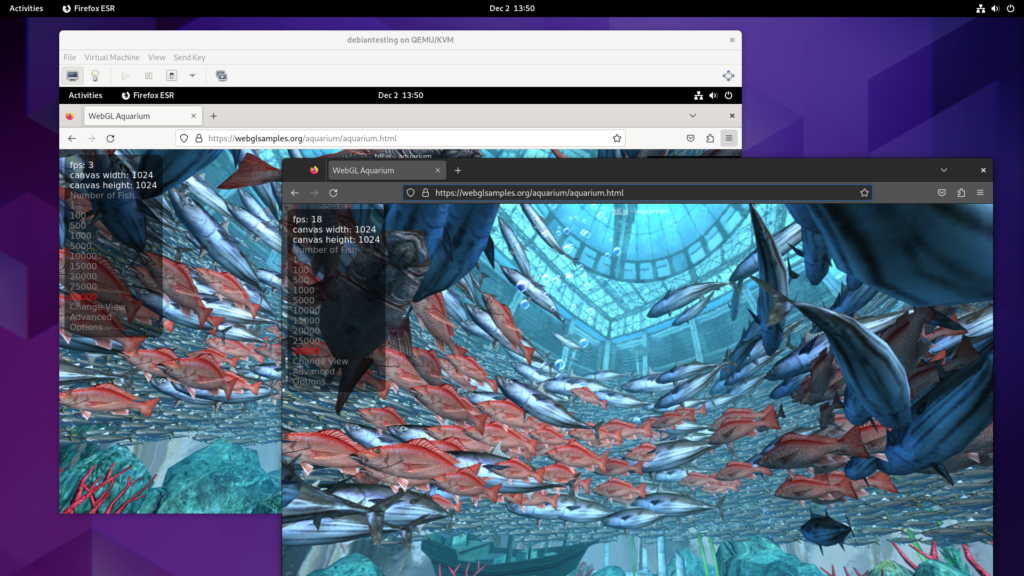
I use the WebGL Aquarium as a simple test for whether 3D acceleration is working. It runs much faster on the host system (this is using the RX 6400). The copy in the VM runs at just 3 frames per second, using SPICE display and virtio virtual GPU at this stage.

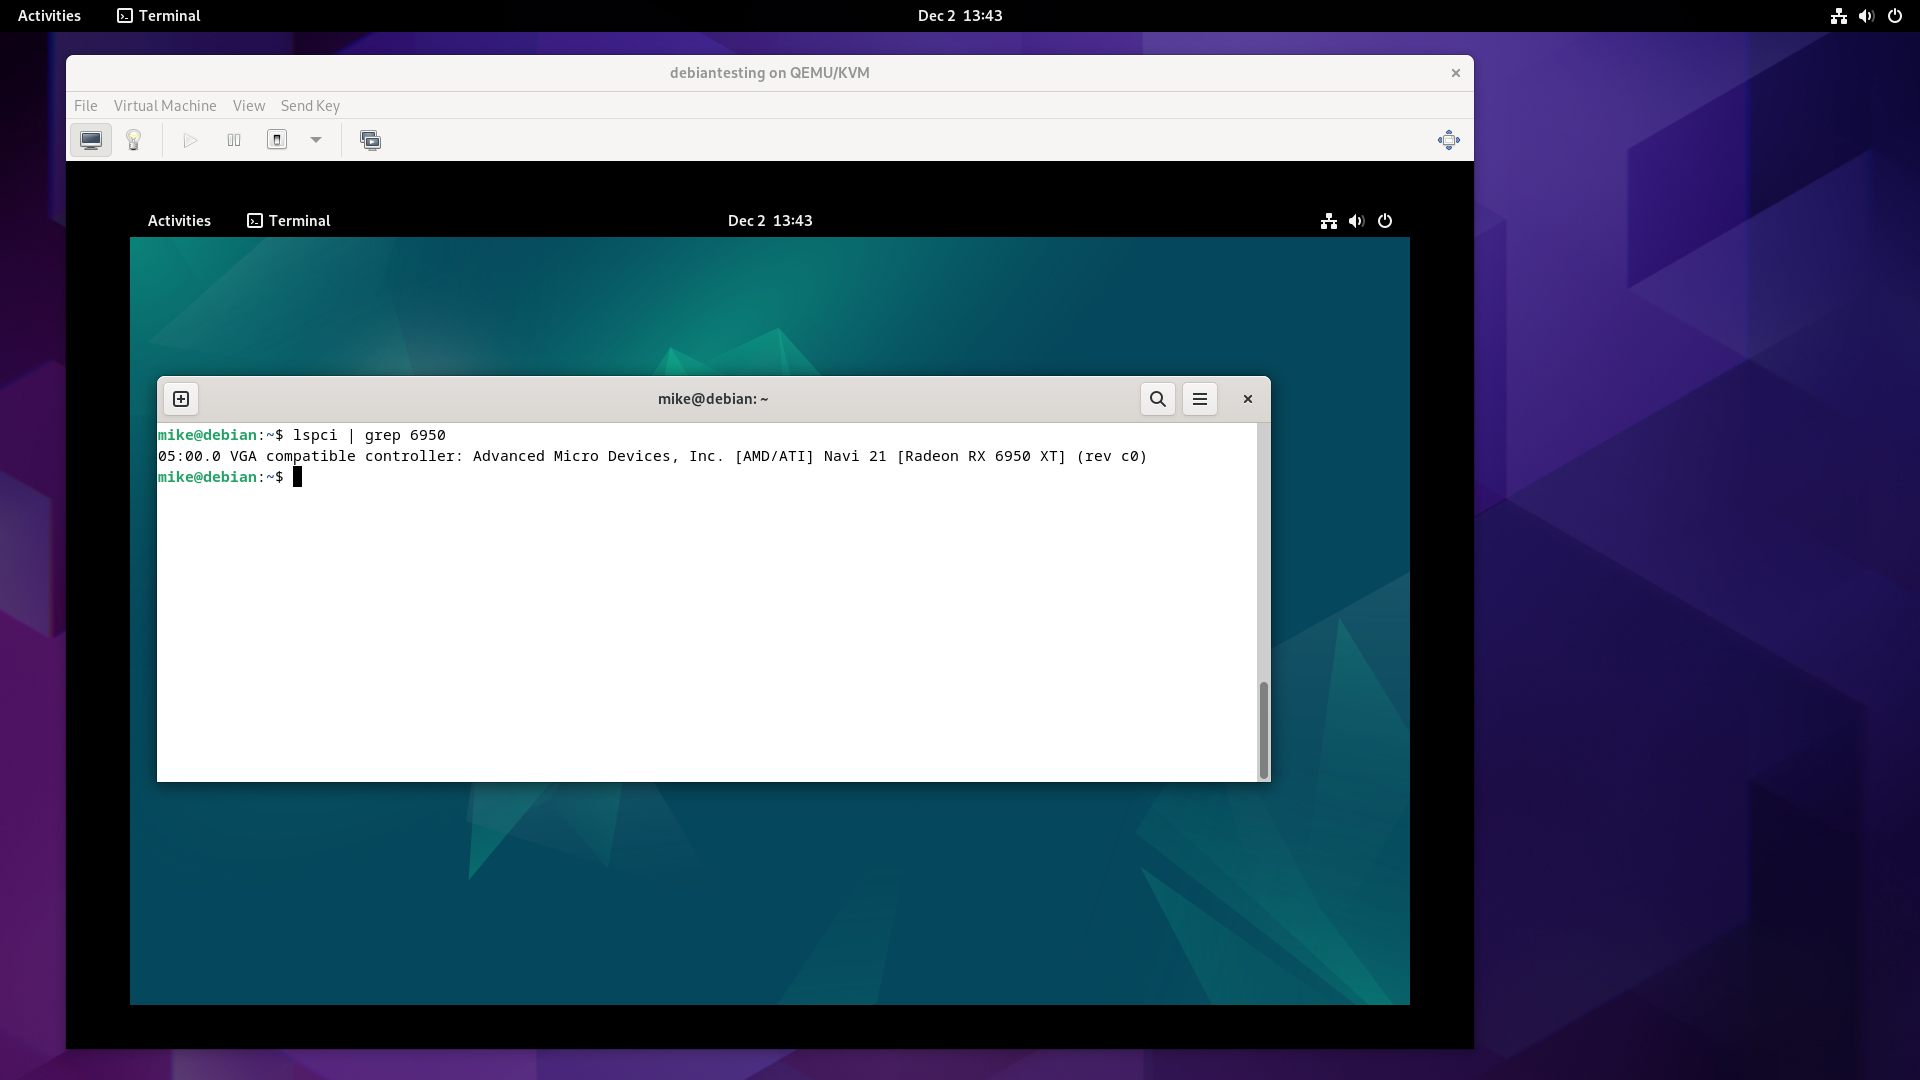
The next step was to isolate the GPU from the host. The relevant line from lspci -nn is:

0e:00.0 VGA compatible controller [0300]: Advanced Micro Devices, Inc. [AMD/ATI] Navi 21 [Radeon RX 6950 XT] [1002:73a5] (rev c0)

The vendor and device ID for this card is shown at the end of the line, 1002:73a5.

This needs to be added to the vfio-pci.ids boot option, which in my case involves updating /etc/default/grub.

GRUB_CMDLINE_LINUX="vfio-pci.ids=1002:73a5"

This is then applied by running update-grub2, and rebooting. It’s apparently possible to accomplish this without a reboot, but I’m following the easy path for now.

I verified that it worked by checking that the vfio-pci kernel module is in use for this device.

$ lspci -v
0e:00.0 VGA compatible controller: Advanced Micro Devices, Inc. [AMD/ATI] Navi 21 [Radeon RX 6950 XT] (rev c0) (prog-if 00 [VGA controller])
...
        Kernel driver in use: vfio-pci
        Kernel modules: amdgpu

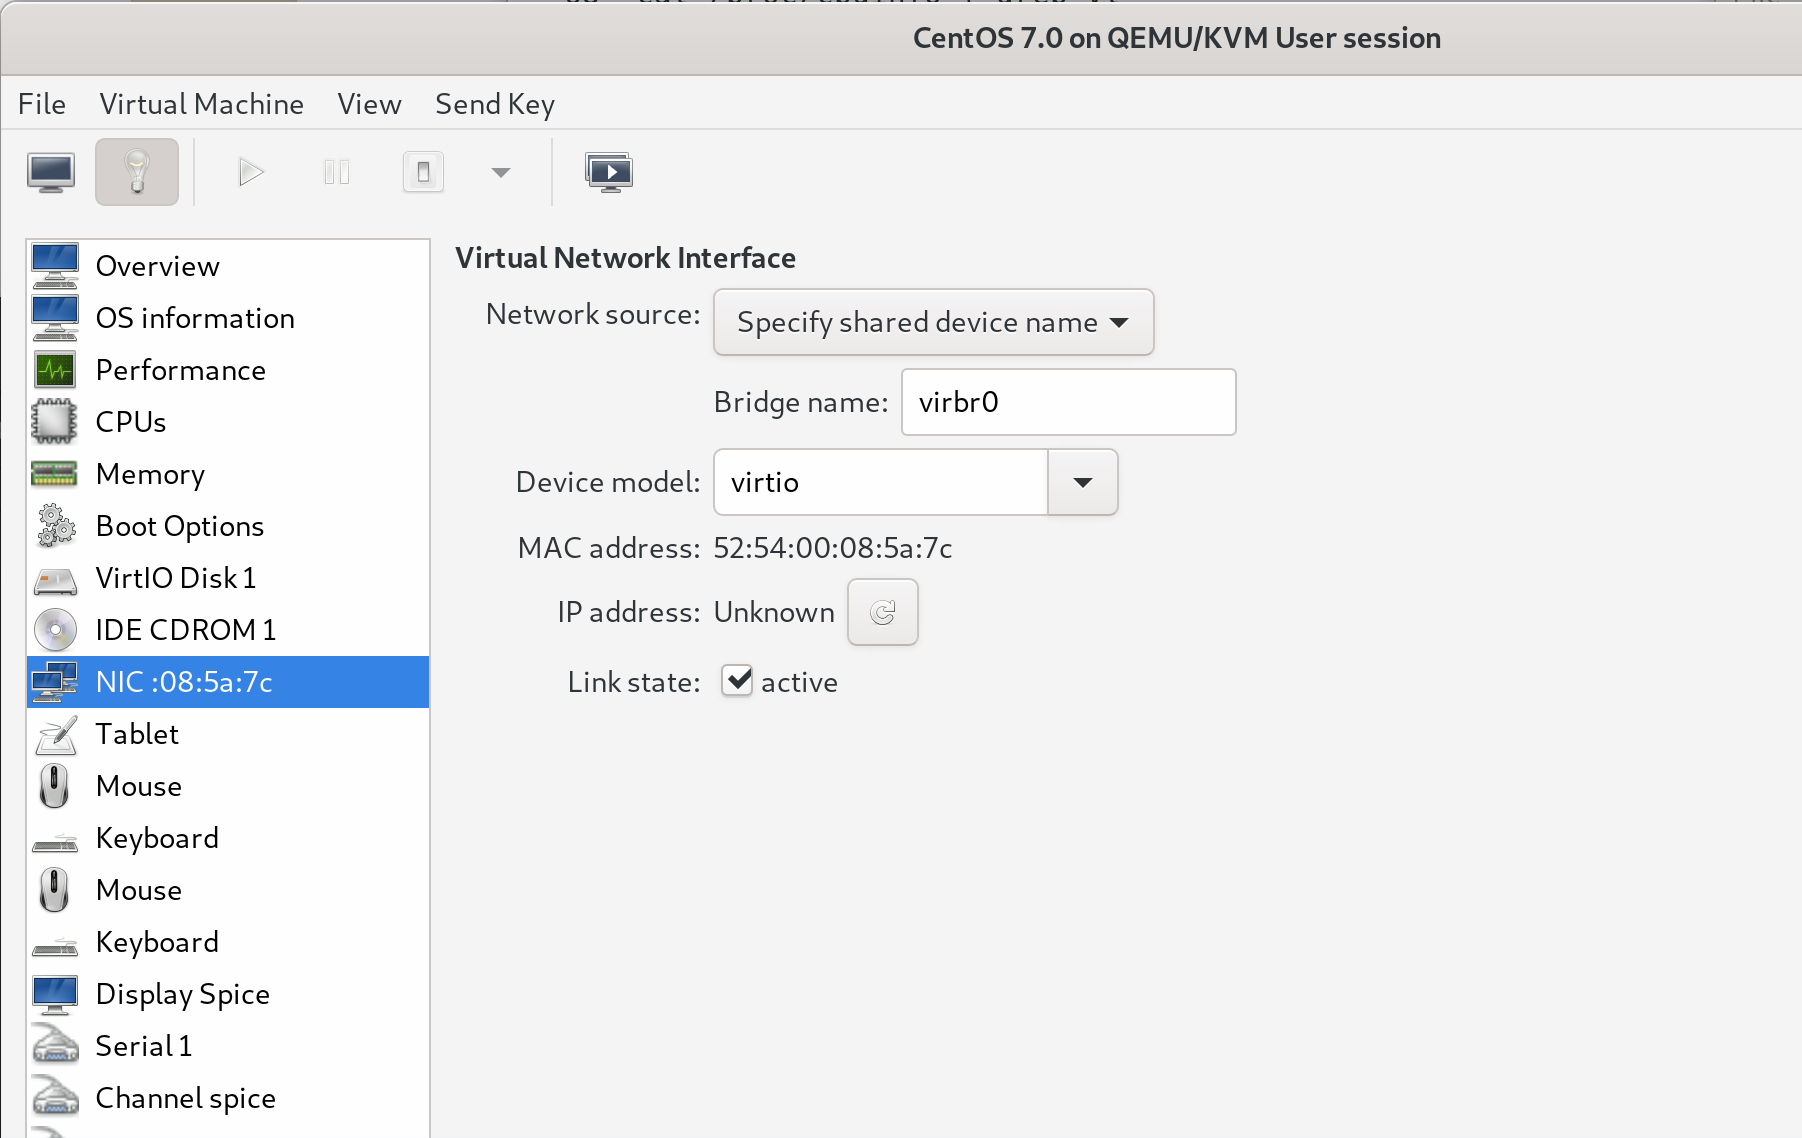
Before booting up the VM, I added the card as a “Host PCI Device”. It was then visible in lspci output within the VM, but was not being used for video output yet.

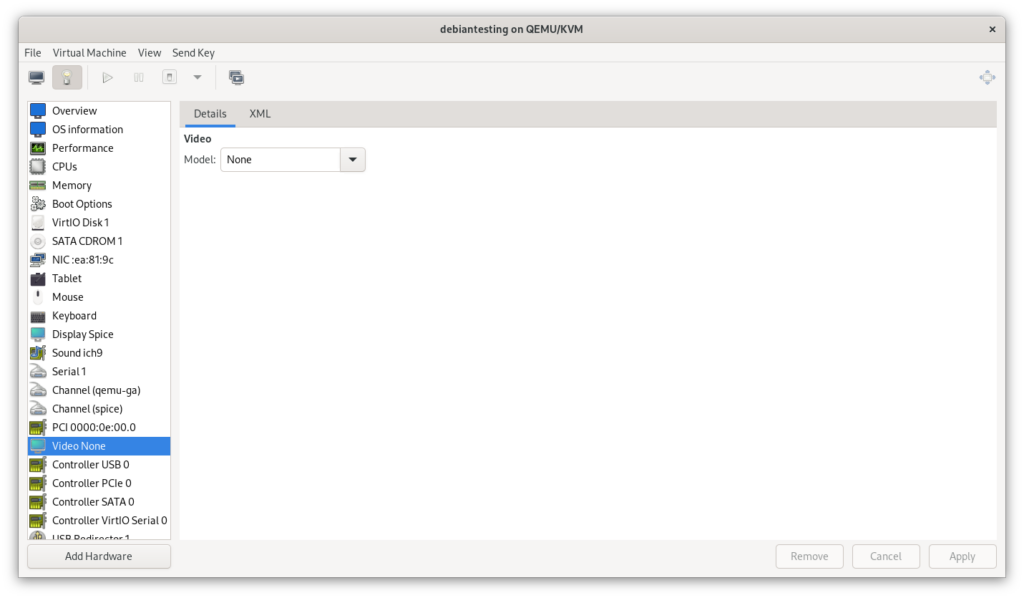
To encourage the VM to output to the physical graphics card, I switched the virtualised video card model from “virtio” to “None”.

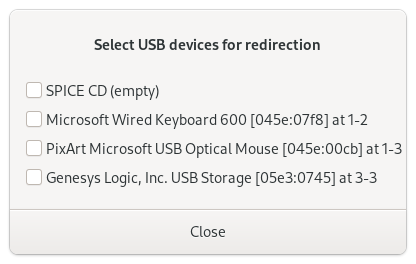
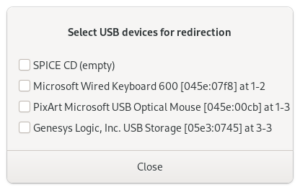
Booting up the VM after this change, the SPICE display no longer produces output, but USB redirection still works. I passed through the keyboard, then the mouse.

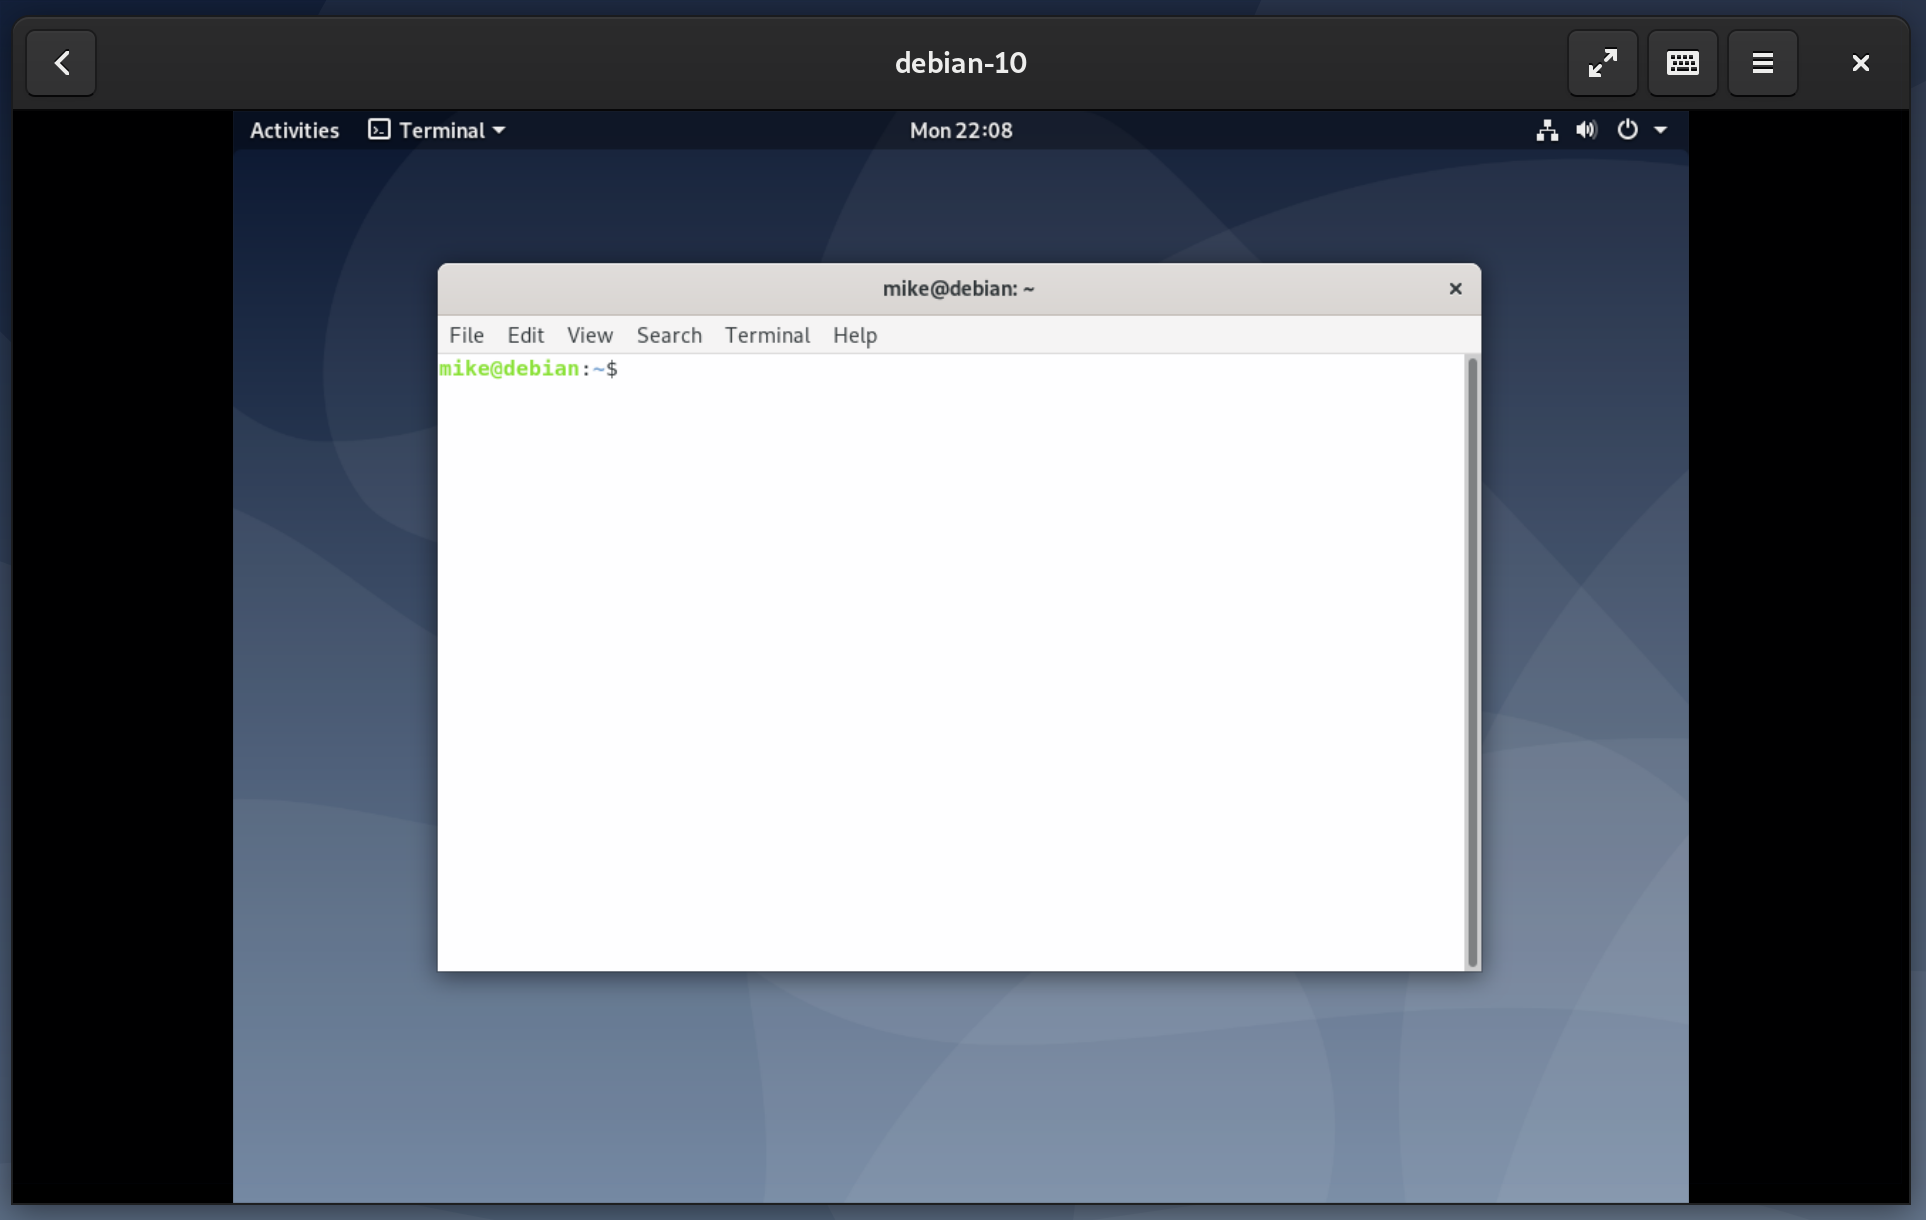
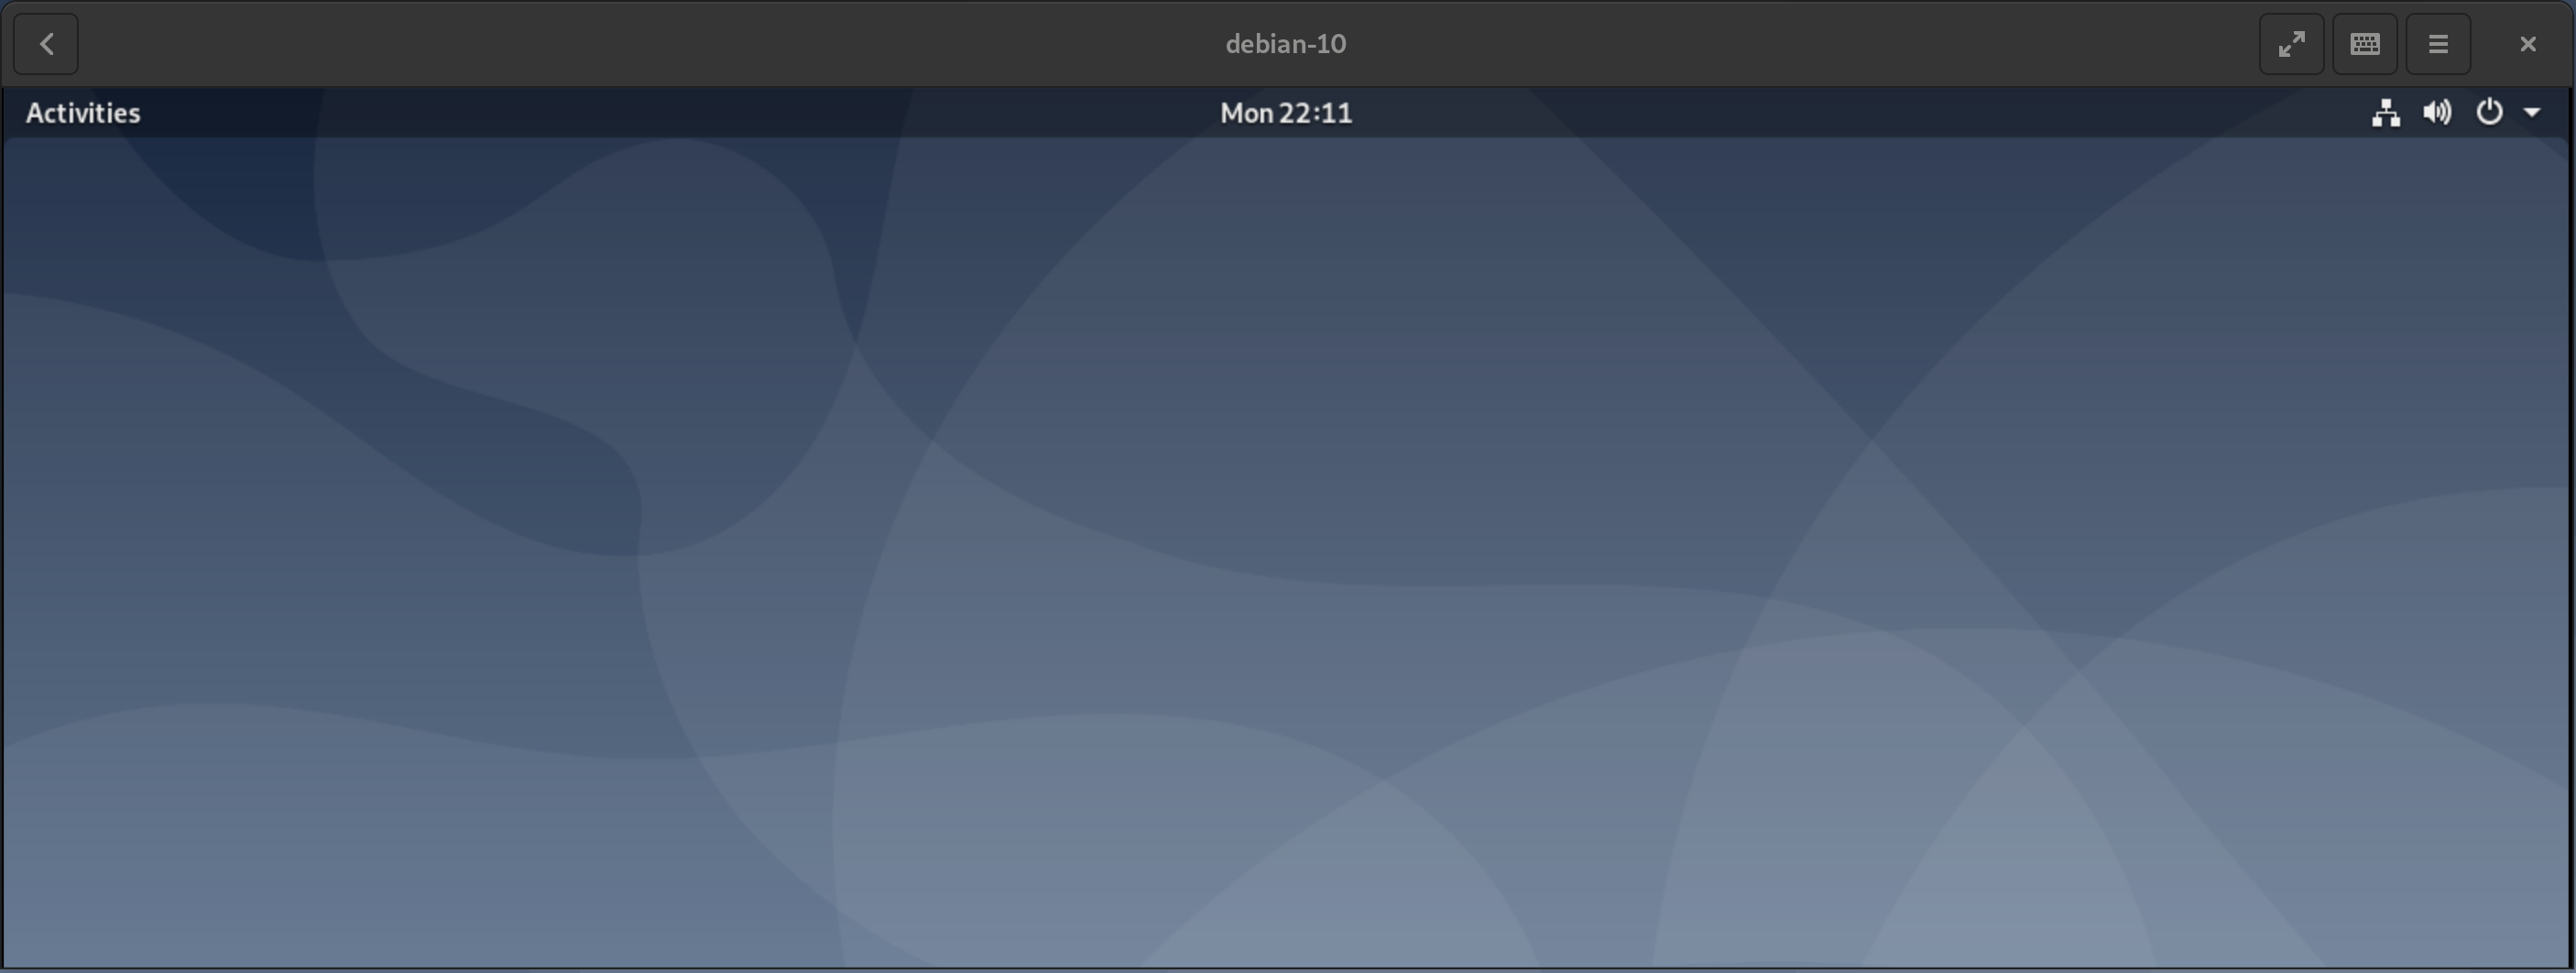
I then switched monitor inputs to the VM, now equipped with a graphics card, and the WebGL aquarium test ran at 30 FPS.

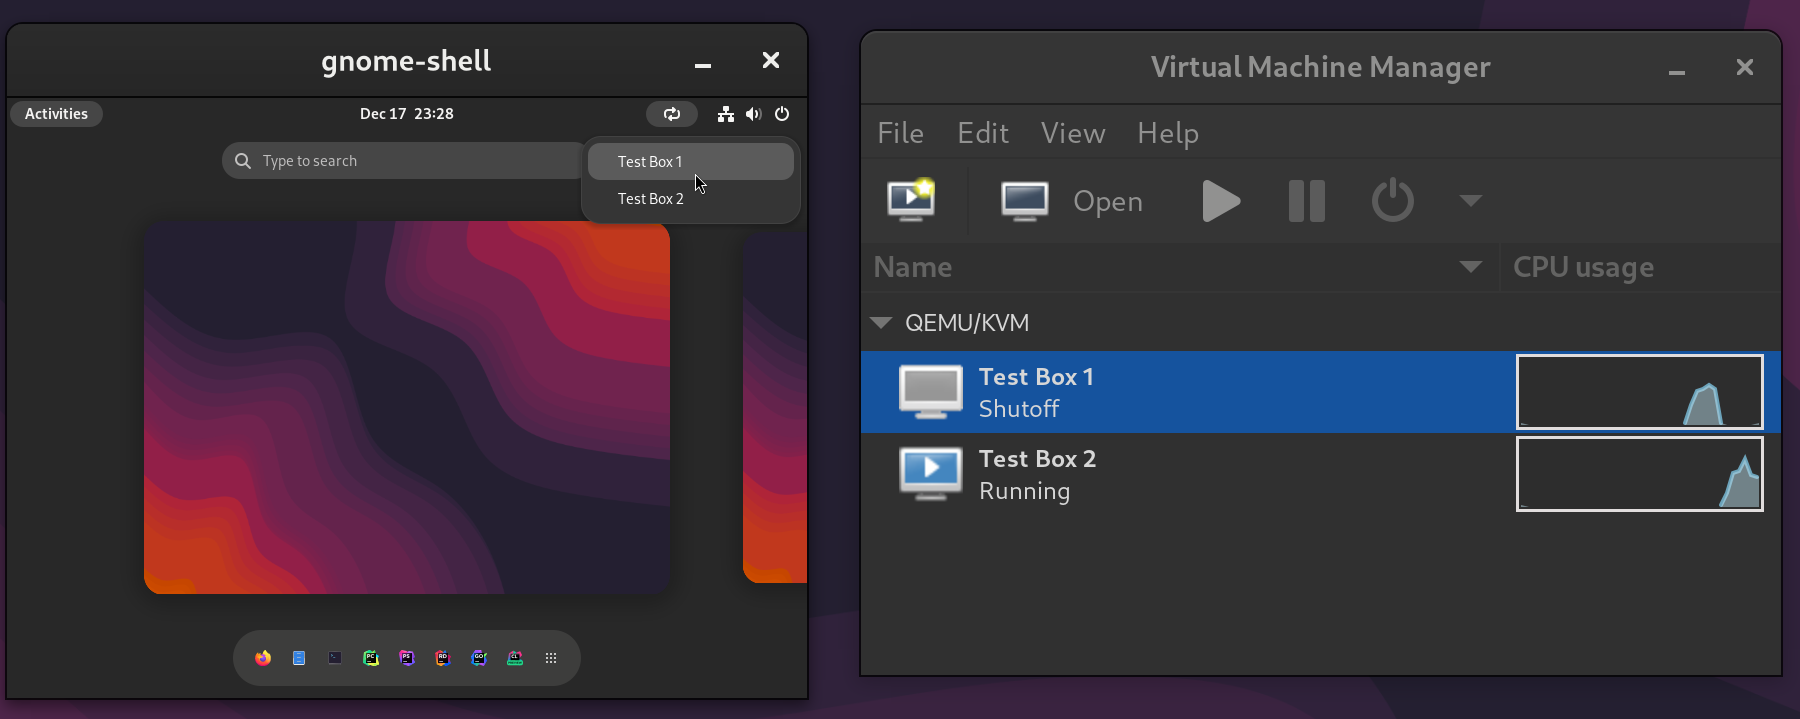
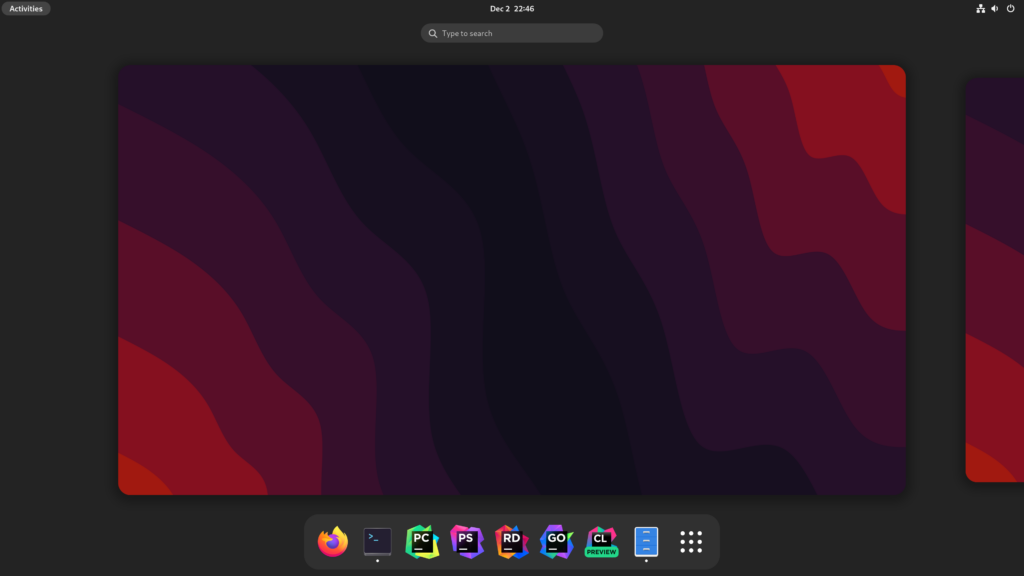
Now that I was switching between near-identical Debian systems, I started using different desktop backgrounds to stay oriented.

Audio output

I needed to make sure that audio output worked reliably in the virtual machine.

Sound was working out of the box through the emulated AC97 device, but I checked an online Audio Video Sync Test, and confirmed that there was a significant delay, somewhere in in the 200-300ms range. This is not good enough, so I deleted the emulated device and decided to try some other options.

I first tried passing through the audio device associated with the graphics card, identified as 1002:ab28.

0e:00.1 Audio device [0403]: Advanced Micro Devices, Inc. [AMD/ATI] Navi 21/23 HDMI/DP Audio Controller [1002:ab28]

I took the ID, and added it to the option in /etc/default/grub. Now that there are multiple devices, they are separated by commas.

GRUB_CMDLINE_LINUX="vfio-pci.ids=1002:73a5,1002:ab28"

As before, I ran update-grub2, rebooted, added the device to the VM through virt-manager, booted up the VM, and tried to use the device.

With that change, I could connect headphones to the monitor and the audio was no longer delayed. This environment would now be viable for developing apps with sound, or following along with a video tutorial for example.

Audio input

Next I attempted to pass through the on-board audio controller to see if I could get both audio input and output. Discussions online suggest that this doesn’t always work, but there is no harm in trying.

I’ll skip through the exact process this time, but I again identified the device, isolated it from the host, and passed it through to a VM.

10:00.4 Audio device [0403]: Advanced Micro Devices, Inc. [AMD] Starship/Matisse HD Audio Controller [1022:1487]

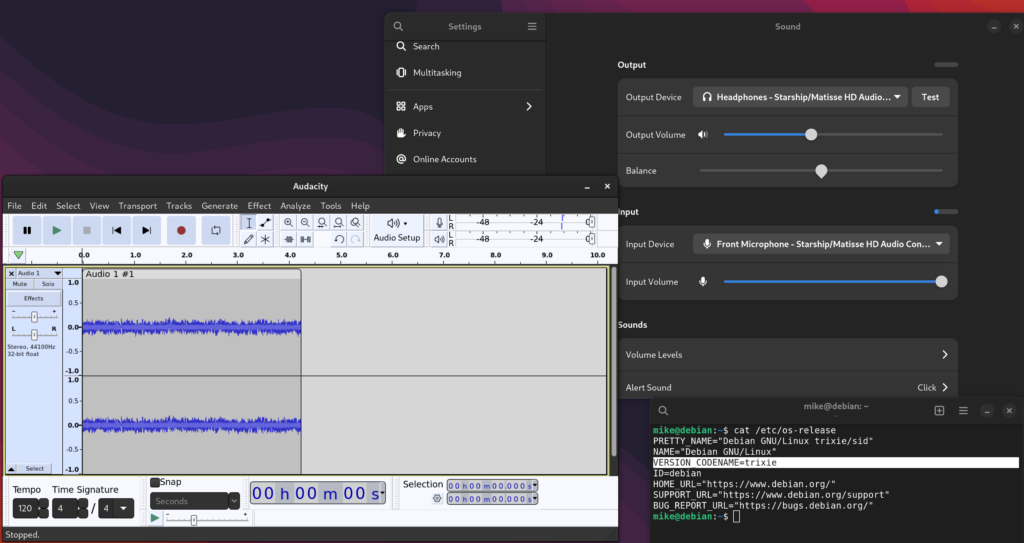
Output worked immediately, but the settings app did not show any microphone level, and attempts to capture would immediately stop. I did some basic reading and troubleshooting, but didn’t have a good idea of what was happening.

What worked for me was blindly upgrading my way out of the problem by switching to the Debian testing rolling release in the guest VM.

I was then able to see the input level in settings, and capture the audio with Audacity.

Audio input is not critical for me, but does allow me to move more types of work into virtual machines without switching to a USB sound card.

USB

My computer has two USB controllers. One is available for passthrough, while the other is in the same IOMMU group as all other chipset-attached devices.

02:00.0 USB controller [0c03]: Advanced Micro Devices, Inc. [AMD] Device [1022:43d0] (rev 01)
10:00.3 USB controller [0c03]: Advanced Micro Devices, Inc. [AMD] Matisse USB 3.0 Host Controller [1022:149c]

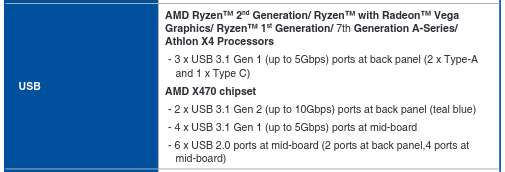
The controller I passed through is the “Matisse USB 3.0 Host Controller”, device ID 1022:149c, which I initially expected would have plenty of USB 3 ports attached to it.

Reading the manual for my motherboard more carefully, I discovered that this controller is only responsible for 2 USB-A ports and 1 USB-C port, or 20% of the USB ports on the system.

I use a lot of USB peripherals for hardware development. More physical USB ports would be ideal, but I can work around this by using a USB hub.

I’ll also continue to use USB passthrough via libvirt to get the keyboard and mouse into the VM. Instead of manually passing these through each time I start the VM, I added each device in the configuration as a “Physical USB Device”.

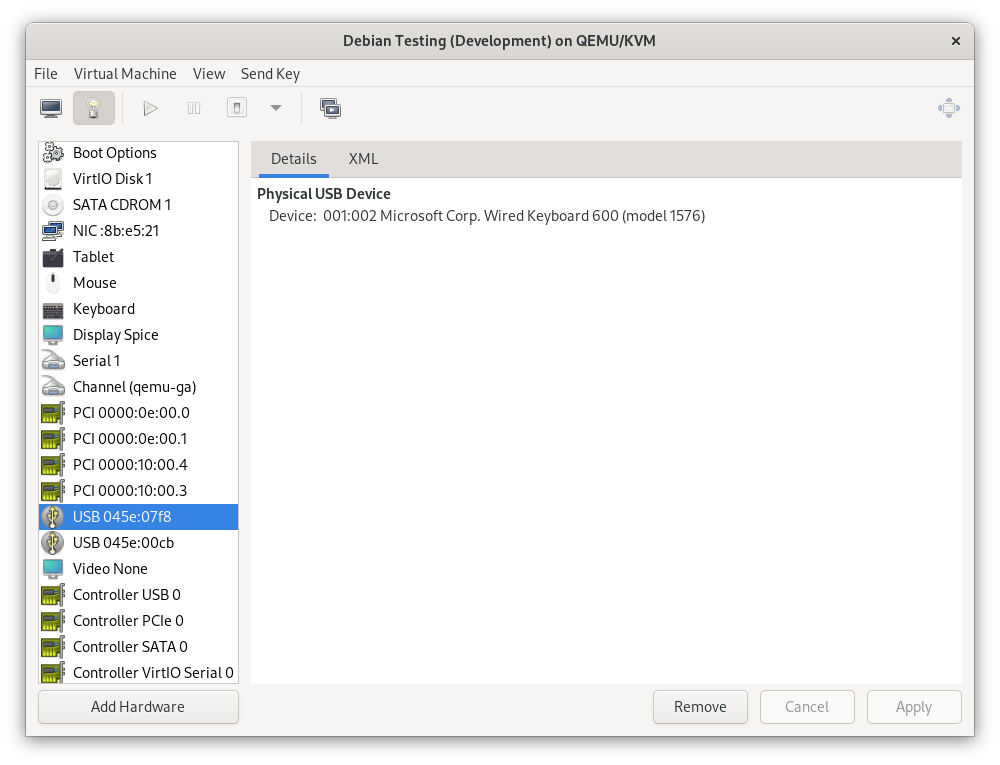
This automatically connects the device when the VM boots, and returns it to the host when the VM shuts down, without the SPICE console needing to be open. If I need to control the host and guest at the same time, I can connect a different mouse and keyboard temporarily – I’ve got plenty of USB ports on the host after all.

If this ever becomes a major issue, it should also be possible to switch this setup around, and pass through the IOMMU group containing all chipset-attached PCIe devices instead of the devices I’ve chosen. This would provide extensive I/O and expansion options to the VM, at the cost of things like on-board networking, SATA ports, and an NVMe slot on the host. The 3 USB ports on the “Matisse USB 3.0 Host Controller”, if left to the host, would be just enough for a mouse, keyboard, and USB-C Ethernet adapter.

File share

On my previous setup, I used a 9p fileshare to map a directory on the host to the same path on every VM, allowing an easy way to exchange files.

The path was /home/mike/workspace – a carry-over from when I used Eclipse. In practice it has been slower to work on a fileshare, so I’ll switch to developing in a local directory.

I’ll still set up a fileshare, but with two changes:

  • I’ll map a share to a more generic /home/mike/Shared, and start to back up anything that lands there.
  • I’ll use virtiofs instead of virtio-9p. This claims to be more performant, and it’s apparently possible to get this working on Windows as well.

This is added as a hardware device in virt-manager on the host.

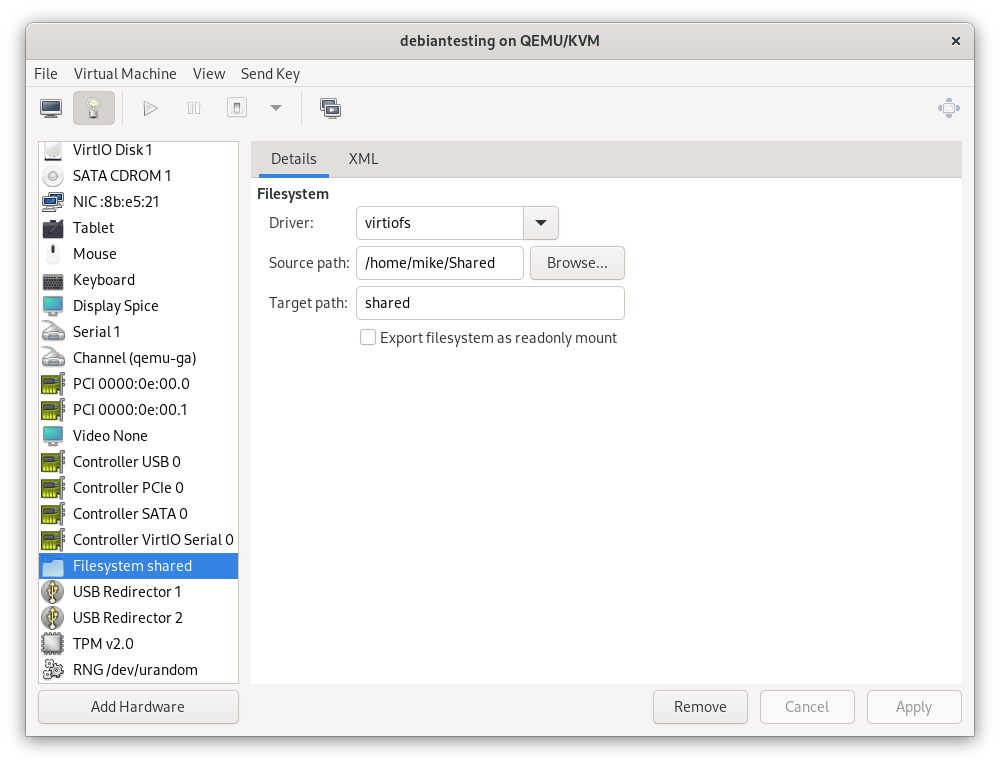
In the guest, I added the following line to /etc/fstab.

shared /home/mike/Shared/ virtiofs

To activate this change, I would previously have created the mount-point and run mount -a. I recently learned that systemd creates mount-points automatically on modern systems, so I instead ran the correct incantation to trigger this process, which is:

$ sudo systemctl daemon-reload
$ sudo systemctl restart local-fs.target

Power management

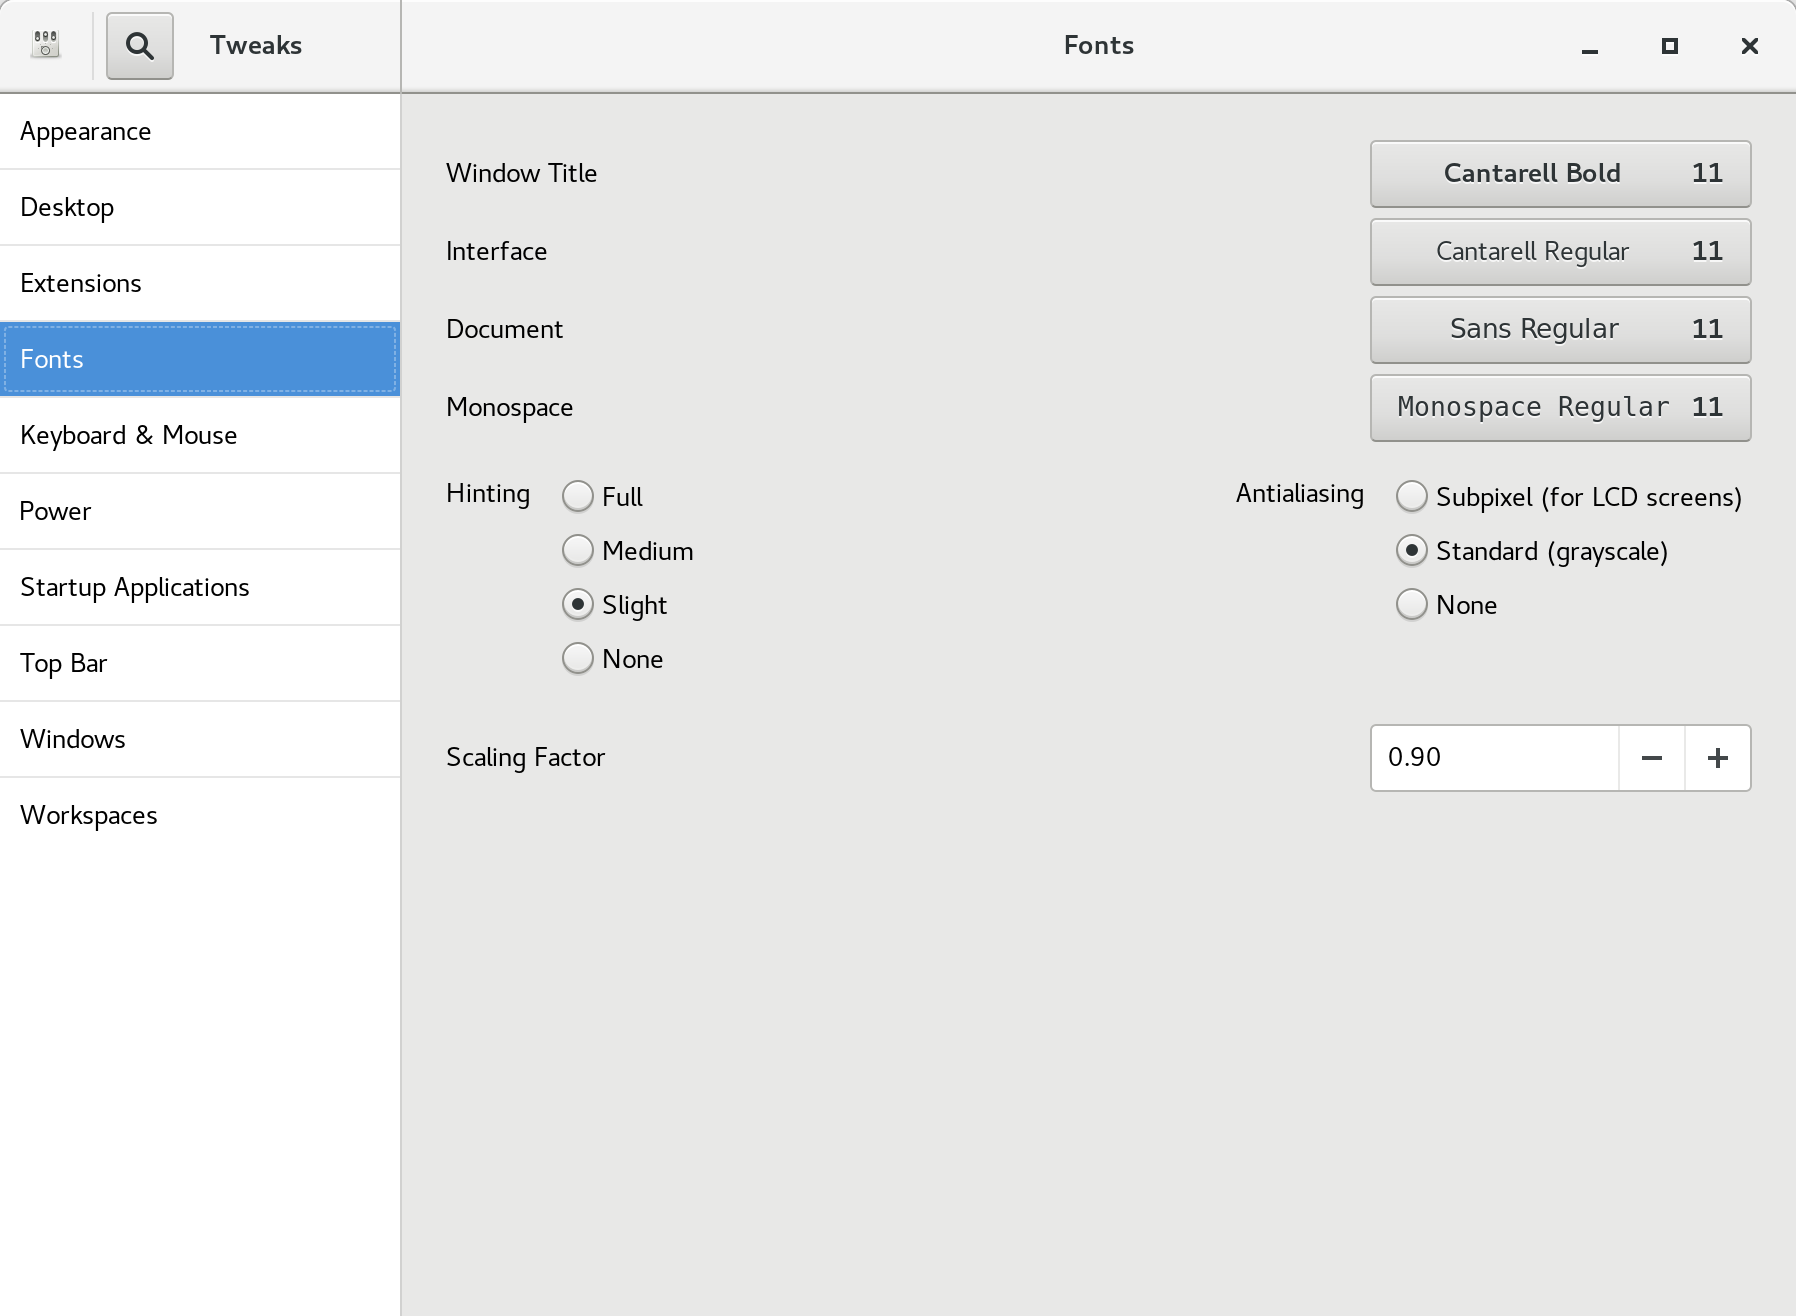
In my current setup, sleep/wake causes instability. I initially disabled idle suspend on the host in GNOME:

While testing a VM which I had configured to start on boot, the system decided to go to sleep while I was using it. In hindsight this makes complete sense: as far as the host could tell, it was sitting on the login page with no mouse or keyboard input, and had been configured to go to sleep after an idle time-out (the setting within GNOME only applies after login).

Dec 05 16:24:43 mike-kvm systemd-logind[706]: The system will suspend now!

To avoid this, I additionally disabled relevant systemd units (source of this command).

$ sudo systemctl mask sleep.target suspend.target hibernate.target hybrid-sleep.target
Created symlink /etc/systemd/system/sleep.target → /dev/null.
Created symlink /etc/systemd/system/suspend.target → /dev/null.
Created symlink /etc/systemd/system/hibernate.target → /dev/null.
Created symlink /etc/systemd/system/hybrid-sleep.target → /dev/null.

I’ve also configured each VM to simply blank the screen when idle, since allowing a guest to suspend causes its own problems.

Recap of unexpected issues

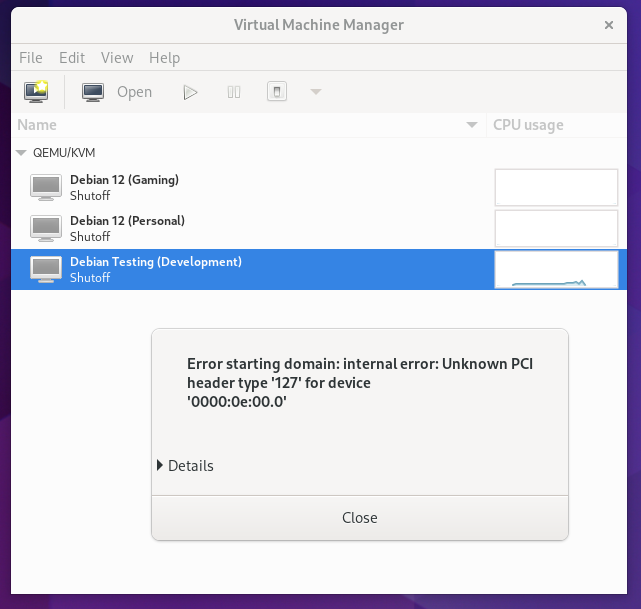
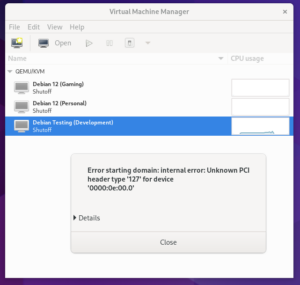
Despite my efforts to plan around the limitations of my hardware, I did hit four unanticipated problems, mostly highlighted above.

  • I assumed that there would be a setting in my BIOS to change which graphics card to use during boot, but I couldn’t find one.
  • The audio devices associated with both of my graphics cards had the same vendor and device ID. The way I have it configured, no audio output is available on the host as a result.
  • Microphone input didn’t work on the HD Audio Controller until I upgraded the guest operating system. The usual workaround for this is apparently to use a USB sound card.
  • I misunderstood the limitations of my USB setup, so I have fewer USB ports directly available in the VM than I had hoped for.

Wrap-up and future ideas

I really like the idea of switching into an environment which only has the tools I need for the task at hand. Compared with my previous setup for developing in a VM, GPU passthrough (and sound controller passthrough, and USB controller passthrough) is a huge improvement.

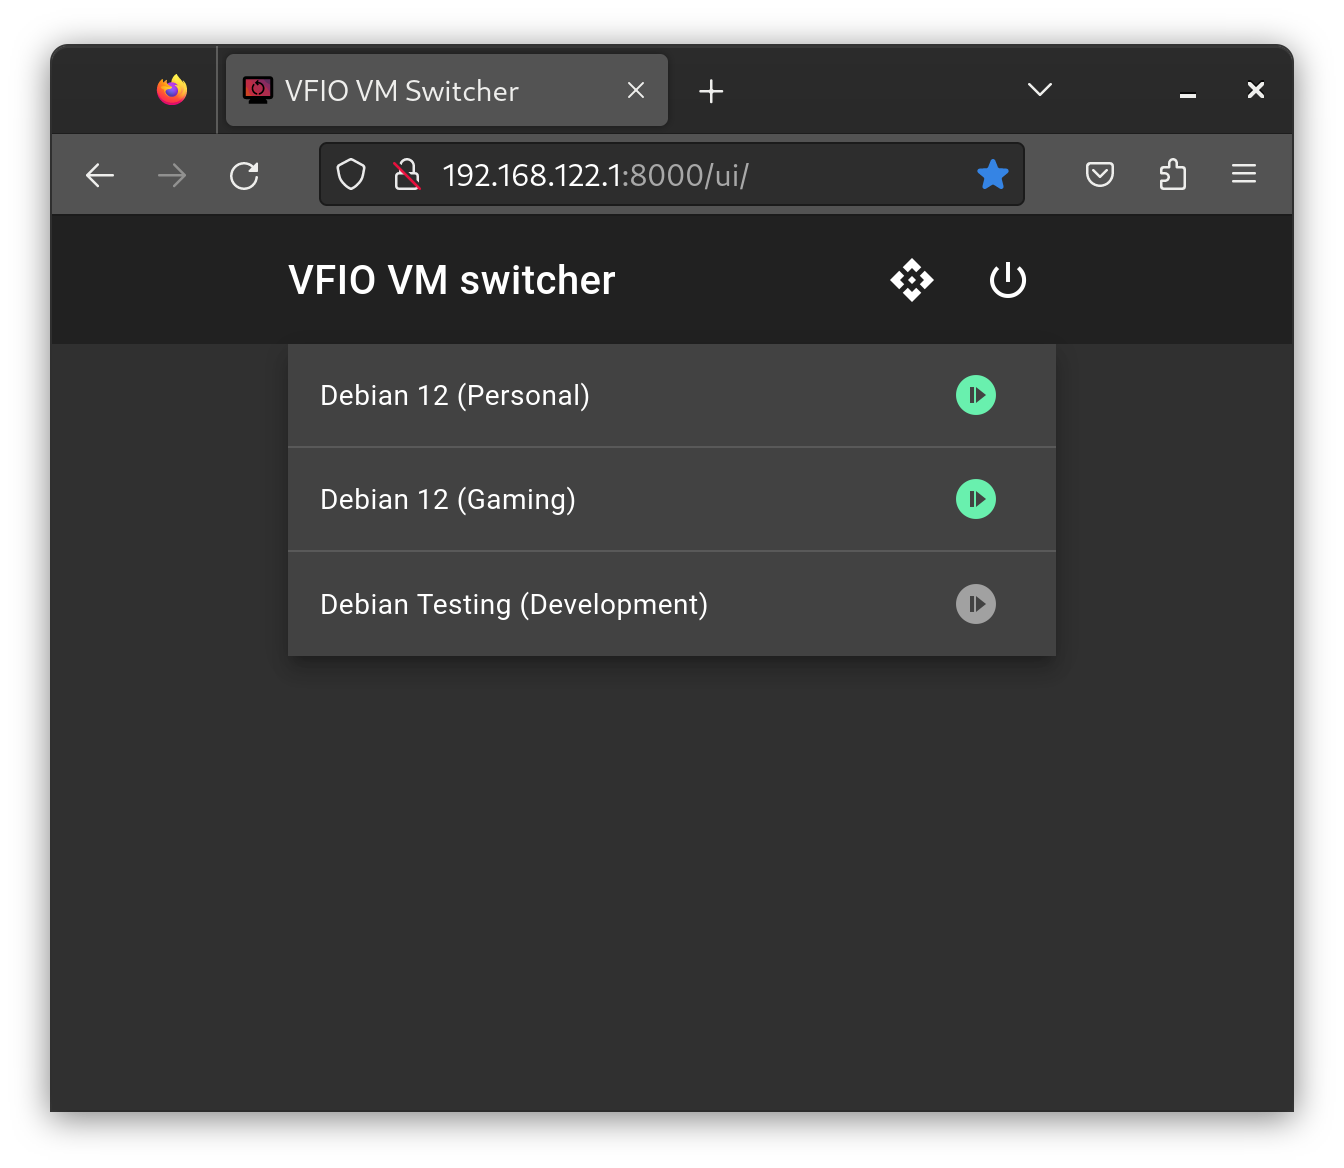
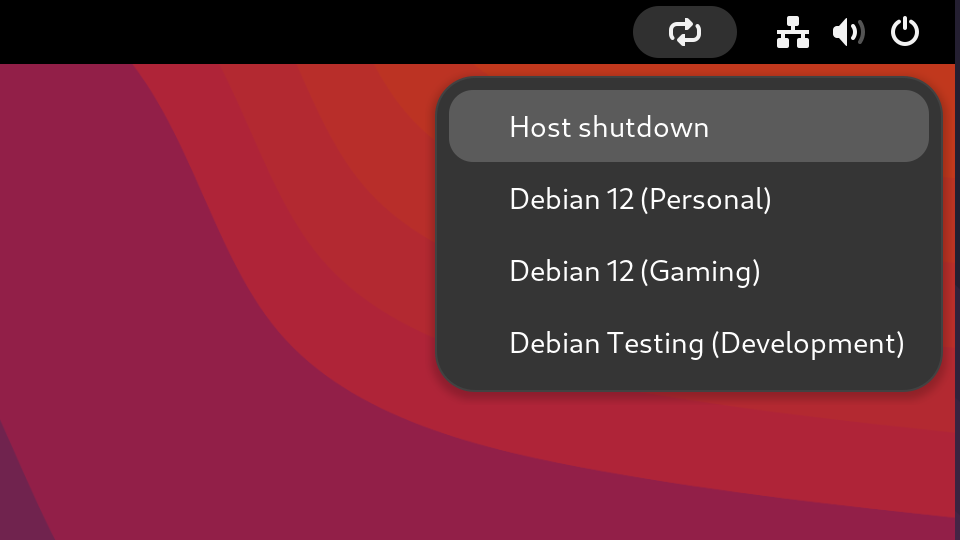
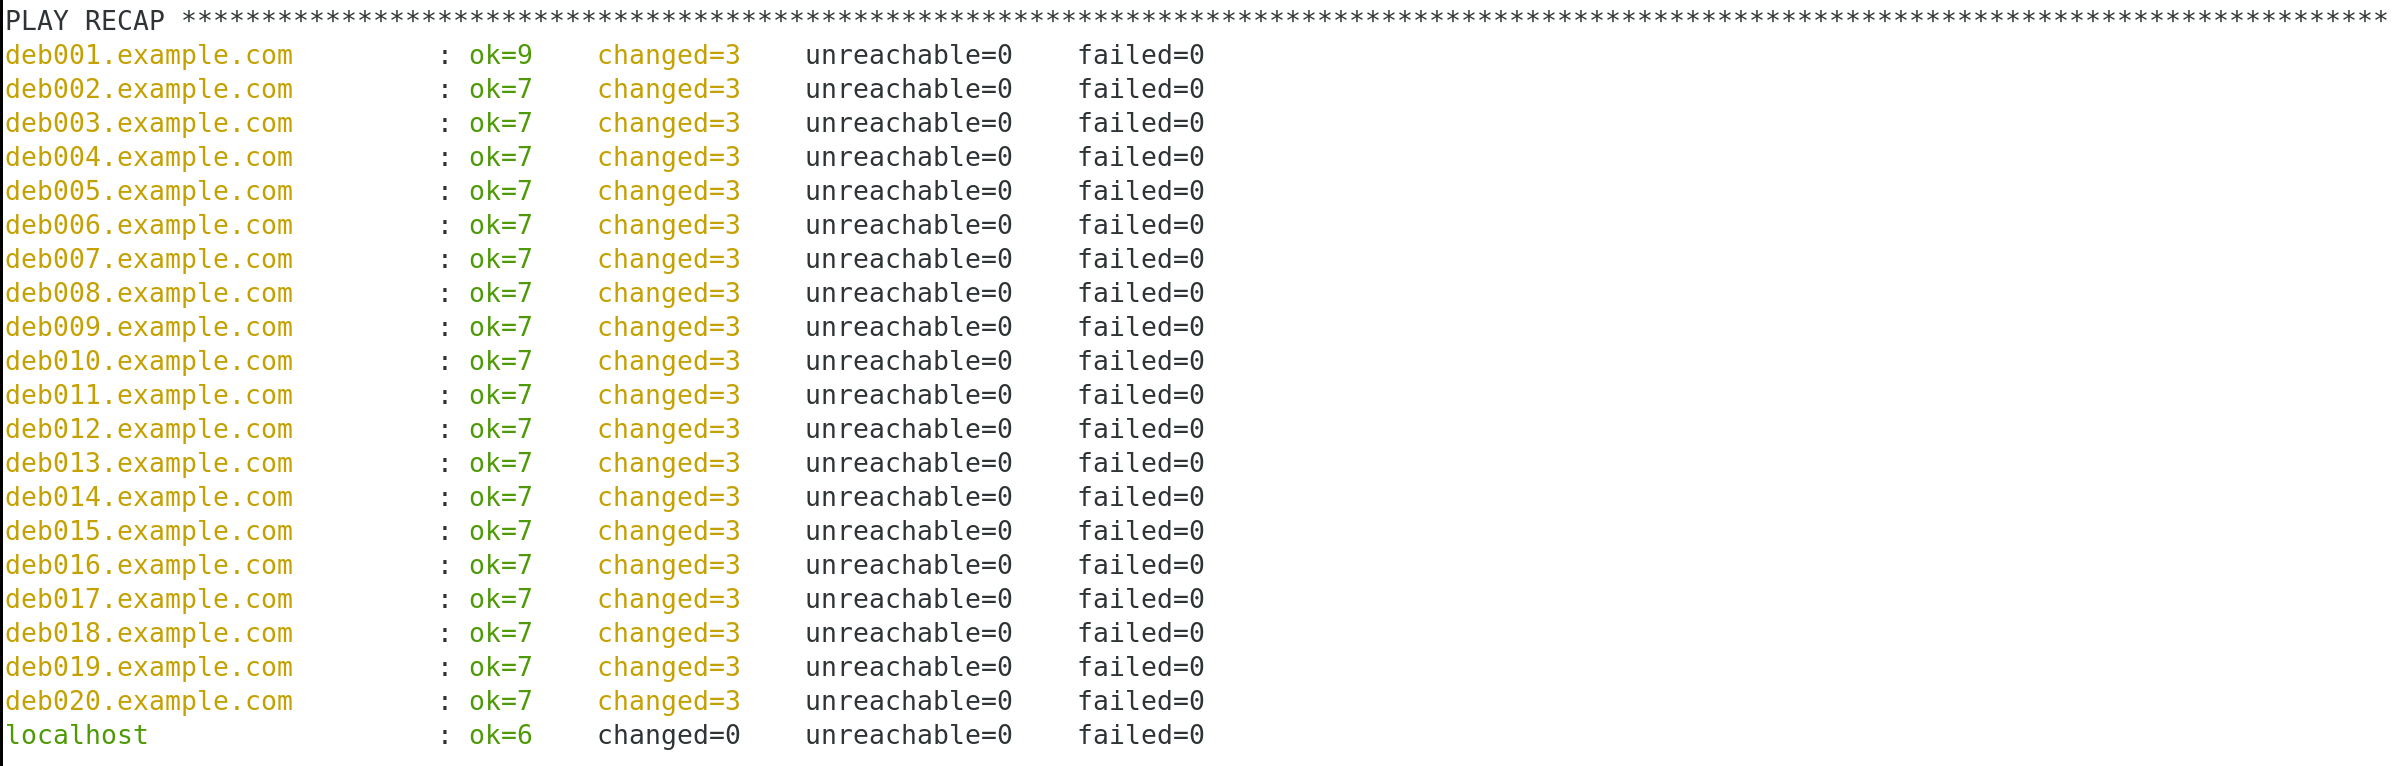
I’ve manually provisioned 3 VM’s, including a general-purpose development VM which has a mix of basic tools so that I can get started.

Since I can only have one VM using the graphics card at a time, this setup works similarly to having multiple operating systems installed as a multi-boot setup. It does however have far better separation between the systems – they can’t read and write each others’ disks for example.

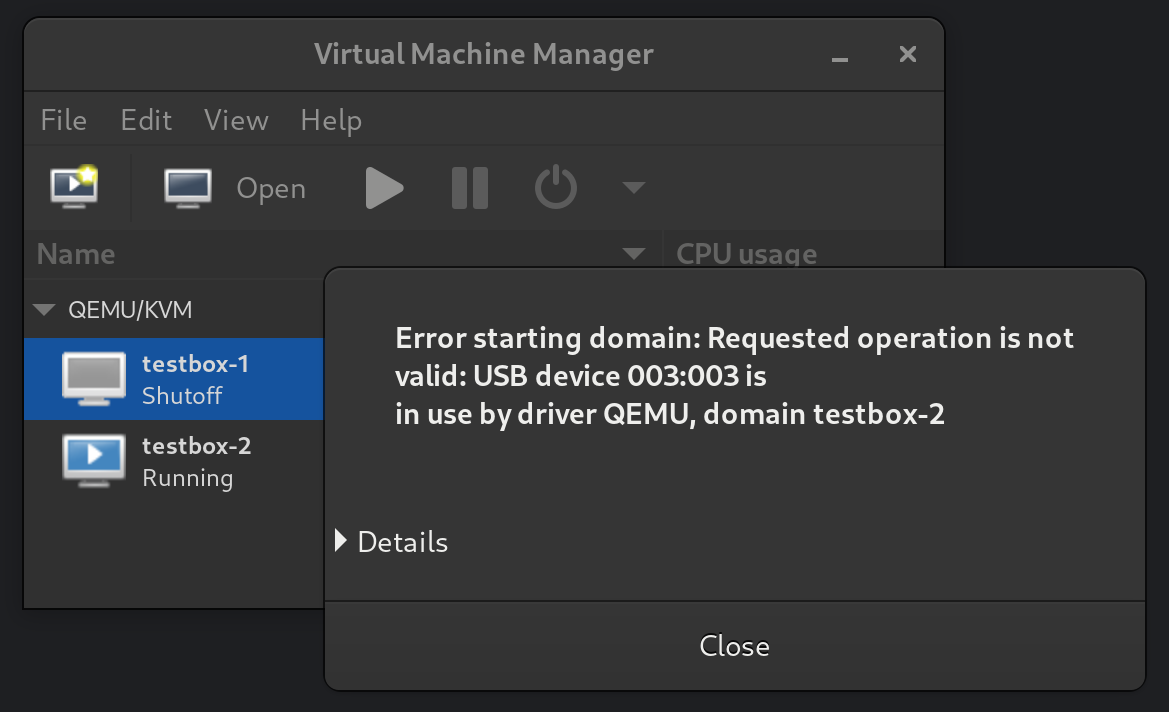
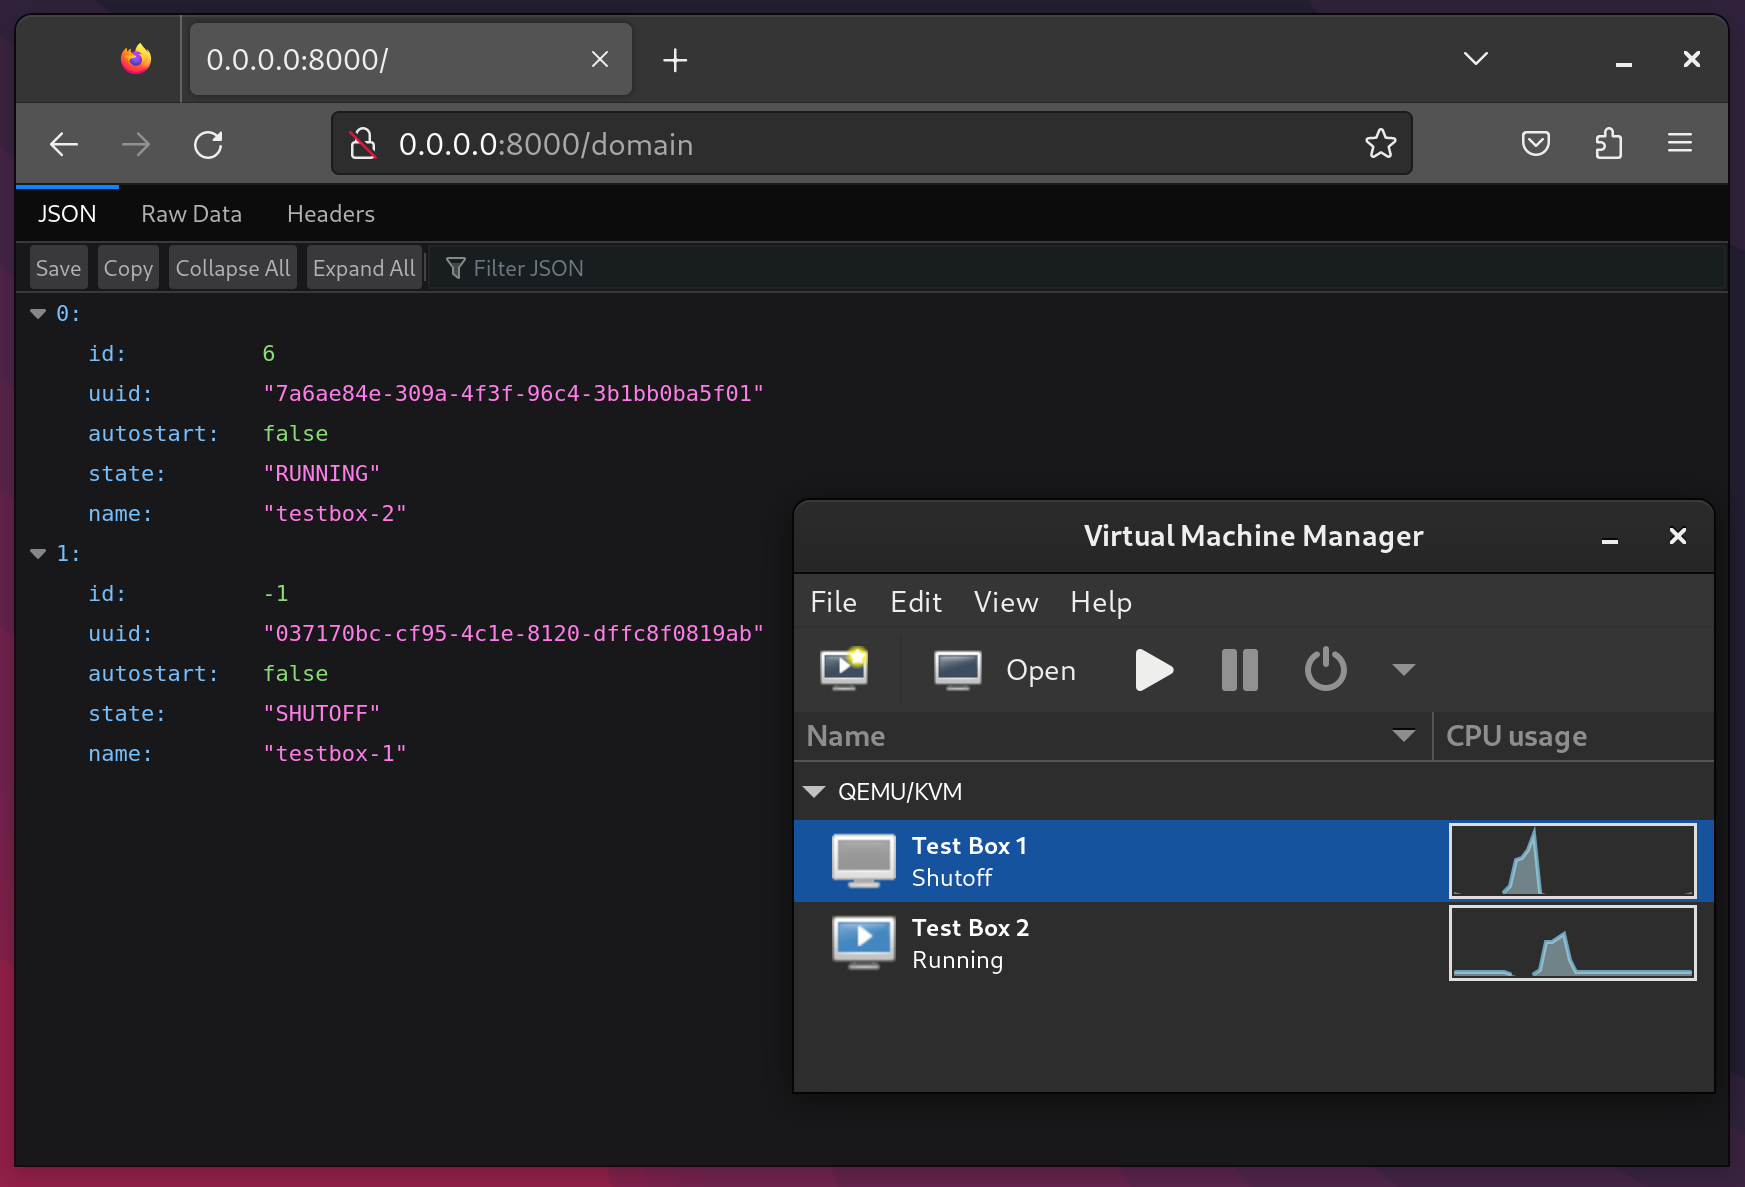
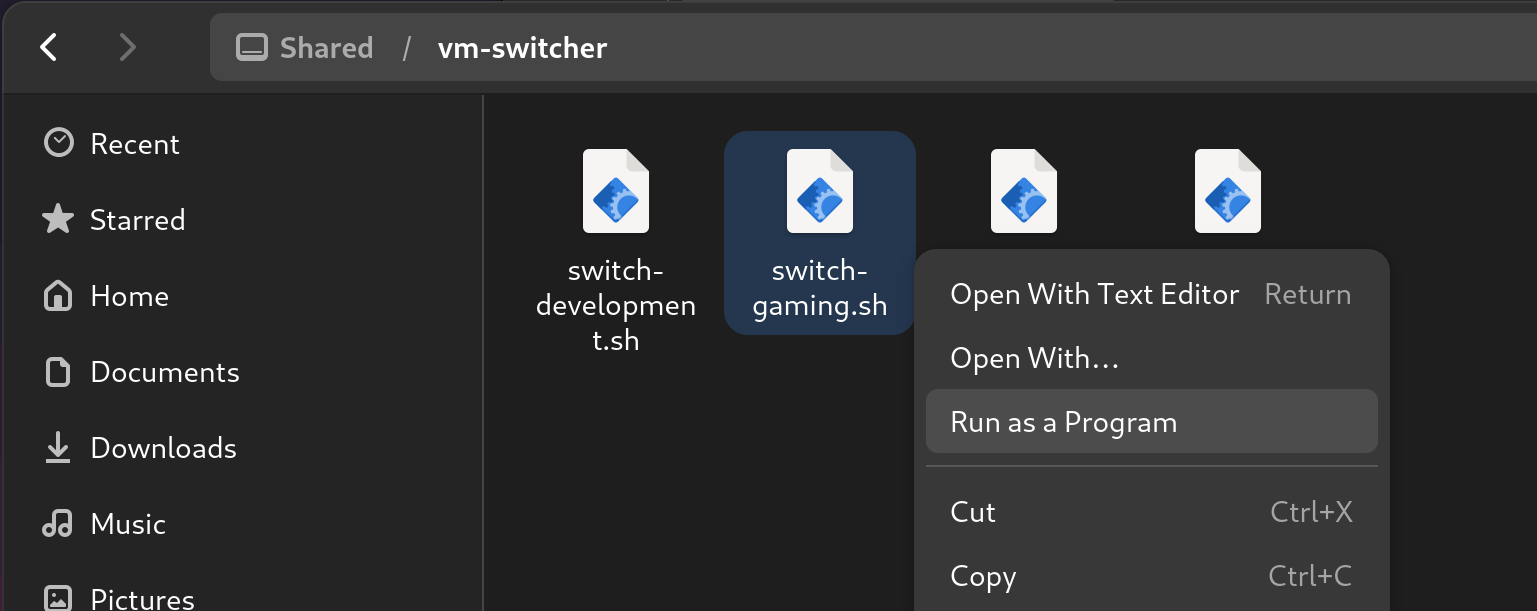
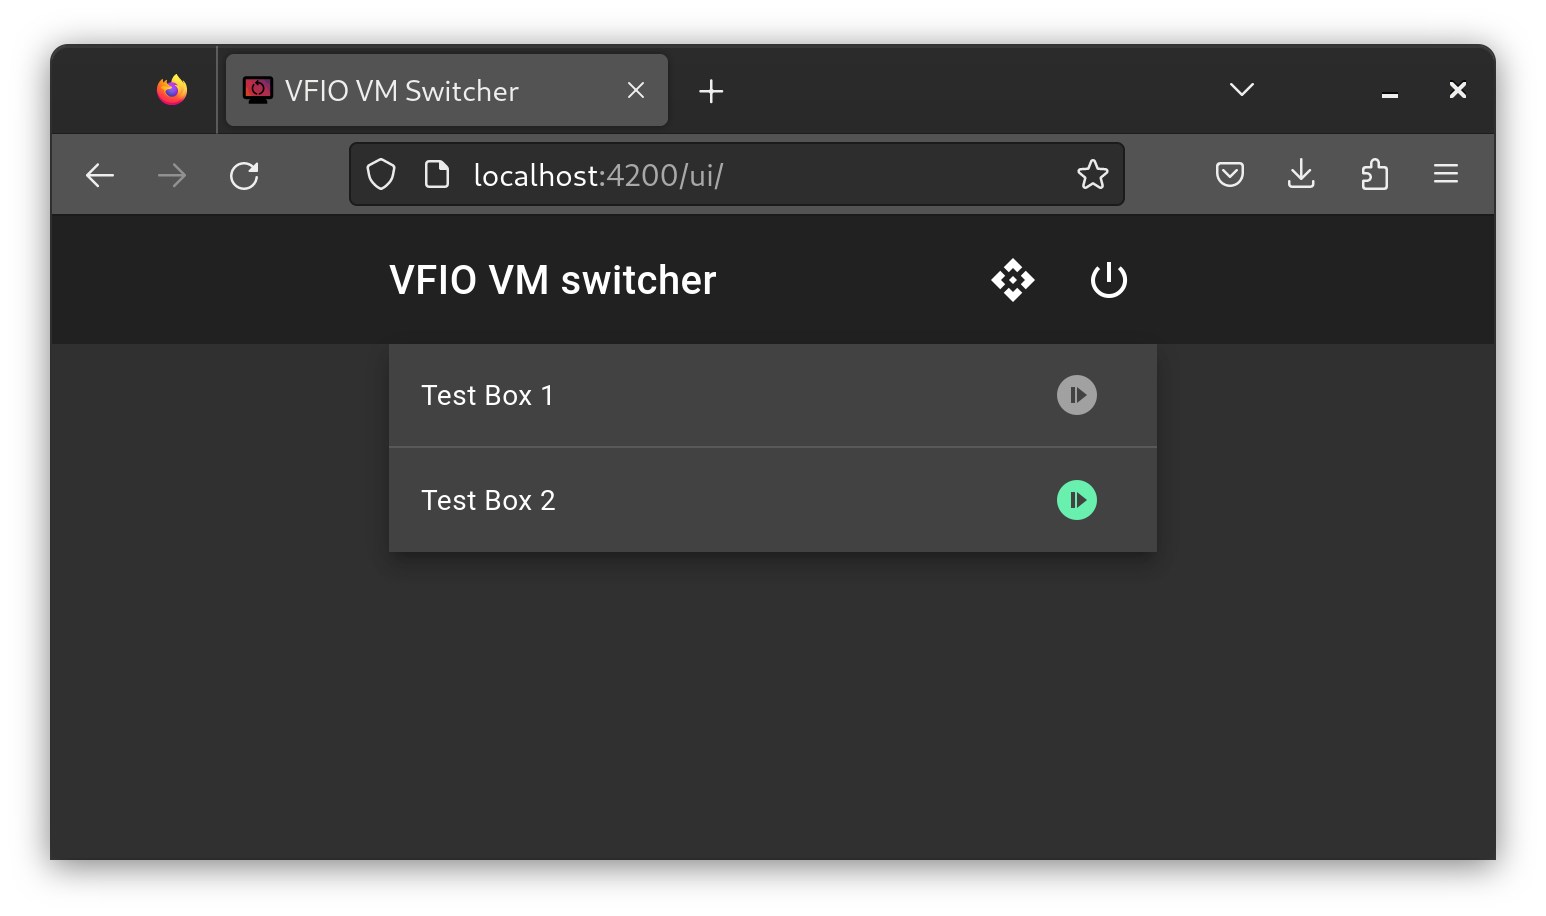
The next steps for me will be to streamline the process of switching VM’s and shutting down the system. Both of these currently require me to manually switch monitor inputs to interact with the host, which I would prefer to avoid.

How to auto-scale the display in GNOME Boxes

I recently installed a virtual machine in GNOME Boxes, and the display was stuck at 1024×768.

The type of display used here is called SPICE, and it includes a channel for auto-scaling. The guest simply needs the agent to be installed.

In this case, I’m running a Debian guest, which means that I must have forgotten to install the spice-vdagent package.

# apt-get install spice-vdagent
Reading package lists... Done
Building dependency tree       
Reading state information... Done
The following NEW packages will be installed:
  spice-vdagent
0 upgraded, 1 newly installed, 0 to remove and 0 not upgraded.
Need to get 47.6 kB of archives.
After this operation, 174 kB of additional disk space will be used.
Get:1 http://deb.debian.org/debian buster/main amd64 spice-vdagent amd64 0.18.0-1 [47.6 kB]
Fetched 47.6 kB in 0s (99.9 kB/s)  
Selecting previously unselected package spice-vdagent.
(Reading database ... 132855 files and directories currently installed.)
Preparing to unpack .../spice-vdagent_0.18.0-1_amd64.deb ...
Unpacking spice-vdagent (0.18.0-1) ...
Setting up spice-vdagent (0.18.0-1) ...
Created symlink /etc/systemd/system/sockets.target.wants/spice-vdagentd.socket → /lib/systemd/system/spice-vdagentd.socket.
[spice-vdagentd.conf:2] Line references path below legacy directory /var/run/, updating /var/run/spice-vdagentd → /run/spice-vdagentd; please update the tmpfiles.d/ drop-in file accordingly.
Processing triggers for man-db (2.8.5-2) ...
Processing triggers for systemd (241-5) ...

The easiest way to ensure that everything is running correctly is to reboot, since the agent will start on boot, and this also forces a new log-in, and a new connection to the display.

# reboot

Result

Assuming that you are otherwise on the default settings, the display in the guest VM will now automatically adjust as you resize the window.

If the “Share Clipboard” setting is enabled for the virtual machine, then spice-vdagent will also enable you to copy & paste text between the host and guest.

How to use the qemu-bridge-helper on Debian 10

If you use the libvirt virtualisation libraries, then you will be familiar with the “user session”. This feature lets you provision virtual machines to run under a regular, unprivileged user account.

The user session is used by GNOME Boxes, and can also be managed from Virtual Machine Manager.

The main downside to this setup is that a regular user can only access a very limited range of networking options. The last time that I mentioned this in a blog post, a reader pointed out that you can actually use qemu-bridge-helper to provide bridged networking to unprivileged virtual machines.

Today I finally tried this out, and it worked really well. With a bit of configuration, you can extend proper networking to this type of VM.

The host

I’m running a graphical Debian 10 desktop, with a few basic virtualisation packages.

  • gnome-boxes for creating VM’s as a local user. This depends on libvirt-daemon, which is enough to host VM’s on the system.
  • virt-manager for a more advanced graphical interface.

The tool that I’m writing about today is qemu-bridge-helper, which is in the qemu-system-common package.

After installation, you will also need to ensure that libvirtd is running.

$ systemctl enable libvirtd.service
$ systemctl start libvirtd.service

Set up a bridge

Libvirt ships with a basic network bridge configuration, you just need to enable it.

Command-line method

Start the default network bridge, and configure it to run on startup.

$ sudo virsh net-autostart --network default
$ sudo virsh net-start --network default

Once this is set up, you should see the bridge virbr0, reporting the IP range 192.168.122.1/24.

$ ip addr show virbr0
3: virbr0: <NO-CARRIER,BROADCAST,MULTICAST,UP> mtu 1500 qdisc noqueue state DOWN group default qlen 1000
    link/ether xx:xx:xx:xx:xx:xx brd ff:ff:ff:ff:ff:ff
    inet 192.168.122.1/24 brd 192.168.122.255 scope global virbr0
       valid_lft forever preferred_lft forever

Graphical method

First, open up Virtual Machine Manager, and authenticate. Right click on QEMU/KVM, and select Details.

Under Virtual NetworksdefaultAutostart, check On Boot, then click Apply.

Setting up qemu-bridge-helper

Create the file /etc/qemu/bridge.conf with the content:

allow virbr0

Restrict the permissions of this file to make sure it can’t be edited by regular users.

# chown root:root /etc/qemu/bridge.conf
# chmod 0640 /etc/qemu/bridge.conf

Add setuid to the qemu-bridge-helper binary.

# chmod u+s /usr/lib/qemu/qemu-bridge-helper

If you do not correctly set this last step, then you will receive the following error when you attempt to connect a VM to the bridge:

Error starting domain: internal error: /usr/lib/qemu/qemu-bridge-helper --use-vnet --br=virbr0 --fd=28: failed to communicate with bridge helper: Transport endpoint is not connected
stderr=failed to create tun device: Operation not permitted

Setting up the VM

Create a virtual machine, either though GNOME Boxes or Virtual Machine Manager. I am using a CentOS VM as an example here, but the guest platform is not particularly important.

Using Virtual Machine Manage, change the network card to the “shared network” virbr0.

The graphical configuration above is equivalent to the following libvirt domain XML, as below.

<interface type='bridge'>
  <mac address='52:54:00:08:5a:7c'/>
  <source bridge='virbr0'/>
  <model type='virtio'/>
  <address type='pci' domain='0x0000' bus='0x00' slot='0x03' function='0x0'/>
</interface>

Result

After restarting the network interface in the guest, I was able to ping the the guest from the host and vice-versa.

This is a significant improvement from “user-mode” networking, which does not facilitate host-to-guest and guest-to-guest communication.

The default virbr0 bridge uses an internal subnet, so the guest here is still inaccessible from the wider LAN. If this doesn’t match your setup, then you can use the same technique to connect unprivileged virtual machines to another bridge of your choice.

Further reading

I had to adapt some paths, user accounts and package names to get this working on Debian. The sources I used are:

How to integrate Gitea and Jenkins

Gitea is a web app for hosting Git repositories. It’s open source, and very simple to get running. With some extra setup, it can also trigger Jenkins builds, and display the Jenkins build status of each commit once it has been built.

Because the documentation for the Jenkins plugin is very minimalist, I decided to write about it for future reference.

About this setup

I installed Jenkins and Gitea on the same Debian 9 server on the LAN. They communicate only over HTTP, so they could just as easily be installed separately.

To make the configuration clear, I’ve used jenkins.example.com in URLs which refer to Jenkins, and gitea.example.com for the Gitea.

Gitea installation

This command will install and start the linux-amd64 version of Gitea as the user “git”.

useradd git -r --create-home && \
  mkdir /opt/gitea && chown -R git: /opt/gitea && \
  wget -O /opt/gitea/gitea https://dl.gitea.io/gitea/1.7.0/gitea-1.7.0-linux-amd64 && \
  chmod +x /opt/gitea/gitea && \
  sudo -u git bash -c "cd /opt/gitea && ./gitea web"

Shut it down, and configure some paths at /opt/gitea/custom/conf/app.ini. These will depend on your environment.

SSH_DOMAIN       = gitea.example.com
DOMAIN           = gitea.example.com
HTTP_PORT        = 3000
ROOT_URL         = http://gitea.example.com:3000/

Start it back up as a systemd service at this point, by creating /etc/systemd/system/gitea.service with this content:

[Unit]
Description=gitea
After=network.target

[Service]
ExecStart=/opt/gitea/gitea web
WorkingDirectory=/opt/gitea
User=git
Type=simple

[Install]
WantedBy=multi-user.target

Once this is saved, start the service.

systemctl daemon-reload
systemctl start gitea

Optionally, also configure it to start on boot.

systemctl enable gitea

Jenkins installation

I installed Jenkins from the official Debian repo at jenkins-ci.org, and clicked through the initial install.

Add plugin

Open up Manage JenkinsManage Plugins. Navigate to Available and check the Gitea plugin.

Next, install the plugin and restart Jenkins.

The configuration for the plugin is located under Manage JenkinsConfigure System.

At this point you will want to tell Jenkins where to find your Gitea server.

I don’t suggest choosing Manage hooks, because it uses the same account to manage hooks across all repos, which would violate the principle of least privilege.

Set up a project in Gitea

In Gitea, create a project, then a repository under that.

Register an account in Gitea for Jenkins to use for this project.

Log out, log back in as yourself, and add Jenkins as a collaborator to the repo, with Write access.

This is the only permission you need for public repositories. If you plan to lock down your Gitea organization later, then you will also need to give this Jenkins account Read access at the organization level.

Set up a project in Jenkins

Add a new Gitea Organization Jenkins job.

Enter the name of the organization, and the account to log in with.

Add the details for the new account, and make sure it’s selected.

The other options don’t need to be changed at this stage.

When you press ‘save’, Jenkins will immediately attempt to find any repositories in the Gitea organization, and kick off any builds. Unless everything is correct, this is unlikely to work the first time, so pay attention to error logs.

These three places will show what’s happening:

  • Scan Gitea Organization Log, which lists repositories in the organization.
  • Scan Multibranch Pipeline Log for each repository, which shows the discovery of branches.
  • Console output for each build, which will show errors if the build status could not be submitted.

Problems which I’ve found here include:

  • The URL of Gitea in the Jenkins configuration must match the URL to Gitea in its own configuration.
  • The Jenkins user account must have permission to list repositories, clone, and update statuses.
  • Empty repositories, and repositories without a ‘Jenkinsfile’ are ignored.

For that last step, here is an empty Jenkinsfile that you can put in your repository to test this integration:

pipeline {
    agent any

    stages {
        stage('Do nothing') {
            steps {
                sh '/bin/true'
            }
        }
    }
}

Once this is sorted out, you can expect to see your repository in Jenkins.

Every branch with a Jenkinsfile will appear.

And each time a commit is mentioned in Gitea, it will display a small icon to indicate the build status.

Set up a web hook in Gitea

At this point, builds need to be manually triggered. To trigger them each time the repository changes, we need to get a notification out to Jenkins.

Under the repository settings, click WebhooksAdd webhookGitea.

The correct values to use are:

  • URL: http://[ your jenkins server ]/gitea-webhook/post
  • POST Content Type: application/json

Once you press Add Webhook, the path will appear with a small grey dot, indicating that it hasn’t been run before.

If you click edit, then the Test Delivery button can be used to check that it’s working.

The icon indicates the status. If things aren’t working correctly, then click the delivery UUID to expand the full request information, which should help with debugging.

Final result

With Jenkins and Gitea, you have a simple self-hosted a continuous integration environment.

In Gitea, you can store, update and review your code. Any build and test steps in a Jenkinsfile will be run automatically each time the repository changes.

The detailed output for each build is visible in Jenkins, where you can track build results with a variety of plugins.

Monitoring network throughput with Prometheus

Today I’m writing a bit about a Prometheus deployment that I made last year on a Raspberry Pi, to get better data about congestion on my uplink to the Internet.

The problem

You have probably run an Internet speed test before, like this:

2017-07-net-05

A speed test will tell you how slow your computer’s connection is, but it can’t narrow down whether it’s because of other LAN users, the line quality, or congestion at the provider.

You can start to assemble this information from the router, which has counters for each network interface:

2017-07-net-02

This table is from a Sagemcom F@ST 3864, which is a consumer-grade router. It has no SNMP interface, so the only way to get these metrics is to query /statsifc.html and /info.html from the LAN.

Getting the data

We can derive throughput metrics for the uplink if we scrape these metrics every few second and load them into a time-series database. To do this, I wrote a small adapter (called an “exporter” in Prometheus lingo), which exposed the metrics in a more structured way.

The result was a web page on the Raspberry Pi, which returned interface data like this:

# HELP lan_network_receive_bytes Received bytes for network interface
# TYPE lan_network_receive_bytes gauge
lan_network_receive_bytes{device="eth0"} 0.0
lan_network_receive_bytes{device="eth1"} 0.0
lan_network_receive_bytes{device="eth2"} 0.0
lan_network_receive_bytes{device="eth3"} 0.0
lan_network_receive_bytes{device="wl0"} 737476060.0
# HELP lan_network_send_bytes Sent bytes for network interface
# TYPE lan_network_send_bytes gauge
lan_network_send_bytes{device="eth0"} 363957004.0
lan_network_send_bytes{device="eth1"} 0.0
lan_network_send_bytes{device="eth2"} 0.0
lan_network_send_bytes{device="eth3"} 0.0
lan_network_send_bytes{device="wl0"} 2147483647.0
# HELP lan_network_receive_packets Received packets for network interface
# TYPE lan_network_receive_packets gauge
lan_network_receive_packets{device="eth0",disposition="transfer"} 1766250.0
lan_network_receive_packets{device="eth0",disposition="error"} 0.0
lan_network_receive_packets{device="eth0",disposition="drop"} 0.0
lan_network_receive_packets{device="eth1",disposition="transfer"} 0.0
lan_network_receive_packets{device="eth1",disposition="error"} 0.0
lan_network_receive_packets{device="eth1",disposition="drop"} 0.0
lan_network_receive_packets{device="eth2",disposition="transfer"} 0.0
lan_network_receive_packets{device="eth2",disposition="error"} 0.0
lan_network_receive_packets{device="eth2",disposition="drop"} 0.0
lan_network_receive_packets{device="eth3",disposition="transfer"} 0.0
lan_network_receive_packets{device="eth3",disposition="error"} 0.0
lan_network_receive_packets{device="eth3",disposition="drop"} 0.0
lan_network_receive_packets{device="wl0",disposition="transfer"} 6622351.0
lan_network_receive_packets{device="wl0",disposition="error"} 0.0
lan_network_receive_packets{device="wl0",disposition="drop"} 0.0
# HELP lan_network_send_packets Sent packets for network interface
# TYPE lan_network_send_packets gauge
lan_network_send_packets{device="eth0",disposition="transfer"} 3148577.0
lan_network_send_packets{device="eth0",disposition="error"} 0.0
lan_network_send_packets{device="eth0",disposition="drop"} 0.0
lan_network_send_packets{device="eth1",disposition="transfer"} 0.0
lan_network_send_packets{device="eth1",disposition="error"} 0.0
lan_network_send_packets{device="eth1",disposition="drop"} 0.0
lan_network_send_packets{device="eth2",disposition="transfer"} 0.0
lan_network_send_packets{device="eth2",disposition="error"} 0.0
lan_network_send_packets{device="eth2",disposition="drop"} 0.0
lan_network_send_packets{device="eth3",disposition="transfer"} 0.0
lan_network_send_packets{device="eth3",disposition="error"} 0.0
lan_network_send_packets{device="eth3",disposition="drop"} 0.0
lan_network_send_packets{device="wl0",disposition="transfer"} 8803737.0
lan_network_send_packets{device="wl0",disposition="error"} 0.0
lan_network_send_packets{device="wl0",disposition="drop"} 0.0
# HELP wan_network_receive_bytes Received bytes for network interface
# TYPE wan_network_receive_bytes gauge
wan_network_receive_bytes{device="ppp2.1"} 3013958333.0
wan_network_receive_bytes{device="ptm0.1"} 0.0
wan_network_receive_bytes{device="eth4.3"} 0.0
wan_network_receive_bytes{device="ppp1.1"} 0.0
wan_network_receive_bytes{device="ppp3.2"} 0.0
# HELP wan_network_send_bytes Sent bytes for network interface
# TYPE wan_network_send_bytes gauge
wan_network_send_bytes{device="ppp2.1"} 717118493.0
wan_network_send_bytes{device="ptm0.1"} 0.0
wan_network_send_bytes{device="eth4.3"} 0.0
wan_network_send_bytes{device="ppp1.1"} 0.0
wan_network_send_bytes{device="ppp3.2"} 0.0
# HELP wan_network_receive_packets Received packets for network interface
# TYPE wan_network_receive_packets gauge
wan_network_receive_packets{device="ppp2.1",disposition="transfer"} 11525693.0
wan_network_receive_packets{device="ppp2.1",disposition="error"} 0.0
wan_network_receive_packets{device="ppp2.1",disposition="drop"} 0.0
wan_network_receive_packets{device="ptm0.1",disposition="transfer"} 0.0
wan_network_receive_packets{device="ptm0.1",disposition="error"} 0.0
wan_network_receive_packets{device="ptm0.1",disposition="drop"} 0.0
wan_network_receive_packets{device="eth4.3",disposition="transfer"} 0.0
wan_network_receive_packets{device="eth4.3",disposition="error"} 0.0
wan_network_receive_packets{device="eth4.3",disposition="drop"} 0.0
wan_network_receive_packets{device="ppp1.1",disposition="transfer"} 0.0
wan_network_receive_packets{device="ppp1.1",disposition="error"} 0.0
wan_network_receive_packets{device="ppp1.1",disposition="drop"} 0.0
wan_network_receive_packets{device="ppp3.2",disposition="transfer"} 0.0
wan_network_receive_packets{device="ppp3.2",disposition="error"} 0.0
wan_network_receive_packets{device="ppp3.2",disposition="drop"} 0.0
# HELP wan_network_send_packets Sent packets for network interface
# TYPE wan_network_send_packets gauge
wan_network_send_packets{device="ppp2.1",disposition="transfer"} 7728904.0
wan_network_send_packets{device="ppp2.1",disposition="error"} 0.0
wan_network_send_packets{device="ppp2.1",disposition="drop"} 0.0
wan_network_send_packets{device="ptm0.1",disposition="transfer"} 0.0
wan_network_send_packets{device="ptm0.1",disposition="error"} 0.0
wan_network_send_packets{device="ptm0.1",disposition="drop"} 0.0
wan_network_send_packets{device="eth4.3",disposition="transfer"} 0.0
wan_network_send_packets{device="eth4.3",disposition="error"} 0.0
wan_network_send_packets{device="eth4.3",disposition="drop"} 0.0
wan_network_send_packets{device="ppp1.1",disposition="transfer"} 0.0
wan_network_send_packets{device="ppp1.1",disposition="error"} 0.0
wan_network_send_packets{device="ppp1.1",disposition="drop"} 0.0
wan_network_send_packets{device="ppp3.2",disposition="transfer"} 0.0
wan_network_send_packets{device="ppp3.2",disposition="error"} 0.0
wan_network_send_packets{device="ppp3.2",disposition="drop"} 0.0
# HELP adsl_attainable_rate_down_kbps ADSL Attainable Rate down (Kbps)
# TYPE adsl_attainable_rate_down_kbps gauge
adsl_attainable_rate_down_kbps 19708.0
# HELP adsl_attainable_rate_up_kbps ADSL Attainable Rate up (Kbps)
# TYPE adsl_attainable_rate_up_kbps gauge
adsl_attainable_rate_up_kbps 1087.0
# HELP adsl_rate_down_kbps ADSL Rate down (Kbps)
# TYPE adsl_rate_down_kbps gauge
adsl_rate_down_kbps 18175.0
# HELP adsl_rate_up_kbps ADSL Rate up (Kbps)
# TYPE adsl_rate_up_kbps gauge
adsl_rate_up_kbps 1087.0
# HELP process_virtual_memory_bytes Virtual memory size in bytes.
# TYPE process_virtual_memory_bytes gauge
process_virtual_memory_bytes 34197504.0
# HELP process_resident_memory_bytes Resident memory size in bytes.
# TYPE process_resident_memory_bytes gauge
process_resident_memory_bytes 22441984.0
# HELP process_start_time_seconds Start time of the process since unix epoch in seconds.
# TYPE process_start_time_seconds gauge
process_start_time_seconds 1497148890.92
# HELP process_cpu_seconds_total Total user and system CPU time spent in seconds.
# TYPE process_cpu_seconds_total counter
process_cpu_seconds_total 3254.92
# HELP process_open_fds Number of open file descriptors.
# TYPE process_open_fds gauge
process_open_fds 7.0
# HELP process_max_fds Maximum number of open file descriptors.
# TYPE process_max_fds gauge
process_max_fds 1024.0

I then deployed Prometheus to the same Raspberry Pi, and configured it to read these metrics every few seconds by editing prometheus.yml

global:
  scrape_interval: 5s

scrape_configs:
  - job_name: net
    static_configs:
    - targets: ["localhost:8000"]

Making some queries

Prometheus has a query language, which I find similar to spreadsheet formulas. You can enter a query directly into the web interface to get a graph or data table.

2017-07-net-03

I settled on these queries to get the data I needed. They show me the maximum attainable line rate, actual sync rate, and current throughput over the WAN interface.

Downloads

Throughput:

rate(wan_network_receive_bytes{device="ppp2.1"}[10s])*8/1024/1024

ADSL attainable:

adsl_attainable_rate_down_kbps/1024

ADSL sync:

adsl_rate_down_kbps/1024

Uploads

Usage:

rate(wan_network_send_bytes{device="ppp2.1"}[10s])*8/1024/1024

ADSL attainable:

adsl_attainable_rate_up_kbps/1024

ADSL sync:

adsl_rate_up_kbps/1024

Onto a dashboard

I then deployed the last component in this setup, Grafana, to the Raspberry Pi. This tool lets you save your queries on a dashboard.

I made two plots, one for uploads, and one for downloads-

2017-07-net-04

By saturating the link with traffic (such as when running a speed test), it was now possible to compare the actual network speed with the ADSL sync speed.

2017-07-net-06

In my case, the best attainable network speed changed depending on the time of day, while the ADSL sync speed was constant. That’s a simple case of congestion.

Conclusion

I’ve deployed a few tiny Prometheus setups like this, because of how simple it is to work with new sources of metrics. It’s designed for much larger setups than an individual router, so it’s a worthwhile tool to be familiar with. Data is always a good reality-check for your assumptions, of course.

This setup had the level of security that you would expect of a Raspberry Pi project (none), and crashed after 4 days because I did not configure it for a RAM-limited environment, but it was a useful learning exercise, so I uploaded it to GitHub anyway. The python and Ansible code can be found here.

How to communicate with USB and networked devices from in-browser Javascript

I recently combined a few tools on Linux to create a local Websocket listener, which could forward raw data to a USB printer, so that it could be accessed using Javascript in a web browser.

Why would you want this? I have point of sale applications (POS) in mind, which need to send raw data to a printer. For these applications, the browser and operating system print systems are not appropriate, since they prompt, spool, and badly render pages by converting them to low-fidelity raster images.

Web interfaces are becoming common for point-of-sale applications. The web page could be served from somewhere outside your local network, which is why we need to get the client-side Javascript involved.

The tools

To run on the client computer:

And to generate the print data on the webserver:

We will use these tools to provide some plumbing, so that we can retrieve the print data, and send it off to the printer from client-side Javascript.

Client computer

The client computer was a Linux desktop system. Both of the tools we need are available in the Debian repositories:

sudo apt-get install websockify socat

Listen for websocket connections on port 5555 and pass them to localhost:7000:

websockify 5555 localhost:7000

Listen for TCP connections on localhost port 7000 and pass them to the USB device (more advanced version of this previous post):

socat -u TCP-LISTEN:7000,fork,reuseaddr,bind=127.0.0.1 OPEN:/dev/usb/lp0

Web page

I made a self-contained web-page to provide a button which requested a print file from the network and passed it to the local websocket.

This is slightly modified from a similar example that I used for a previous project.

<html>
<head>
    <meta charset="UTF-8">
    <title>Web-based raw printing example</title>
</head>
<body>
<h1>Web-based raw printing example</h1>

<p>This snippet forwards raw data to a local websocket.</p>

<form>
  <input type="button" onclick="directPrintBytes(printSocket, [0x1b, 0x40, 0x48, 0x65, 0x6c, 0x6c, 0x6f, 0x20, 0x77, 0x6f, 0x72, 0x6c, 0x64, 0x0a, 0x1d, 0x56, 0x41, 0x03]);" value="Print test string"/>
  <input type="button" onclick="directPrintFile(printSocket, 'receipt-with-logo.bin');" value="Load and print 'receipt-with-logo'" />
</form>

<script type="text/javascript">
/**
 * Retrieve binary data via XMLHttpRequest and print it.
 */
function directPrintFile(socket, path) {
  // Get binary data
  var req = new XMLHttpRequest();
  req.open("GET", path, true);
  req.responseType = "arraybuffer";
  console.log("directPrintFile(): Making request for binary file");
  req.onload = function (oEvent) {
    console.log("directPrintFile(): Response received");
    var arrayBuffer = req.response; // Note: not req.responseText
    if (arrayBuffer) {
      var result = directPrint(socket, arrayBuffer);
      if(!result) {
        alert('Failed, check the console for more info.');
      }
    }
  };
  req.send(null);
}

/**
 * Extract binary data from a byte array print it.
 */
function directPrintBytes(socket, bytes) {
  var result = directPrint(socket, new Uint8Array(bytes).buffer);
  if(!result) {
    alert('Failed, check the console for more info.');
  }
}

/**
 * Send ArrayBuffer of binary data.
 */
function directPrint(socket, printData) {
  // Type check
  if (!(printData instanceof ArrayBuffer)) {
    console.log("directPrint(): Argument type must be ArrayBuffer.")
    return false;
  }
  if(printSocket.readyState !== printSocket.OPEN) {
    console.log("directPrint(): Socket is not open!");
    return false;
  }
  // Serialise, send.
  console.log("Sending " + printData.byteLength + " bytes of print data.");
  printSocket.send(printData);
  return true;
}

/**
 * Connect to print server on startup.
 */
var printSocket = new WebSocket("ws://localhost:5555", ["binary"]);
printSocket.binaryType = 'arraybuffer';
printSocket.onopen = function (event) {
  console.log("Socket is connected.");
}
printSocket.onerror = function(event) {
  console.log('Socket error', event);
};
printSocket.onclose = function(event) {
  console.log('Socket is closed');
}
</script>
</body>
</html>

Webserver

On a Apache HTTP webserver, I uploaded the above webpage, and a file with some raw print data, called receipt-with-logo.bin. This file was generated with escpos-php and is available in the repository:

For reference, the test file receipt-with-logo.bin contains this content:

Test

I opened up the web page on the client computer with socat, websockify and an Epson TM-T20II connected. After clicking the “Print” button, the file was sent to my printer. Success!

Because I wasn’t closing the websocket connection, only one browser window could access the printer at a time. Still, it’s a good demo of the basic idea.

To take this from an example to something you might deploy, you would basically just need to keep socat and websockify running in the background as a service (via systemd), close the socket when it’s not being used, and integrate it into a real app.

Different printers, different forwarding

The socat tool can connect to USB, Serial, or Ethernet printers fairly easily.

USB

Forward TCP connections from port 7000 to the receipt printer at /dev/usb/lp0:

socat TCP4-LISTEN:7000,fork /dev/usb/lp0

You can also access the device files directly under /sys/bus/usb/devices/

Serial

Forward TCP connections from port 7000 to the receipt printer at /dev/usb/ttyS0:

socat TCP4-LISTEN:7000,fork /dev/usb/ttyS0

Network

Forward TCP connections from port 7000 to the receipt printer at 10.1.2.3:9100:

socat -u TCP-LISTEN:7000,fork,reuseaddr,bind=127.0.0.1 TCP4-CONNECT:10.1.2.3:9100

You can forward websocket connections directly to an Ethernet printer with websockify:

socat -u TCP-LISTEN:7000,fork,reuseaddr,bind=127.0.0.1 localhost:7000

Other types of printer

If you have another type of printer, such as one accessible only via smbclient or lpr, then you will need to write a helper script.

Direct printing is faster, so I don’t use this method. Check the socat EXEC documentation or man socat if you want to try this.

Future

I’ve had a lot of questions on the escpos-php bug tracker from users who are attempting to print from cloud-hosted apps, which is why I tried this setup.

The browser is a moving target. I have previously written receipt-print-hq/chrome-raw-print, a dedicated app for forwarding WebSocket connections to USB, but that will stop working in a few months when Chrome apps are discontinued. Some time later, WebUSB should become available to make this type of printer available in the browser, which should be infinitely useful for connecting to accessories in point-of-sale setups.

The available tools for generating ESC/POS (receipt printer) binary from the browser are a long way off reaching feature parity with the likes of escpos-php and python-escpos. If you are looking for a side-project, then this a good choice.

Lastly, the socat -u flag makes this all unidirectional, but many types of devices (not just printers) can respond to commands. I couldn’t the end-to-end path to work without this flag, so don’t expect to be able to read from the printer without doing some extra work.

Useful links

Some links that I found while setting this up-

Get the code

View on GitHub →

Automating LXC container creation with Ansible

LXC is a Linux container technology that I use for both development and production setups hosted on Debian.

This type of container acts a lot like a lightweight virtual machine, and can be administered with standard linux tools. When configured over SSH, you should be able to use the same scripts against either an LXC container or VM without noticing the difference.

This setup will provision “privileged” containers behind a NAT, which is a setup that is most useful for a developer workstation. A setup in a server rack would be more likely to use “unprivileged” containers on a host bridge, which is slightly more complex to set up. The good news is that the guest container will behave very similarly once it’s provisioned, so developers shouldn’t need to adapt their code to those details either.

Manual setup of an LXC container

You need to know how to do something manually before you can automate it.

The best reference guide for this is the current Debian documentation. This is a shorter version of those instructions, with only the parts we need.

Packages

Everything you need for LXC is in the lxc Debian package:

$ sudo apt-get install lxc
...
The following additional packages will be installed:
  bridge-utils debootstrap liblxc1 libpam-cgfs lxcfs python3-lxc uidmap
Suggested packages:
  btrfs-progs lvm2
The following NEW packages will be installed:
  bridge-utils debootstrap liblxc1 libpam-cgfs lxc lxcfs python3-lxc uidmap
0 upgraded, 8 newly installed, 0 to remove and 0 not upgraded.
Need to get 1,367 kB of archives.
After this operation, 3,762 kB of additional disk space will be used.
Do you want to continue? [Y/n] y
...

Network

Enable the LXC bridge, and start it up:

echo 'USE_LXC_BRIDGE="true"' | sudo tee -a /etc/default/lxc-net
$ sudo systemctl start lxc-net

This gives you an internal network for your containers to connect to. From there, they can connect out to the Internet, or communicate with each-other:

$ ip addr show
...
3: lxcbr0:  mtu 1500 qdisc noqueue state DOWN group default qlen 1000
    link/ether 00:16:3e:00:00:00 brd ff:ff:ff:ff:ff:ff
    inet 10.0.3.1/24 scope global lxcbr0
       valid_lft forever preferred_lft forever

Defaults

Instruct LXC to attach a NIC to this network each time you make a containers:

$ sudo vi /etc/lxc/default.conf

Replace that file with:

lxc.network.type = veth
lxc.network.link = lxcbr0
lxc.network.flags = up
lxc.network.hwaddr = 00:16:3e:xx:xx:xx

You can then create a ‘test1’ box, using the Debian image online. Note the output here indicates that the container has no SSH server or root password.

$ sudo lxc-create --name test1 --template=download -- --dist=debian --release=stretch --arch=amd64
Setting up the GPG keyring
Downloading the image index
Downloading the rootfs
Downloading the metadata
The image cache is now ready
Unpacking the rootfs

---
You just created a Debian container (release=stretch, arch=amd64, variant=default)

To enable sshd, run: apt-get install openssh-server

For security reason, container images ship without user accounts
and without a root password.

Use lxc-attach or chroot directly into the rootfs to set a root password
or create user accounts.

The container is created in a stopped state. Start it up now:

$ sudo lxc-start --name test1 

It now appears with an automatically assigned IP.

$ sudo lxc-ls --fancy
NAME  STATE   AUTOSTART GROUPS IPV4       IPV6 
test1 RUNNING 0         -      10.0.3.250 -    

Set up login access

Start by getting your SSH public key ready. You can locate at ~/.ssh/id_rsa.pub. You can use ssh-keygen to create this if it doesn’t exist.

To SSH in, you need to install an SSH server, and get this public key into the /root/authorized_keys file in the container.

$ sudo lxc-attach --name test1
root@test1:/# apt-get update
root@test1:/# apt-get -y install openssh-server
root@test1:/# mkdir -p ~/.ssh
root@test1:/# echo "ssh-rsa (public key) user@host" >> ~/.ssh/authorized_keys

Type exit or press Ctrl+D to quit, and try to log in from your regular account over SSH:

$ ssh root@10.0.3.250
The authenticity of host '10.0.3.250 (10.0.3.250)' can't be established.
ECDSA key fingerprint is SHA256:EWH1zUW4BEZUzfkrFL1K+24gTzpd8q8JRVc5grKaZfg.
Are you sure you want to continue connecting (yes/no)? yes
Warning: Permanently added '10.0.3.250' (ECDSA) to the list of known hosts.
Linux test1 4.14.0-3-amd64 #1 SMP Debian 4.14.13-1 (2018-01-14) x86_64

The programs included with the Debian GNU/Linux system are free software;
the exact distribution terms for each program are described in the
individual files in /usr/share/doc/*/copyright.

Debian GNU/Linux comes with ABSOLUTELY NO WARRANTY, to the extent
permitted by applicable law.
root@test1:~# 

Any you’re in. You may be surprised how minimal the LXC images are by default, but the full power of Debian is available from apt-get.

This container is not configured to start on boot. For that, you would add this line to /var/lib/lxc/test1/config:

lxc.start.auto = 1

Teardown

To stop the test1 container and then delete it permanently, run:

sudo lxc-stop --name test1
sudo lxc-destroy --name test1

Automated setup of LXC containers with Ansible

Now that the basic steps have been done manually, I’ll show you how to Ansible to create a set of LXC containers. If you haven’t used it before, Ansible is an automation tool for managing computers. At its heart, it just logs into machines and runs things. These scripts are an approximate automation of the steps above, so that you can create 10 or 100 containers at once if you need to.

I use this method on a small project that I maintain on GitHub called ansible-live, which bootstraps a containerized training environment for Ansible.

Host setup

You need a few packages and config files on the host. In addition to the lxc package, we need lxc-dev and the lxc-python2 python package to manage the containers from Ansible:

- hosts: localhost
  connection: local
  become: true
  vars:
  - interface: lxcbr0

  tasks:
  - name: apt lxc packages are installed on host
    apt: name={{ item }}
    with_items:
    - lxc
    - lxc-dev
    - python-pip

  - copy:
      dest: /etc/default/lxc-net
      content: |
        USE_LXC_BRIDGE="true"

  - copy:
      dest: /etc/lxc/default.conf
      content: |
        lxc.network.type = veth
        lxc.network.link = {{ interface }}
        lxc.network.flags = up
        lxc.network.hwaddr = 00:16:3e:xx:xx:xx

  - service:
      name: lxc-net
      state: started

  - name: pip lxc packages are installed on host
    pip:
      name: "{{ item }}"
    with_items:
    - lxc-python2
    run_once: true

This can be executed with this command:

ansible-playbook setup.yml --ask-become-pass --diff

Container creation

Add a file called inventory to specify the containers to use. These are two IP addresses in the range of the LXC network.

deb1 ansible_host=10.0.3.100
deb2 ansible_host=10.0.3.101

For local work, I find it easier to set an IP address with Ansible and use the /etc/hosts file, which is why IP addresses are included here. Without it, you need to wait for each container to boot, then detect its IP address before you can log in.

Add this to setup.yml

- hosts: all
  connection: local
  become: true
  vars:
  - interface: lxcbr0
  tasks:
  - name: Load in local SSH key path
    set_fact:
      my_ssh_key: "{{ lookup('env','HOME') }}/.ssh/id_rsa.pub"

  - name: interface device exists
    command: ip addr show {{ interface }}
    changed_when: false
    run_once: true

  - name: Local user has an SSH key
    command: stat {{ my_ssh_key }}
    changed_when: false
    run_once: true

  - name: containers exist and have local SSH key
    delegate_to: localhost
    lxc_container:
      name: "{{ inventory_hostname }}"
      container_log: true
      template: debian
      state: started
      template_options: --release stretch
      container_config:
        - "lxc.network.type = veth"
        - "lxc.network.flags = up"
        - "lxc.network.link = {{ interface }}"
        - "lxc.network.ipv4 = {{ ansible_host }}/24"
        - "lxc.network.ipv4.gateway = auto"
      container_command: |
        if [ ! -d ~/.ssh ]; then
          mkdir ~/.ssh
          echo "{{ lookup('file', my_ssh_key) }}" | tee -a ~/.ssh/authorized_keys
          sed -i 's/dhcp/manual/' /etc/network/interfaces && systemctl restart network
        fi

In the next block of setup.yml, use keyscan to get the SSH keys of each machine as it becomes available.

- hosts: all
  connection: local
  become: false
  serial: 1
  tasks:
  - wait_for: host={{ ansible_host }} port=22

  - name: container key is up-to-date locally
    shell: ssh-keygen -R {{ ansible_host }}; (ssh-keyscan {{ ansible_host }} >> ~/.ssh/known_hosts)

Lastly, jump in via SSH and install python. This is required for any follow-up configuration that uses Ansible.

- hosts: all
  gather_facts: no
  vars:
  - ansible_user: root
  tasks:
  - name: install python on target machines
    raw: which python || (apt-get -y update && apt-get install -y python)

Next, you can execute the whole script to create the two containers.

ansible-playbook setup.yml --ask-become-pass --diff

Scaling to hundreds of containers

Now that you have created two containers, it is easy enough to see how you would make 20 containers by adding a new inventory:

for i in {1..20}; do echo deb$(printf "%03d" $i).example.com ansible_host=10.0.3.$((i+1)); done | tee inventory
deb001.example.com ansible_host=10.0.3.2
deb002.example.com ansible_host=10.0.3.3
deb003.example.com ansible_host=10.0.3.4
...

And then run the script again:

ansible-playbook -i inventory setup.yml --ask-become-pass

This produces 20 machines after a few minutes.

The processes running during this setup were mostly rync (copying the container contents), plus the network waiting to retrieve python many times. If you need to optimise to frequent container spin-ups, LXC supports
storage back-ends that have copy-on-write, and you can cache package installs with a local webserver, or build some packages into the template.

Running these 20 containers plus a Debian desktop, I found that my computer was using just 2.9GB of RAM, so I figured I would test 200 empty containers at once.

for i in {1..200}; do echo deb$(printf "%03d" $i).example.com ansible_host=10.0.3.$((i+1)); done > inventory
ansible -i inventory setup.yml

It took truly a very long time to add Python to each install, but the result is as you would expect:

$ sudo lxc-ls --fancy
NAME               STATE   AUTOSTART GROUPS IPV4       IPV6 
deb001.example.com RUNNING 0         -      10.0.3.2   -    
deb002.example.com RUNNING 0         -      10.0.3.3   -    
deb003.example.com RUNNING 0         -      10.0.3.4   -    
...
deb198.example.com RUNNING 0         -      10.0.3.199 -    
deb199.example.com RUNNING 0         -      10.0.3.200 -    
deb200.example.com RUNNING 0         -      10.0.3.201 -    

The base resource usage of an idle container is absolutely tiny, around 13 megabytes — the system moved from 2.9GB to 5.4GB of RAM used when I added 180 containers. Containers clearly have a lower overhead than VM’s, since no RAM has been reserved here.

Software updates

The containers are updated just like regular VM’s-

apt-get update
apt-get dist-upgrade

Backups

In this setup, the container’s contents is stored under /var/lib/lxc/. As long as the container is stopped, you get at it safely with tar or rsync to make a full copy:

$ sudo tar -czf deb001.20180209.tar.gz /var/lib/lxc/deb001.example.com/
$ rsync -avz /var/lib/lxc/deb001.example.com/ remote-computer@example.com:/backups/deb001.example.com/

Full-machine snapshots are also available on the Ceph or LVM back-ends, if you use those.

Teardown

The same Ansible module can be used to delete all of these machines in a few seconds.

- hosts: all
  connection: local
  become: true
  tasks:
  - name: Containers do not exist
    delegate_to: localhost
    lxc_container:
      name: "{{ inventory_hostname }}"
      state: absent
ansible-playbook -i inventory teardown.yml --ask-become-pass

Conclusion

Hopefully this post has given you some insight into one way that Linux containers can be used. I have found LXC to be a great technology to work with for standalone setups, and regularly use the same scripts to configure either an LXC container or a VM’s depending on the target environment.

The low resource usage also means that I can run fairly complex setups on a laptop, where the overhead of large VM’s would be prohibitive.

I don’t think that LXC is directly comparable to full container ecosystems like Docker, since they are geared towards different use cases. These are both useful tools to know, and have complementary strengths.

How to use HiDPI displays on Debian 9

I recently added a 4K monitor to my Debian box, and had to set a few things to make it display things at a good size. These high-density moniotors that are becoming common on laptops and desktops are known as “HiDPI” displays.

Currently I get the best results with:

  • Window scaling factor of 2
  • Font scaling 0.90 to make text slightly smaller

Note that “window scaling” is not “upscaling” (stretching an image). In this version of Gnome, it means “single/double/triple DPI”. The implementations are in the process of changing: Soon you should be able to set any scaling factor.

This post assumes a Gnome version around 3.26, which is what you would get as a default if you installed Debian 9 today.

Apply to one user

Under Settings → Devices → Displays, set the Scale to 200%.

Under Tweaks → Fonts, set the Scaling Factor to 0.90.

Next, add these variables to ~/bashrc to apply similar scaling to QT apps.

QT_AUTO_SCREEN_SCALE_FACTOR=0
QT_SCALE_FACTOR=2

Log out and back in to ensure that the settings have applied everywhere.

Apply to any user

If you have a shared system (eg. domain accounts), or want to style the login box as well, then you can set the same settings as below.

These steps are based on answers to the Ask Ubuntu question: Adjust text scaling factor for all users.

nano /usr/share/glib-2.0/schemas/org.gnome.desktop.interface.gschema.xml

Set the text-scaling-factor to 0.9, and the scaling-factor to 2.

<key name="text-scaling-factor" type="d">
  <range min="0.5" max="3.0"/>
  <default>0.9</default>
  <summary>Text scaling factor</summary>
  <description>
    Factor used to enlarge or reduce text display, without changing font si$
  </description>
</key>
<key name="scaling-factor" type="u">
  <default>2</default>
  <summary>Window scaling factor</summary>
  <description>
    Integer factor used to scale windows by. For use on high-dpi screens.
    0 means pick automatically based on monitor.
  </description>
</key>

Re-compile the schemas:

glib-compile-schemas /usr/share/glib-2.0/schemas

Next drop some similar environent variables for QT apps in /etc/profile.d/hidpi.sh to apply it to all users:

export QT_AUTO_SCREEN_SCALE_FACTOR=0
export QT_SCALE_FACTOR=2

After this, reboot. If the setting has applied, then the gdm3 login box will be scaled as well.

How to install PHP Composer as a regular user

Composer is an essential utility for PHP programmers, and allows you to manage dependencies.

Dependencies

You can use your regular account to install composer, use it, and even update it. You do need to have a few packages installed first though:

sudo apt-get install git curl php-cli

Or on Fedora:

sudo dnf install git curl php-cli

Local install

Next, fetch the installer and deploy composer to your home directory

curl https://getcomposer.org/installer > composer-setup.php
mkdir -p ~/.local/bin
php composer-setup.php --install-dir=$HOME/.local/bin --filename=composer
rm composer-setup.php

Last, add ~/.local/bin to your $PATH:

echo 'PATH=$PATH:~/.local/bin' >> ~/.bashrc
source  ~/.bashrc
echo $PATH

You can now run composer:

$ composer --help
Usage:
  help [options] [--] []
...
$ composer self-update
You are already using composer version 1.5.6 (stable channel).

Make Composer available for all users

Just run this line if you decide that all users should have access to your copy of Composer:

sudo mv ~/.local/bin/composer /usr/local/bin/composer

If you look up a how to install Composer, you will find a tempting one-liner that uses curl to fetch a script from the Composer website, then executes it as root. I don’t think it’s good practice to install software like that, so I would encourage you to just run ‘sudo mv’ at the end.