Porting the Amiga bouncing ball demo to the NES

Earlier this year, I ported the Amiga bouncing ball demo to the Nintendo Entertainment System. This is a video capture from a NES emulator.

I completed this back in January, but I’m only publishing this blog post now, because I was considering entering it into a demo competition.

How it works

If you are familiar with NES development, then you will probably notice that there is nothing ground-breaking going on here. The ball is made up of 64 8×8 sprites, bouncing around the screen over a static background.

There are two different versions of the ball in sprite memory, and with some palette swapping, this can be stretched to 4 frames of animation, just enough to make the ball appear to spin.

There is enough sprite memory to extend this to 8 frames of animation without any banking tricks, but I would need to start again from scratch to achieve that.

Pre-rendered 3D

I drew the ball in Blender, with twice the number of segments required for the final image. This is a UV sphere with 8 rings, and 32 segments.

I coloured each face with one of 4 colours, then rendered it with the Workbench renderer, which I had configured to use Flat lighting, no anti-aliasing, and the texture colour.

I also tilted the ball.

This gave me a crisp, high-resolution ball with solid colours.

To test the idea, I processed this down to a 64×64 image on a transparent background. I need to substitute colours, so there is no antialiasing here.

I then wrote up a Python script to swap out colours to make the 4-frame pattern. Note that frames 3 and 4 are the same as frames 1 and 2, but with white and red swapped.

I ran this through ImageMagick to convert it into a GIF preview.

convert -delay 3.5 -loop 0 *.png animation.gif

The result appeared workable, so I went about making the same animation in a NES rom.

NES implmentation

On the NES, it’s not possible to create the spinning ball effect with palette changes only, because it would require four colours plus transparency. To overcome this, I split the image into two frames, each stored as two colours plus transparency, which is possible.

To start the code, I checked out a fresh copy of Brad Smith’s NES example project, then deleted things that I didn’t need.

When working with sprites on the NES, it is typical to store object attributes in RAM, then perform a DMA operation once per frame to copy this over to the Picture Processing Unit (PPU). For this project, I wanted to try setting up two different copies of the object attribute memory in RAM – one for each of the two rotations.

This should allow me to set any of the four frames by choosing between two possible colour palettes, and two possible DMA source addresses. This worked, and the first milestone was a spinning ball.

Switching between two DMA sources did not save much effort in the end, because I still needed quite a lot of code to set the X/Y positions of 64 sprites each frame. I set up some assembler macros to help with this.

Physics and sound

I have made one NES game before, and I was not happy with the physics. For this project, I wanted to do a bit better.

For the X position, I use a fixed speed, and simple collision detection with left/right boundaries. The animation frame is calculated from the X position, so the ball changes rotation depending on which direction it is moving, just like the Amiga demo.

The Y location of the ball is a simple loop, and follows the absolute value of a sine wave. I pre-computed this with some Python.

My last project also had no sound, so I read up on the NES APU, and added some noise when the ball changes direction.

Development setup

Since my last NES project, I have improved my development setup quite a bit. As always, I am using the ca65 assembler on Linux.

Previously, I was using a text editor. I have since moved to a custom 6502 assembly plugin on PyCharm, which allows me to quickly jump to definitions/usages. I developed this for my other 65C02 and 65C816 projects, which you can read about on this blog.

When I click run, I’ve set up the project to assemble a NES ROM, then launch with fceux, which has debugging features.

The debug features were previously only available on Windows builds of fceux, so when I made this demo, I was running the emulator via WINE. This has been added to the Linux builds as of v2.5.0, so I’ll most likely switch to that for my next project.

Wrap-up

I learn something new every time I write code for the NES, and it’s a lot of fun to make simple demos for these old systems. It’s also refreshing to create something standalone which I can explain through screenshots, instead of pages of assembly code.

For those who do want to read pages of assembly code, though, this project is up on GitHub at mike42/nes-ball-demo.

Building my first NES game: A retrospective

Last year, I spent a fair amount of time learning how to make games for the Nintendo Entertainment System. The homebrew scene for this system is very much alive, and I was quite proud that I was able to make a simple, working video game which runs on a NES emulator.

So, I present to you: 8-bit Table Tennis.

This blog post just a few notes about the tools and resources that I used for NES development on Linux, plus a few things that I learned along the way.

Development tools

The CPU in the NES is a derivative of the once-ubiquitous MOS 6502, and games for it are mostly written in 6502 assembly. I already do a fair amount of programming, but quickly found that my usual editors, compilers and debuggers were useless for this platform.

The main resources I used were:

To build my code, I used the cc65 toolchain, which includes a cross-assembler. I did most of my testing in the Nestopia emulator, and most of my editing in Gedit. All three of these are available in the official Debian repositories.

Gedit setup

Out of the box, Gedit can’t syntax highlight 6502 assmebly. I found a language spec file for it on the the 6502.org forums, and edited it slightly before using it.

At the time of writing, new language specs can be installed on Debian like this:

sudo cp asm6502.lang /usr/share/gtksourceview-4/language-specs/asm6502.lang && sudo chmod 0644 /usr/share/gtksourceview-4/language-specs/asm6502.lang

It possible to add a console and git support to with gedit, but this is still a long way from a full IDE.

Geany

Geany is a programming text editor, and is also available in the official Debian repositories.

I wasn’t able to get it to recognise 6502 assembly, but it does have good x86 assembly (NASM) support, which is similar enough for it to allow navigation through the source code using labels.

Geany can also set up projects with build scripts (such as a Makefile), which could allow for quicker testing.

FCEUX

FCEUX is a NES emulator which has an in-built debugger, and it runs well under WINE. I was also able to build and run it natively on Linux, but the debugger is only present in the Windows build.

I also briefly experimented with using the FCEUX Lua interface to pause/resume the emulator over a TCP socket for debugging, since that interface is available in the Linux build. I could only pause the emulator between frames, so I decided to abandon this.

Graphics

I created the graphics in the GNU Image Manipulation Program, and manually broke the title page down into tiles.

I also wrote a custom program to convert a 4-colour PNG file into the native NES CHR graphics format. I run this conversion as part of the build process, so that the graphics files can be stored in a modern format.

Things I learned

Programming for the NES is quite simple once the project is up and running, but even simple tasks can be a real hassle. I spent more time than I expected on mundane tasks such as collision detection, and certainly did a poor job of implementing game physics. The 6502 CPU has no built-in way to multiply, divide, or perform floating point operations. The version used for the NES additionally lacks any way to perform a binary-to-decimal conversion, which would have been very useful for displaying the player scores! In hindsight, I would have been able to improve the physics by pre-computing some lookup tables.

On the other hand, I expected it to be difficult to work within 2KiB of RAM, but due to the simplicity of the game, I only used around 25% of it, and had plenty of CHR ROM space leftover as well.

It took me three weekends to make this project, without having ever written a line of 6502 assembly before. I think that development would be a lot faster if I were able to set breakpoints from my code editor, so I will definitely be looking at other debugging emulators before attempting my next 6502 assembly project.

Conclusion

8-bit Table Tennis is available as an iNES ROM on GitHub.

I have only been running it with an emulator, so if any readers of this blog own a flash cartridge for the NES (such as an Everdrive), then please let me know if it works on the real hardware!

Building a tiny Linux gaming PC

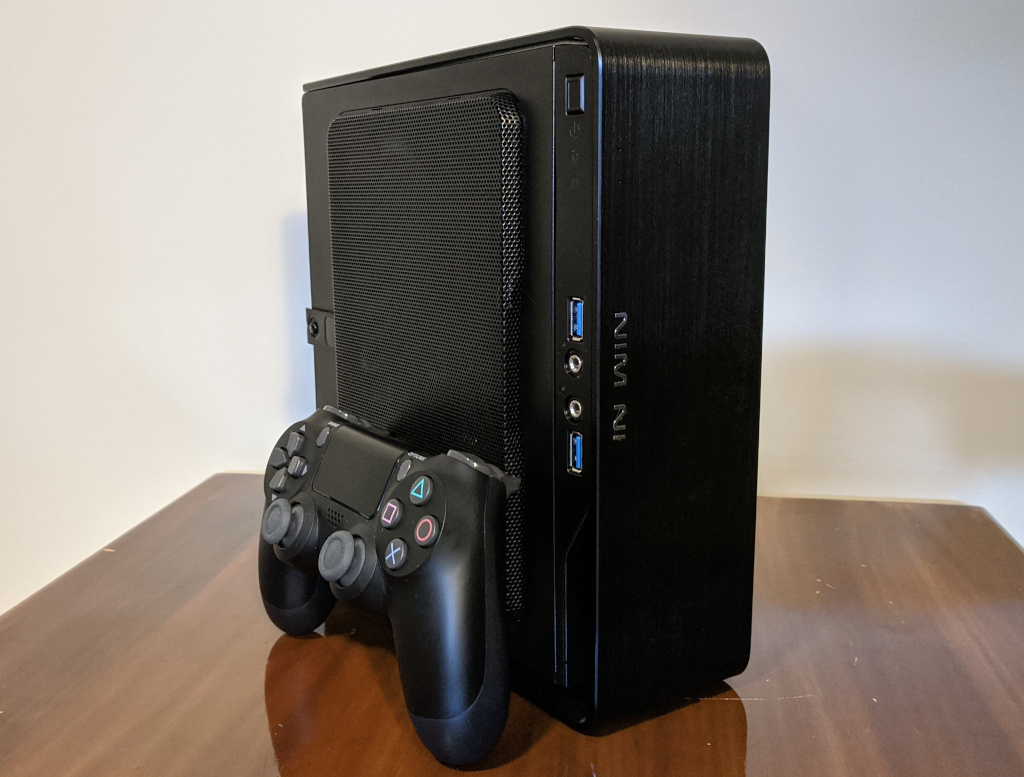
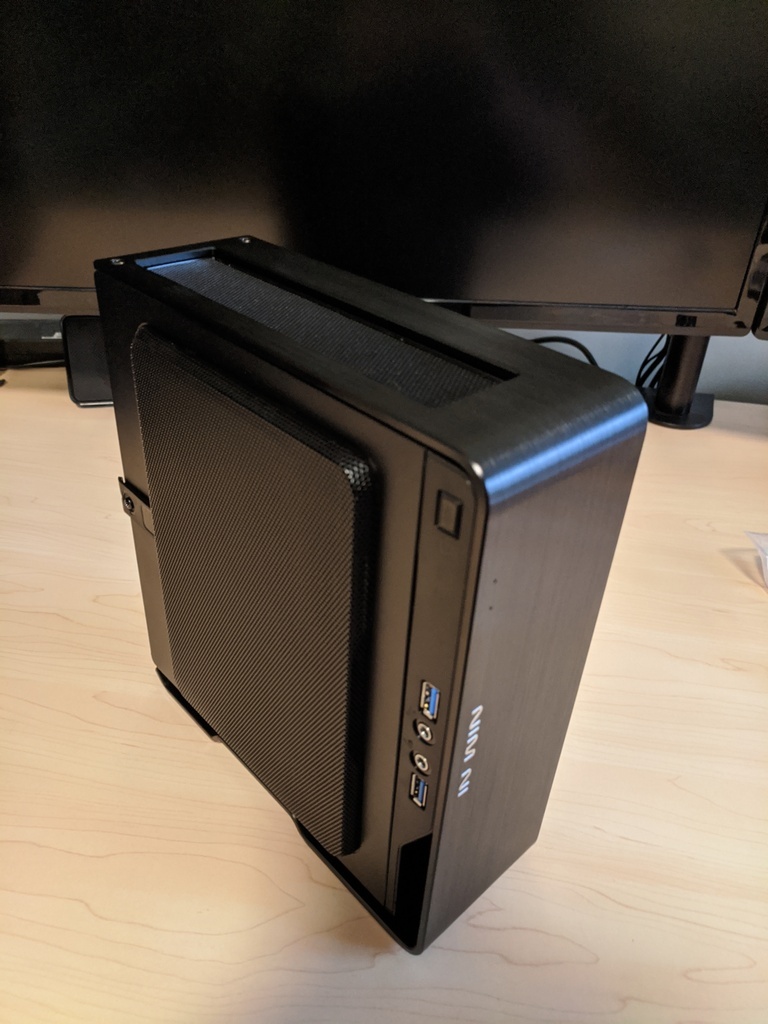
I recently put together a small form factor PC to use with my TV, with the aim of building a Linux-based, console-like gaming setup. This mostly went to plan, and is certainly a big upgrade from my previous hardware, which was based on a retired desktop computer.

I am writing a bit about it today, partly because it’s been an interesting project, but also to show a working setup for anybody who is attempting something similar.

Quick reference

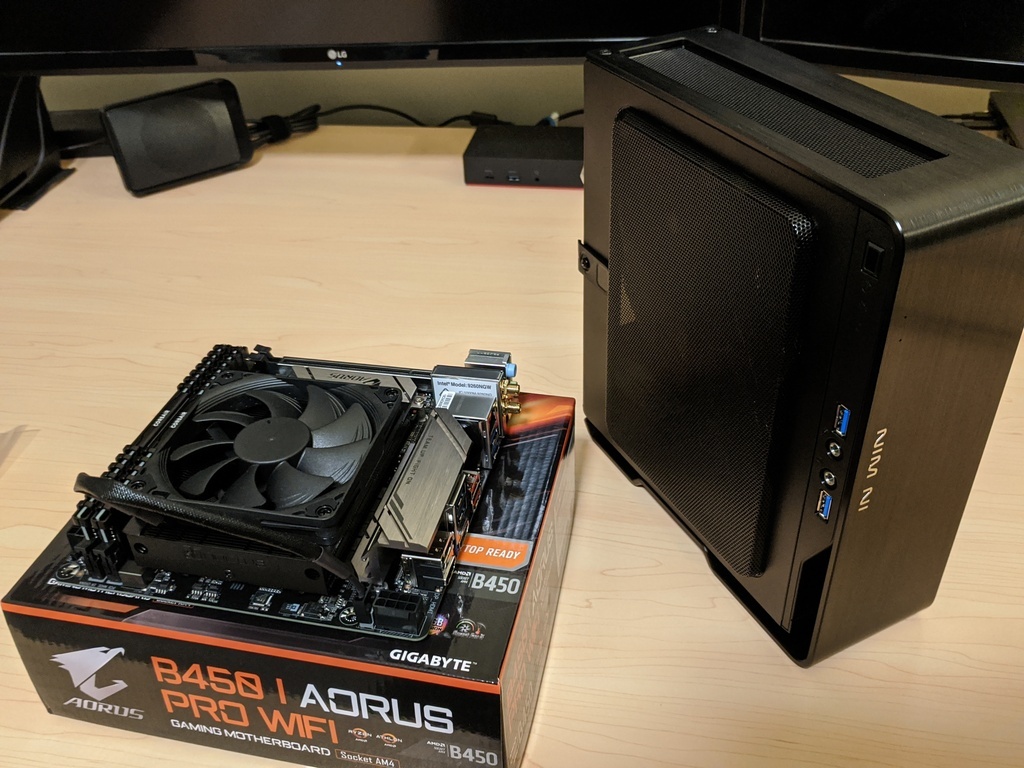
The build is based around these components (PC part picker list here):

  • In Win Chopin case
  • AMD Ryzen 5 3400G CPU
  • Gigabyte B450 I AORUS PRO Motherboard
  • Noctua NH-L9a-AM4 Cooler
  • Corsair Vengeance LPX 16 GB (2x8GB) DDR4-3200 RAM
  • Samsung 970 Evo 1 TB

Peripherals:

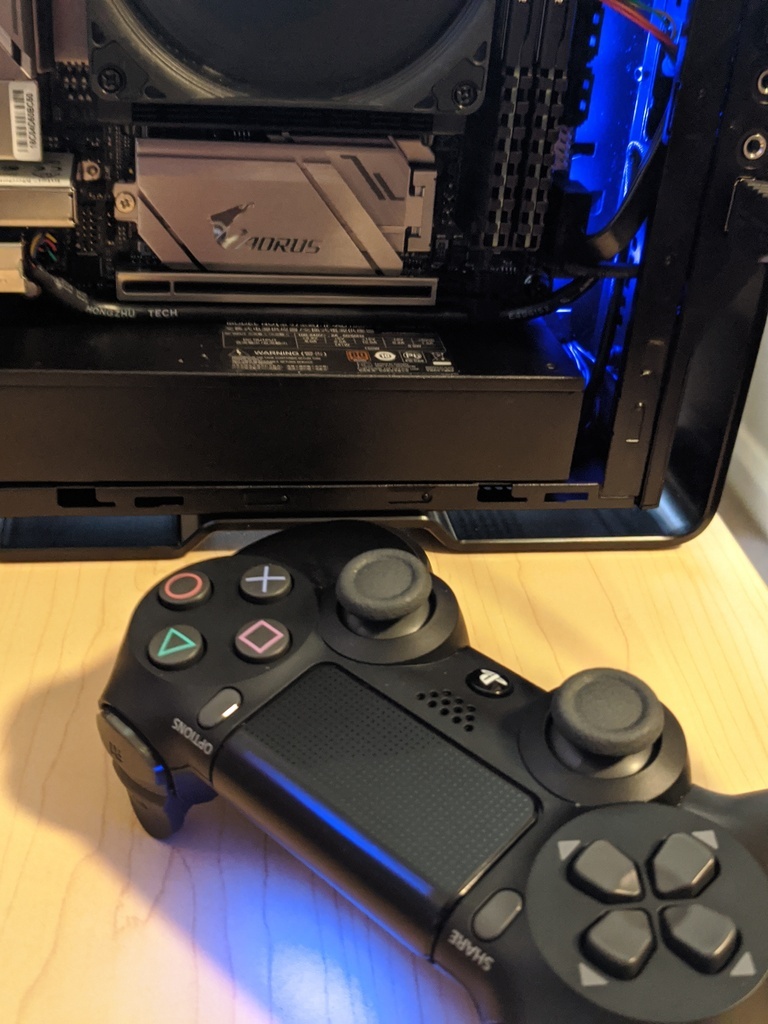
  • Sony DualShock 4 controller – Works over Bluetooth and can be used as a touch-pad.
  • 8BitDo SF30 Pro controller – Also works over Bluetooth, and can emulate an Xbox controller.
  • Logitech K400R wireless keyboard/mouse

Hardware setup

This is the smallest PC I’ve built with desktop parts, and there is not a lot of spare space in the case. I first put the everything together on my desk confirm that it would POST, then disassembled the case to make some modifications.

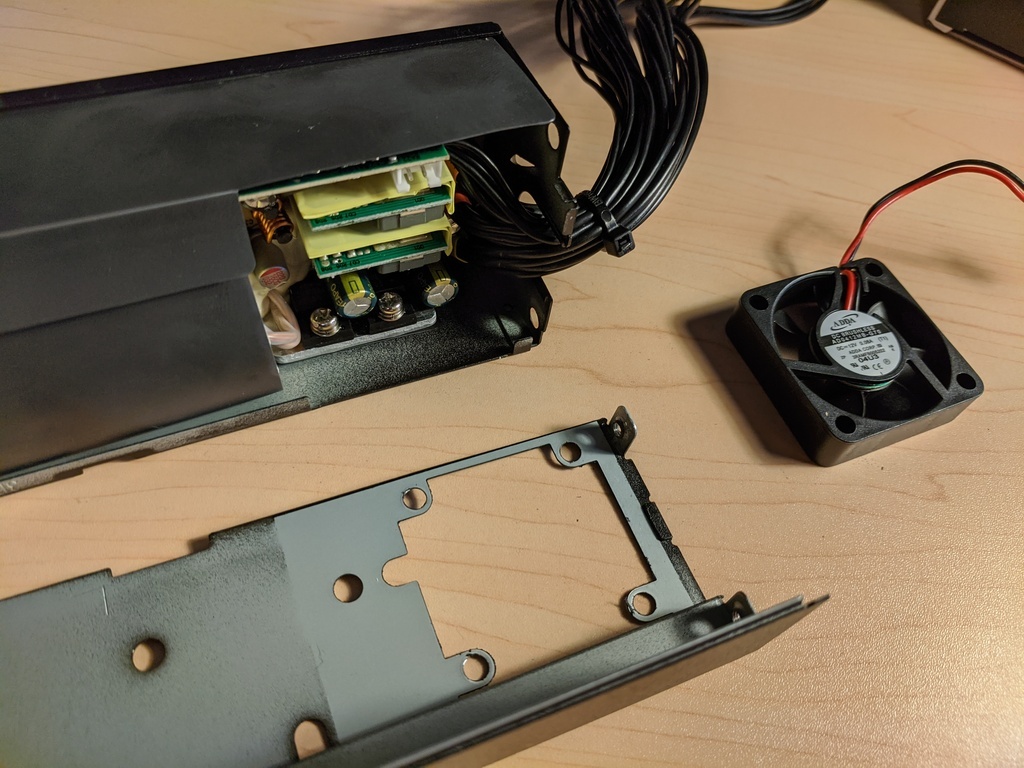
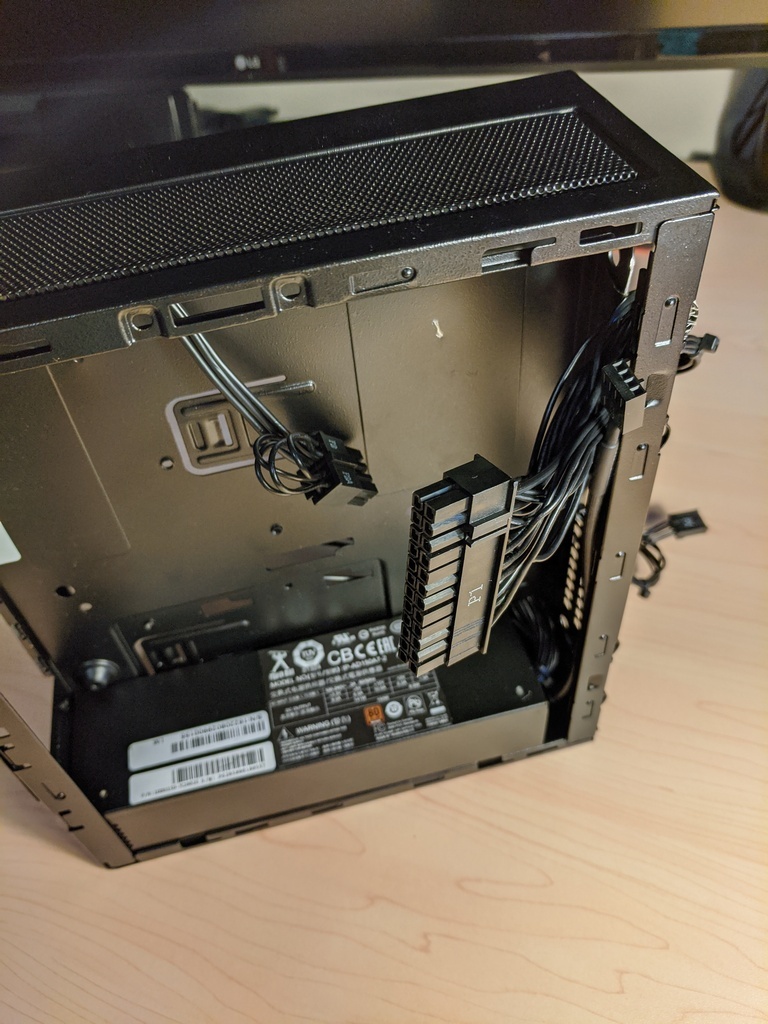
Three screws hold in the power supply, two torx screws hold the aluminium shell to the chassis, and two Phillips-head screws and some tabs hold the plastic front panel cover to the chassis.

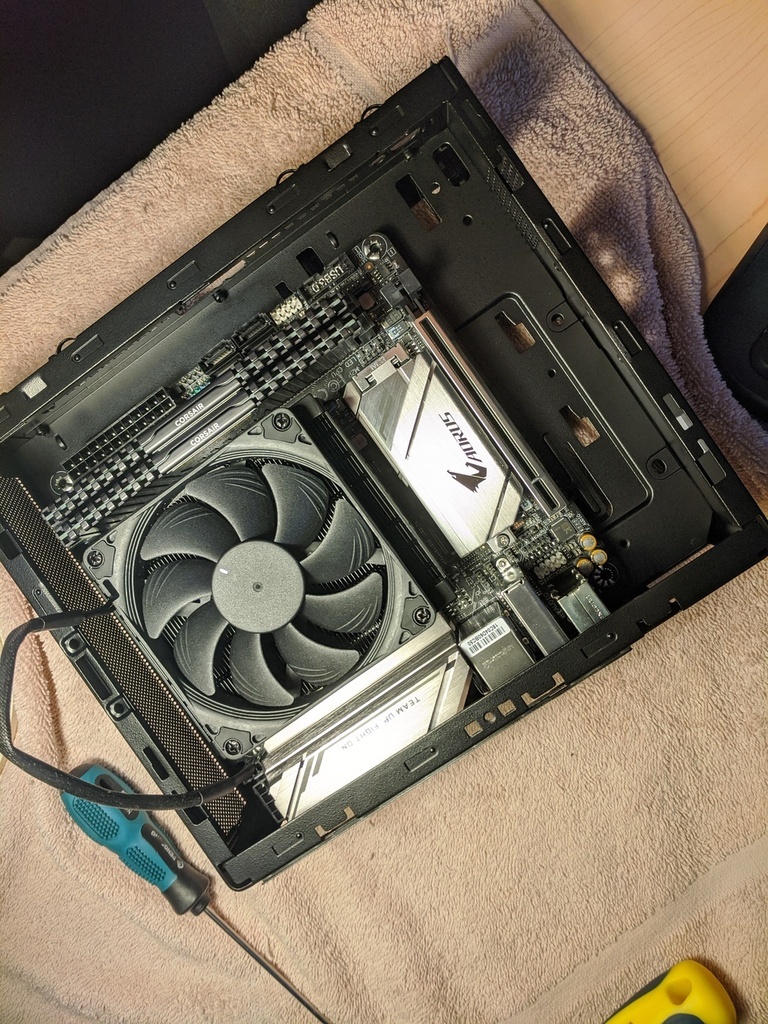
In that last image, the motherboard almost fills the case, and a power supply has to fit in there as well.

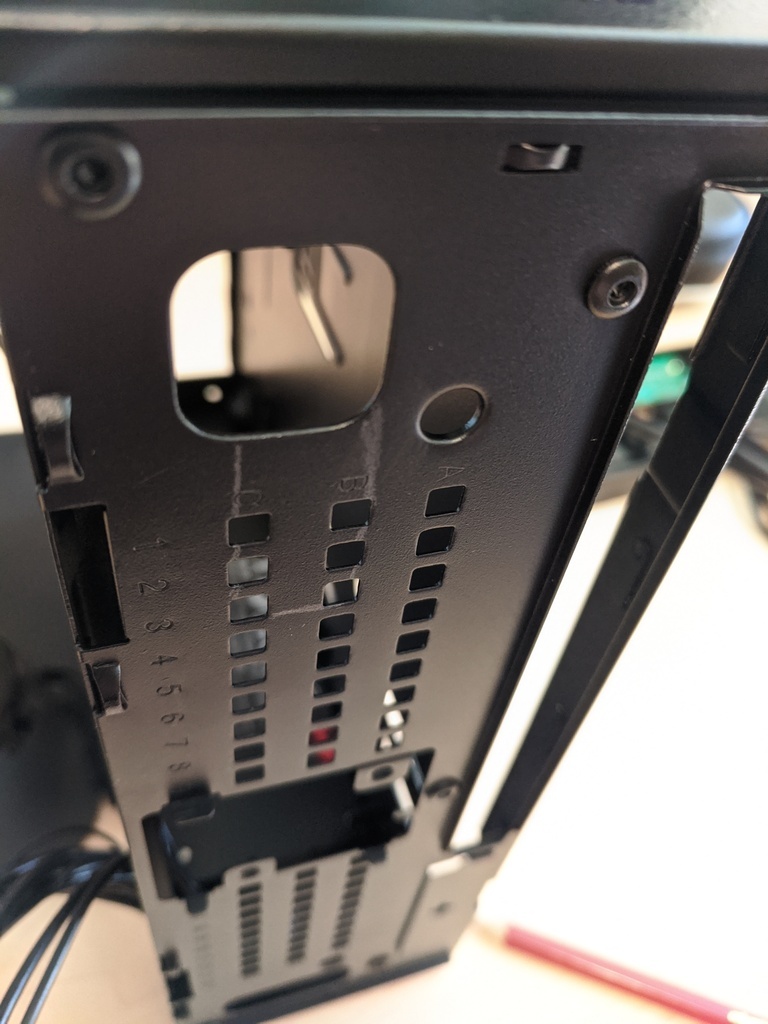
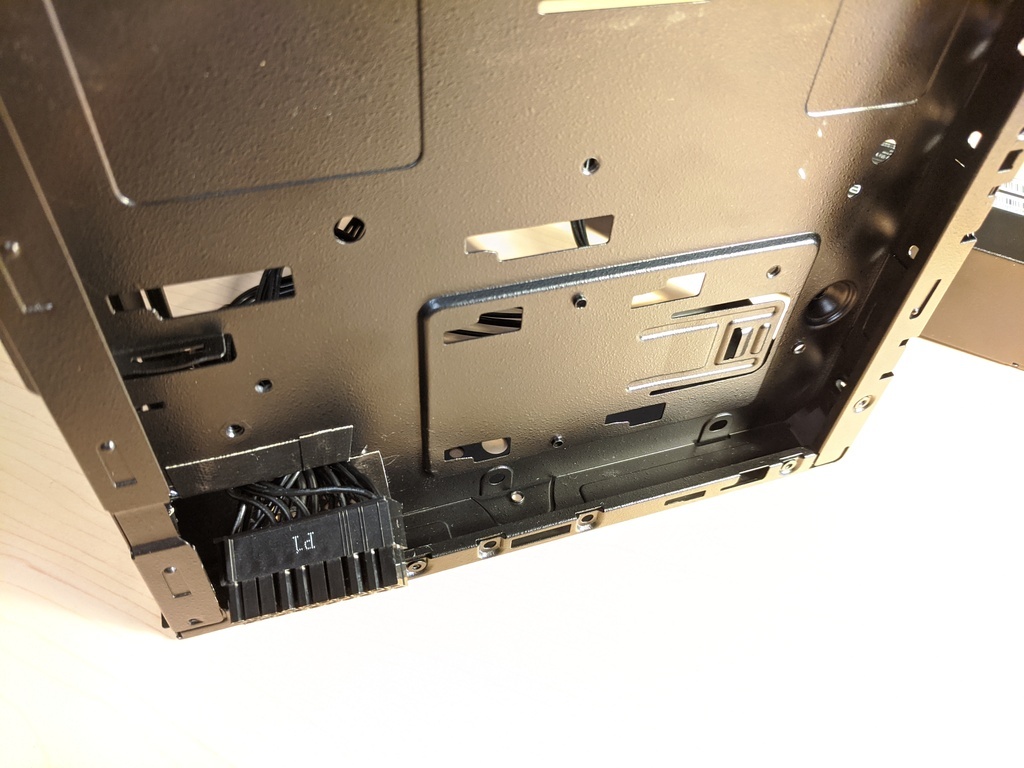
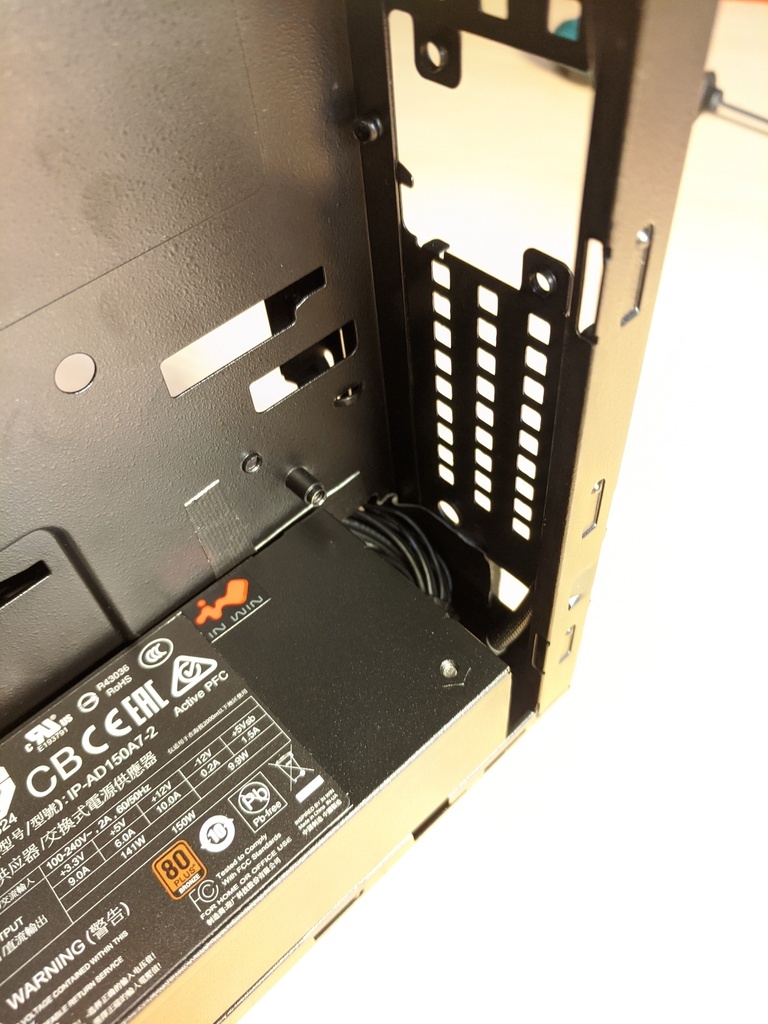
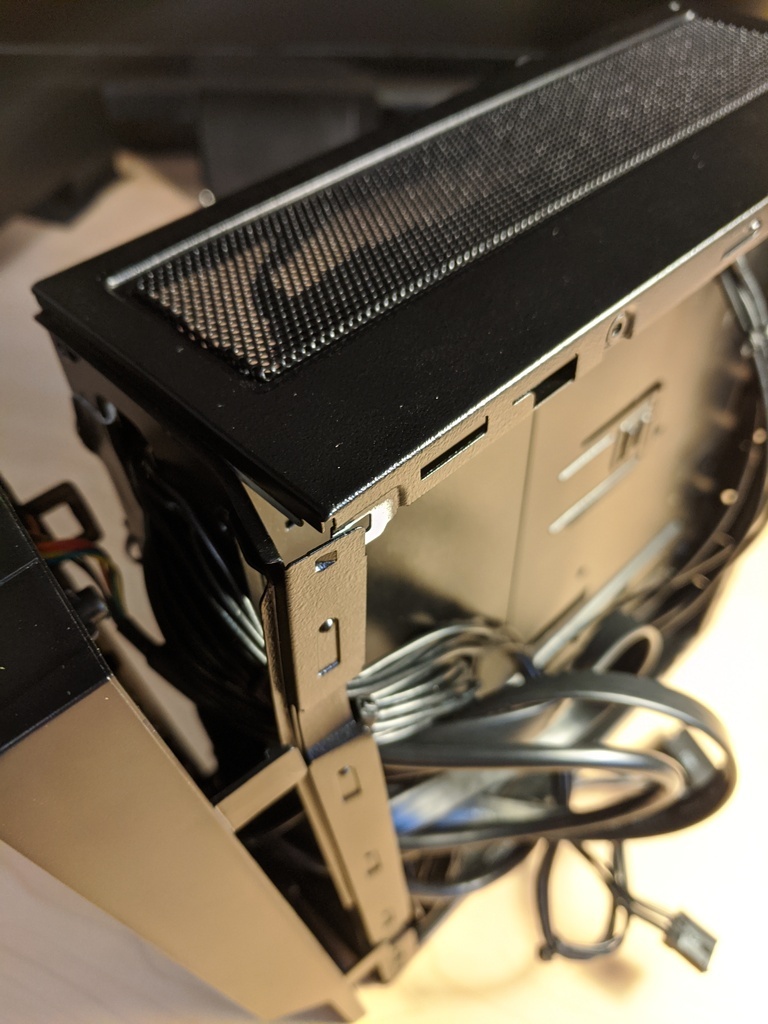
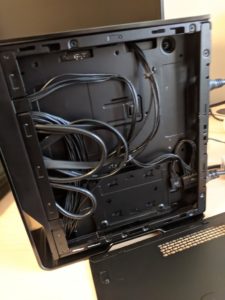
My plan was to route the power cables around the back of the case rather than leaving them in the main cavity. This involved cutting out a square near one of the drive trays for all of the power cables to exit, and another for the ATX power connector to connect to the motherboard. I also removed a metal tab from the power supply, since I had cut out the metal that it was supposed to be screwed to.

There was an existing hole which I could use for the CPU power connector, which was already the correct size.

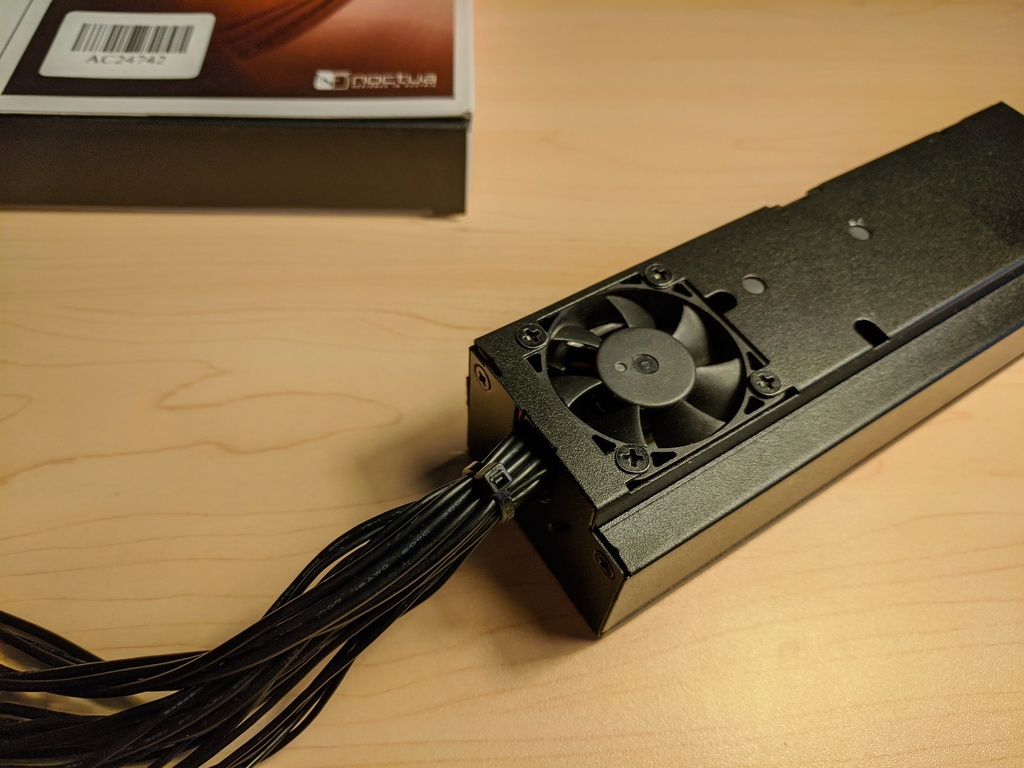
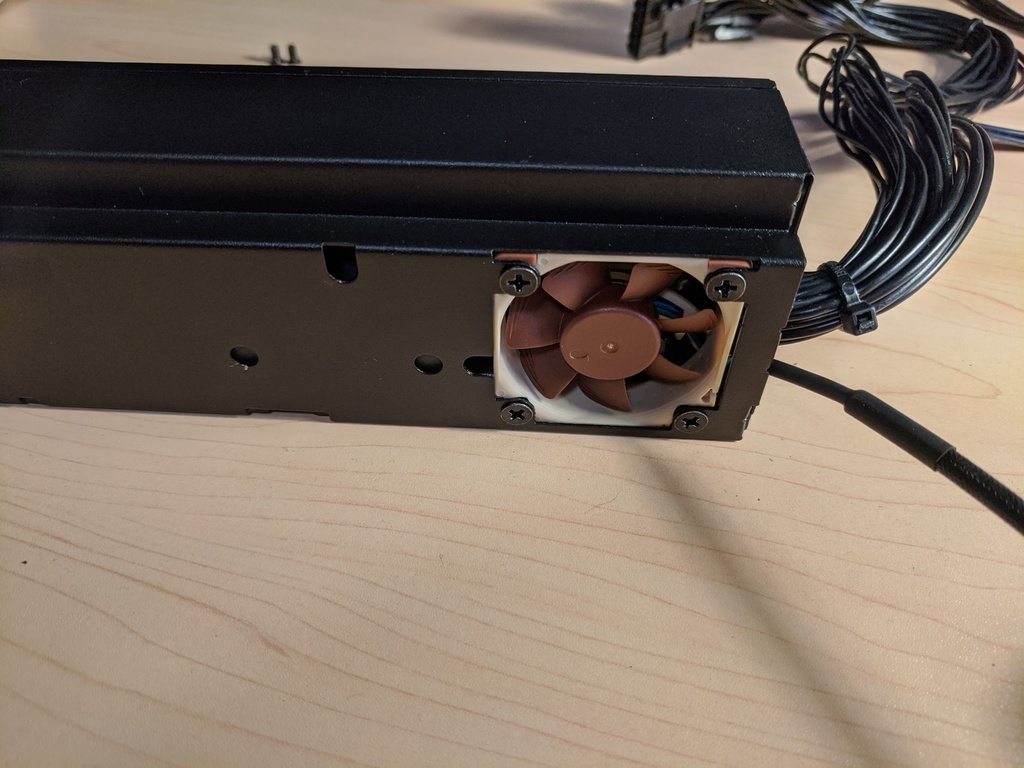
I then swapped the power supply fan for a Noctua A4x10 PWM so that I could control the fan speed from software. I do not recommend this, since it is unnecessary, and opening a power supply is an electrocution hazard.

Next, I got all of the cables into place, since there is no space to do this after the motherboard is installed

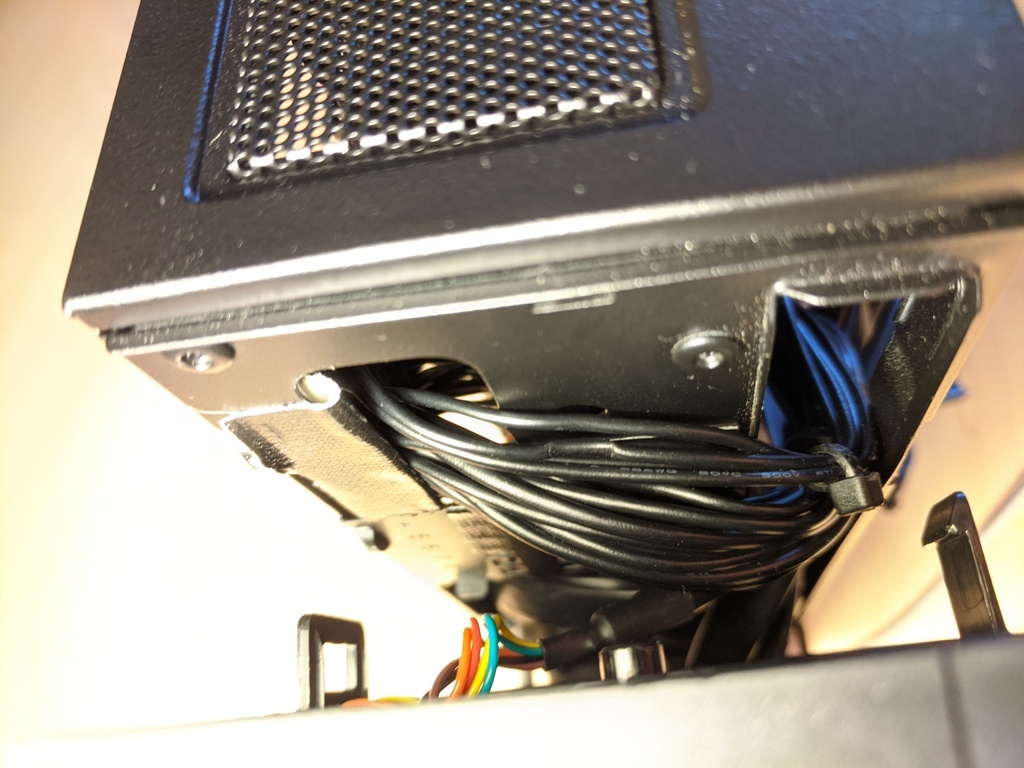
Once the power cables were in the right place, I added the motherboard, then connected the front panel I/O, feeding all of the excess cables to the space behind the case. This is a very tight fit, and I accidentally bent the case and squashed some cables before finally getting the plastic front panel to attach.

After finally lining everything up, I checked that the case closed, and re-attached the shell.

Lastly, I was able to re-fit one of the two drive trays, in case that is ever needed in future.

BIOS setup

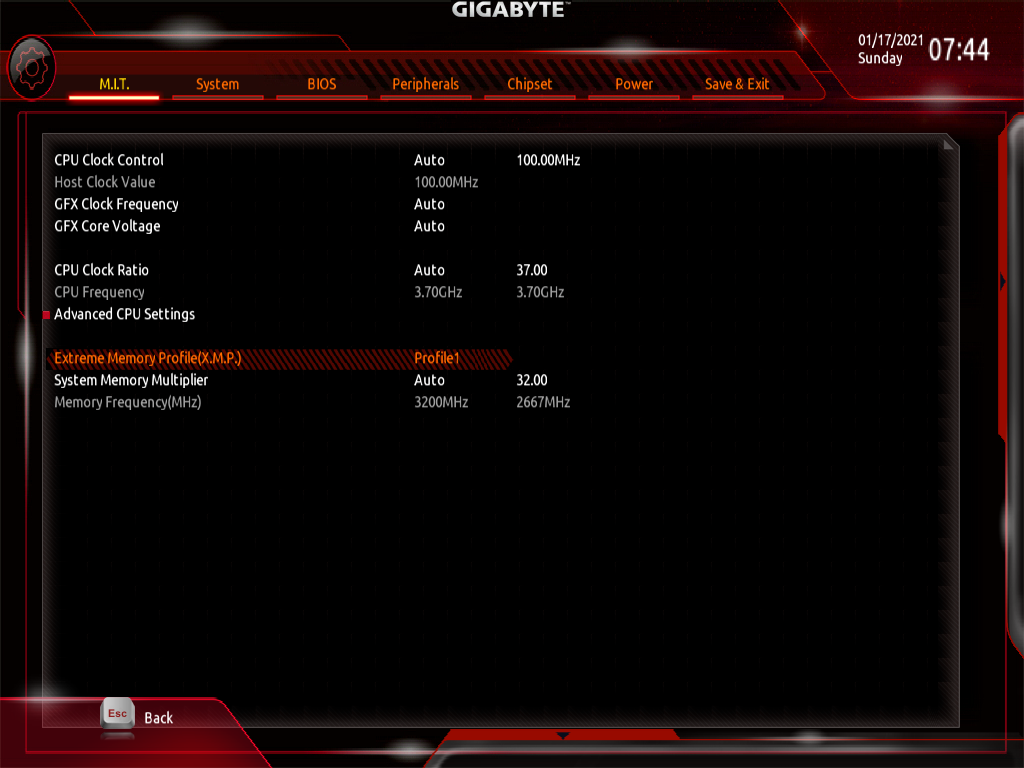
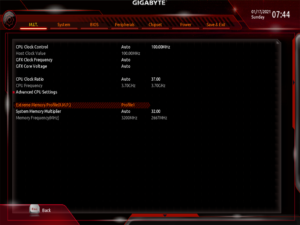
This build uses integrated graphics, so the system memory is also being used as video memory. This means that RAM speed is more important than usual.

I enabled XMP to run the RAM at its rated 3200 MHz speed. This is higher than the highest officially supported speed of 2933 MHz for this CPU, but for me that was not an issue.

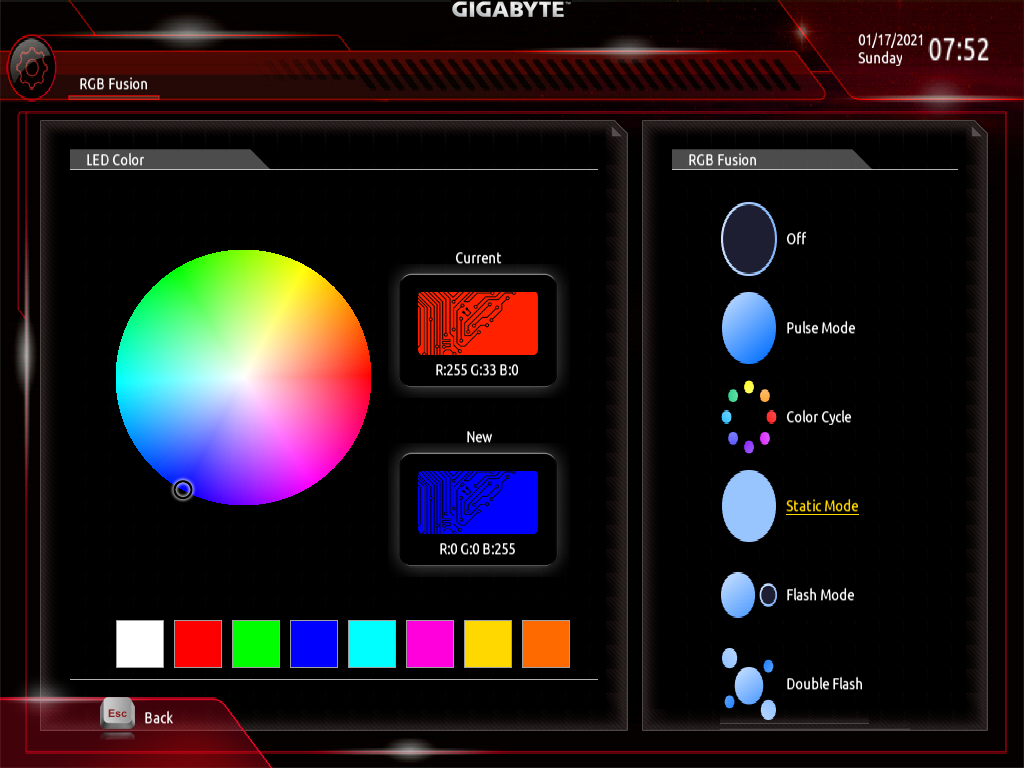
I set the built-in motherboard LED’s to blue, to match the default colour on the Sony DualShock 4 controller. This also meant that I would not need to get any RGB software working on Linux.

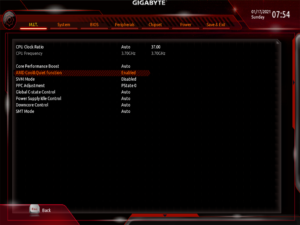
Some online sources suggest disabling the AMD Cool & Quiet function to get extra gaming performance, but I consider this advice to be out-dated, unless you’re overclocking. Instead, I am leaving this setting enabled, then automatically setting the CPU to ‘performance’ mode while gaming via software.

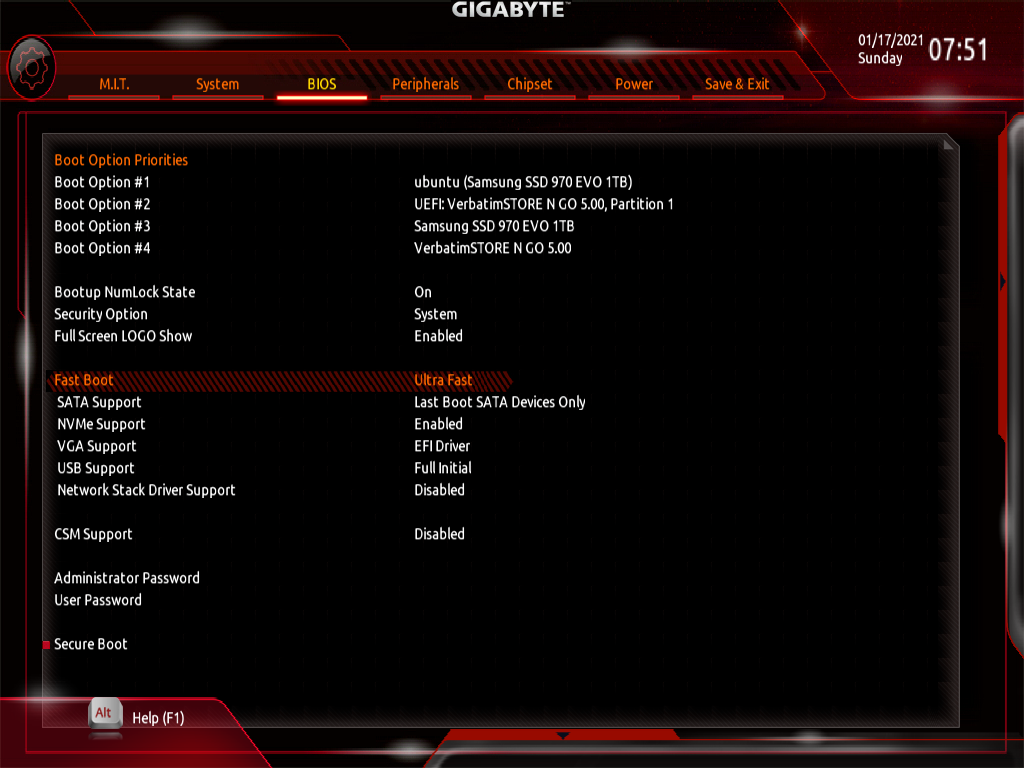
Once I got everything working, I disabled everything that I wasn’t using, and enabled Ultra Fast Boot. This makes the system start faster, but also removes the ability to re-configure the BIOS, because the keyboard will not work. The settings can be reset via a jumper on the motherboard if I need to get back into it.

Software setup

I installed Ubuntu 20.04 LTS. I would suggest sticking with the Long Term Support version of Ubuntu if you are using it for gaming, since Steam is available in the package manager. Bluetooth, Wi-Fi, sound and 3D-accelerated graphics all worked out of the box.

Configuring Ubuntu

These settings make Ubuntu act less like a desktop, and more like a Home Theater PC.

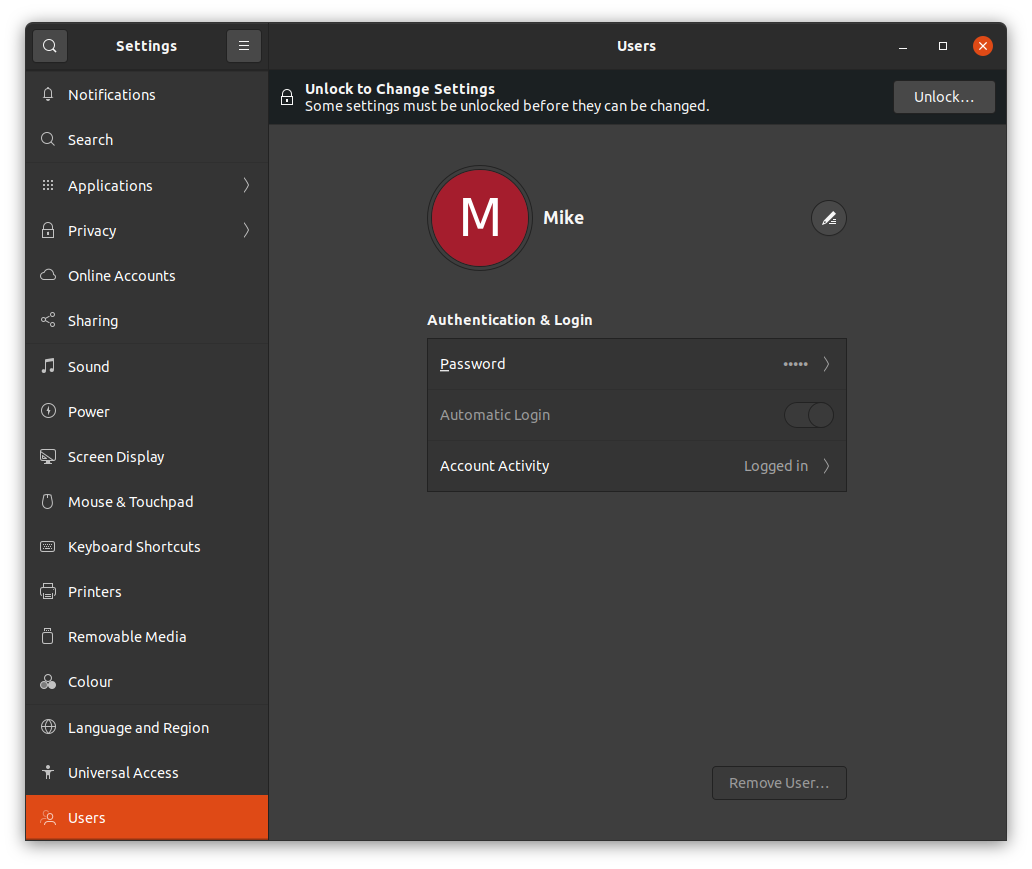
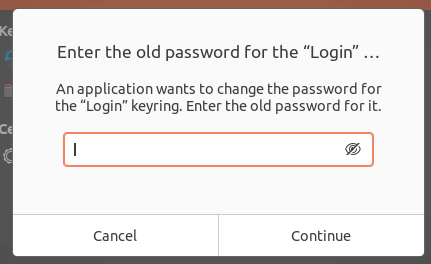
First I enabled automatic login, then cleared the password for the login keyring. This avoids needing to use a keyboard on startup, or getting prompted for a password when web browsers attempt to access the keyring.

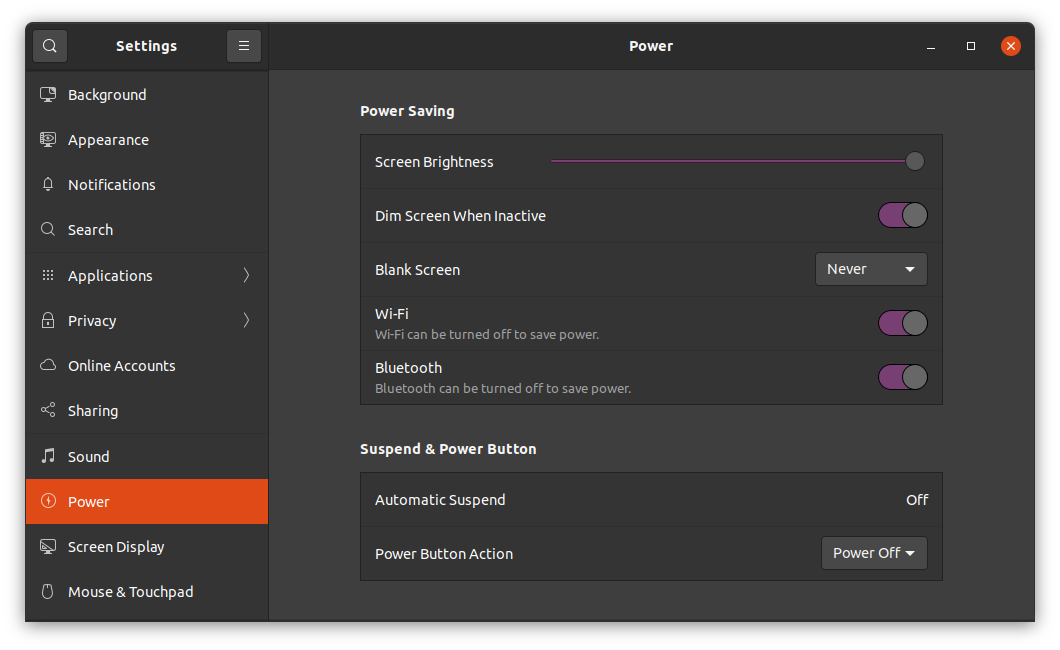
Under power settings, I set “Blank Screen” to “Never”, and Automatic Suspend to “Off”.

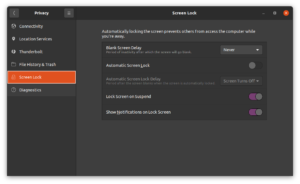
Under screen lock settings, I set “Blank Screen Delay” to “Never”, and disabled “Automatic Screen Lock”.

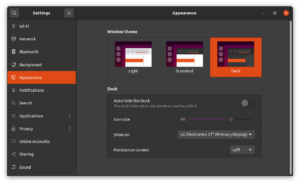
Next, I set the theme to dark mode, the display output to 1920×1080 60Hz, and the audio output device to HDMI. The display is 4K, but compatibility will be challenging enough without adding scaling issues in there, so I’m using a lower resolution for now.

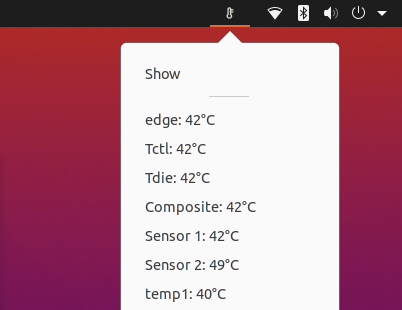
Lastly, I set up a tool called psensor to start on boot, so that I could check temperatures.

Installing applications

Linux gaming has advanced a fair bit recently, and since it is a large topic, I won’t try to cover in too much detail here. I’m connecting this computer up to a TV, so this type of setup is only suitable for games with controller support. Still, this includes:

  • Native Linux games.
  • Windows games running via a compatibility layer (WINE/DXVK or Proton).
  • Games for other systems played through an emulator.

An extensive catalogue is available through the Linux version of Steam, which I installed via the Ubuntu package manager. I could have set Steam to launch on startup and call it a day, but there are two other launchers which I installed alongside it:

  • Lutris (from the lutris-team/lutris PPA).
  • Retroarch (from the libretro/testing PPA)

Next, I installed WINE (32 bit and 64 bit), winetricks, and gamemode from the Ubuntu package manager, then Proton GE from GitHub. Proton GE is a widely-used Proton fork, which integrates fixes from upstream WINE. This gave me several different run-times for Windows applications, and simply switching between them or adding some environment variables has been sufficient to work around every compatibility issue that I’ve encountered so-far.

Lastly, I installed Kodi from the team-xbmc/ppa PPA.

Game testing

For this section, I’m listing out a few games from my library that I’ve tested. As a quick reminder, this is all running on integrated graphics, on Linux.

I was mainly checking that I could get a (subjectively) playable frame-rate, and that I could get two controllers to work in local multiplayer where available.

Steam

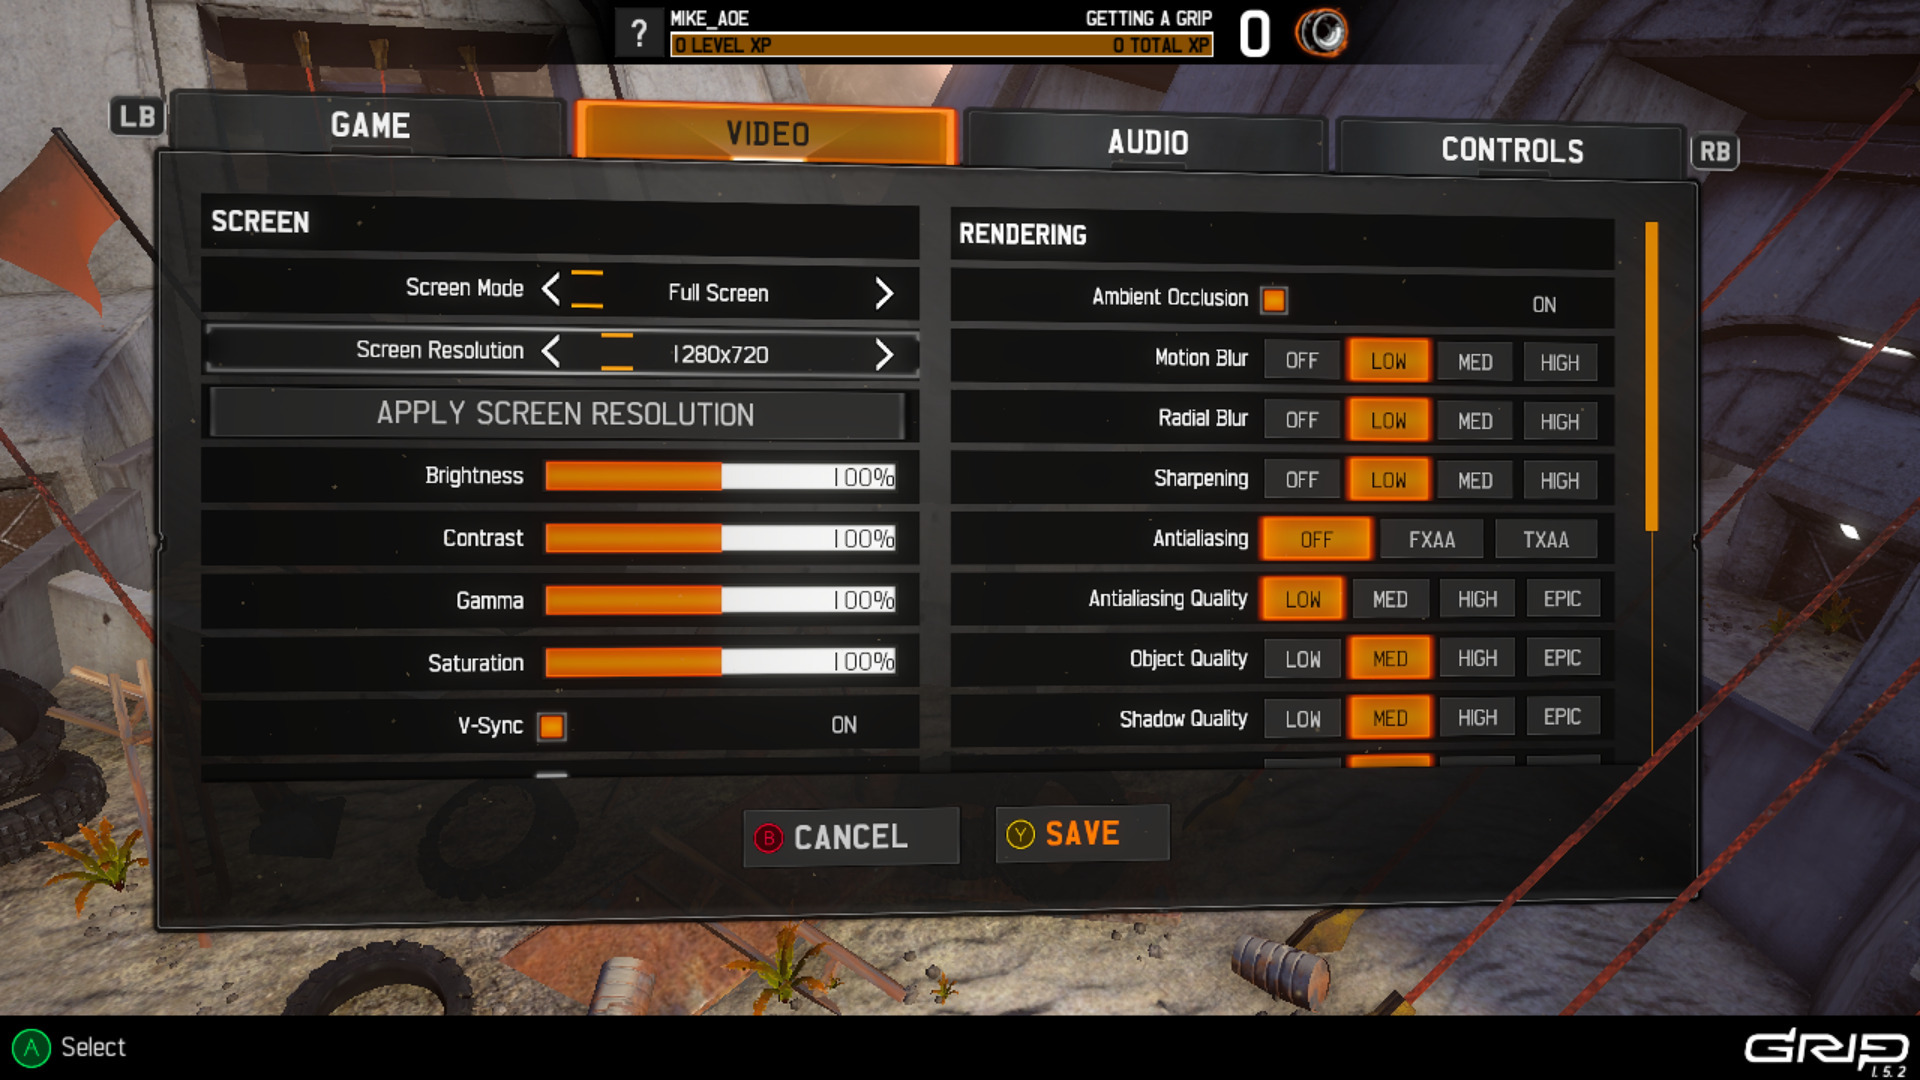
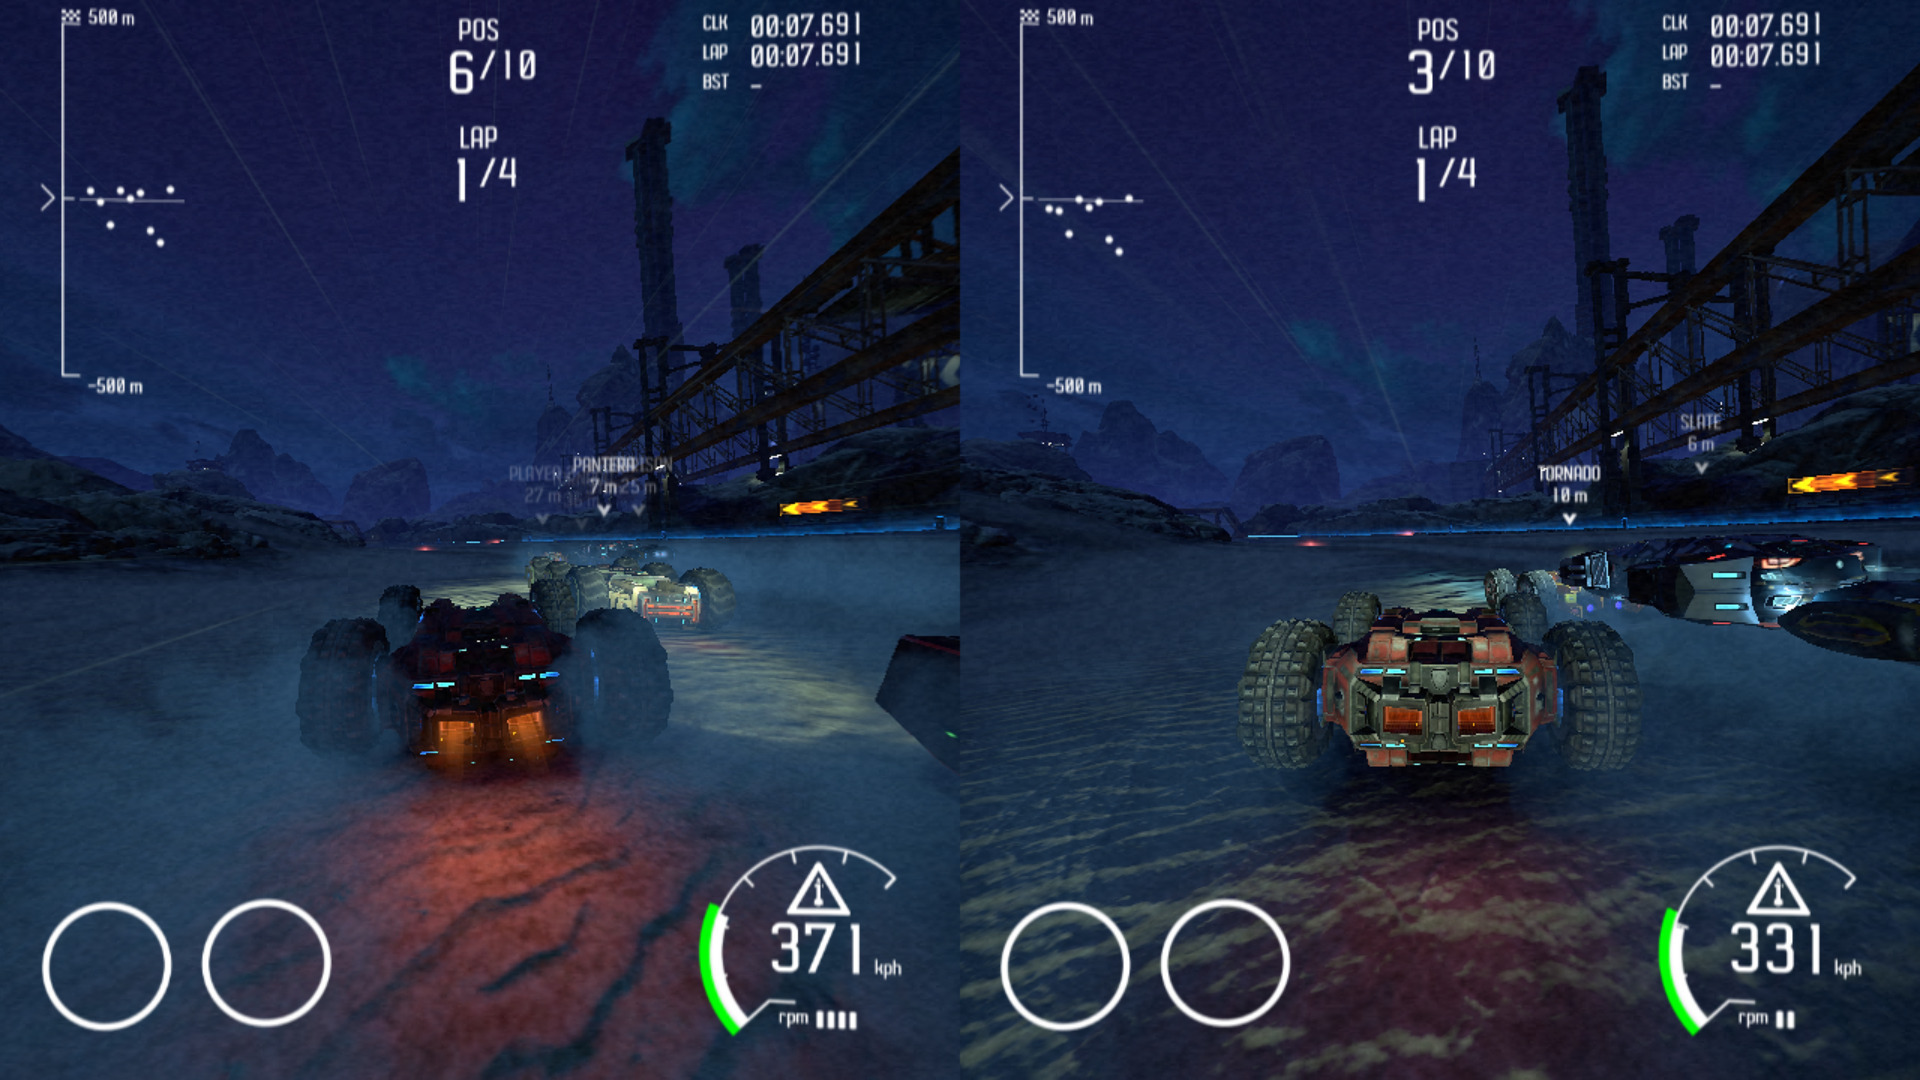
GRIP combat racing runs via Proton. It is a fast-paced racing game, has local split-screen multiplayer, and runs very smoothly at 720p.

Untitled Goose Game also runs via Proton. It has recently added a 2-player mode, and runs at 1080p with no hiccups.

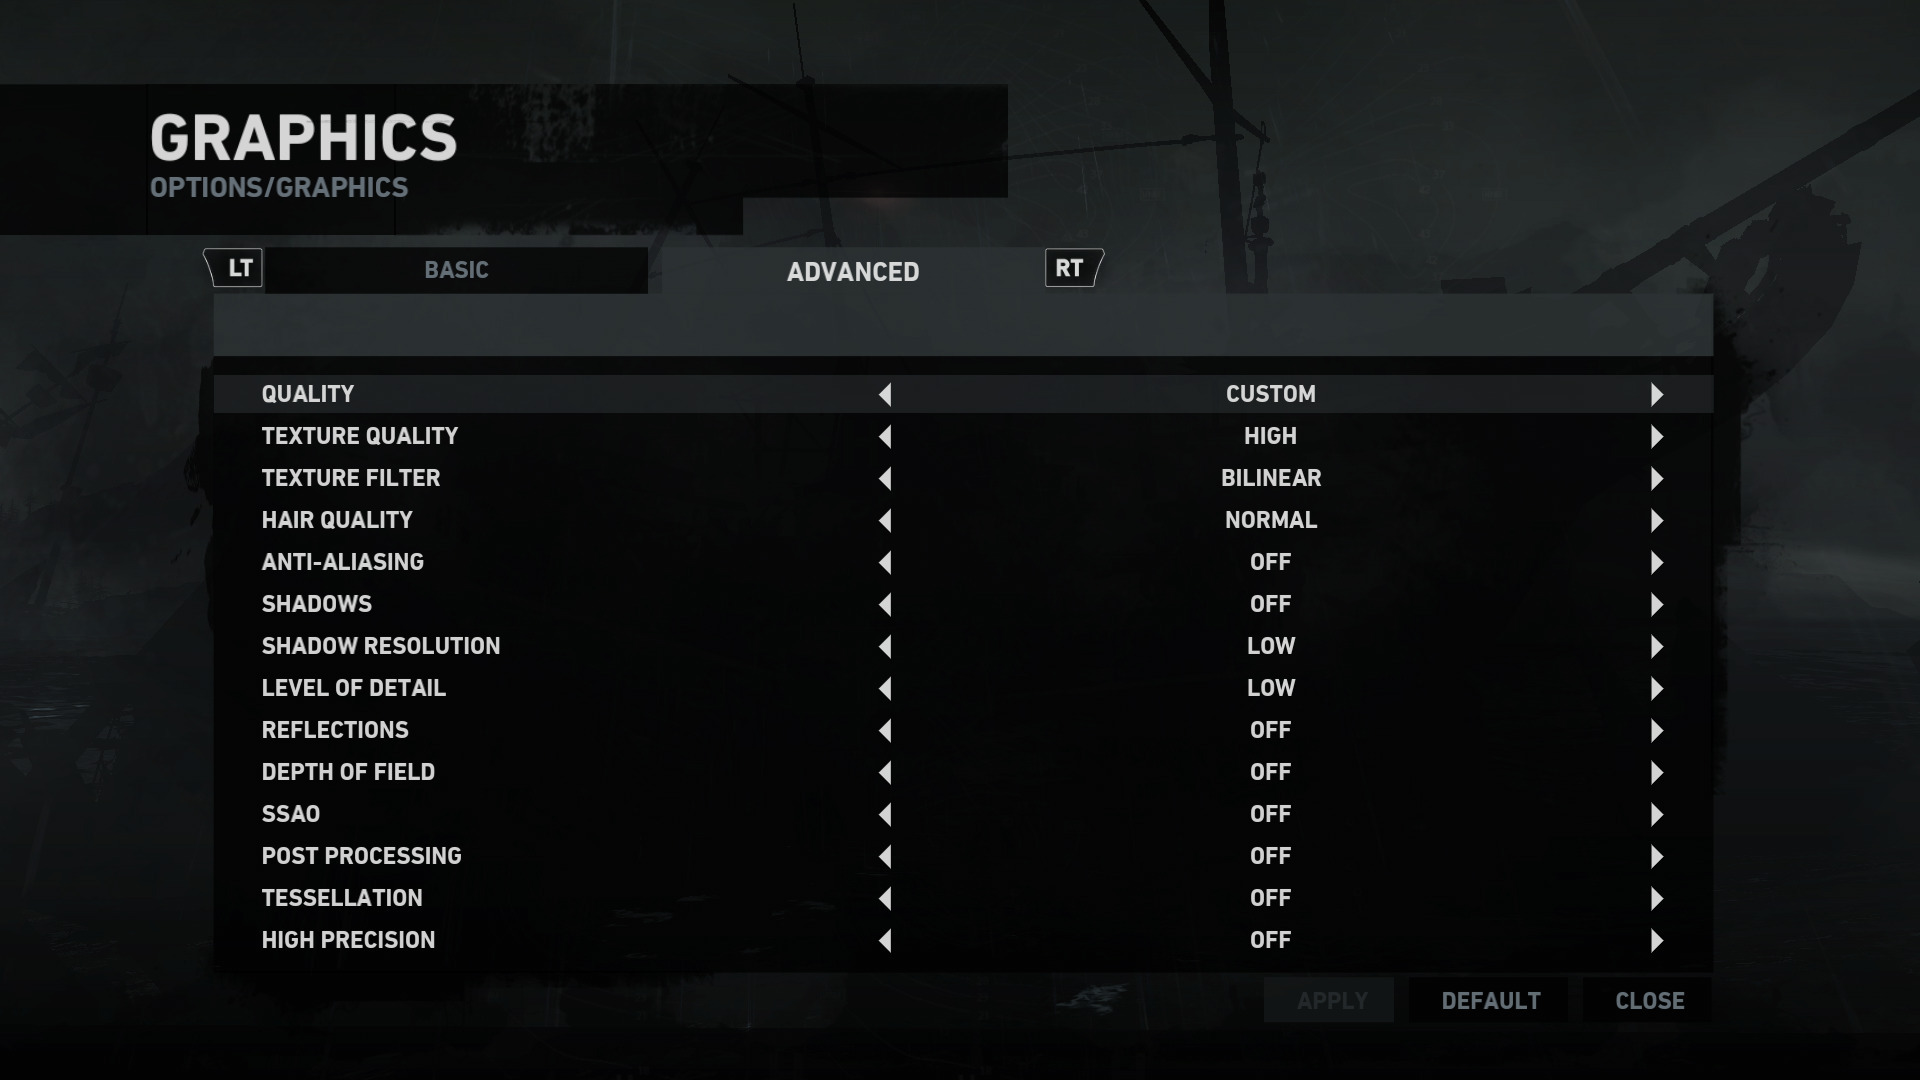
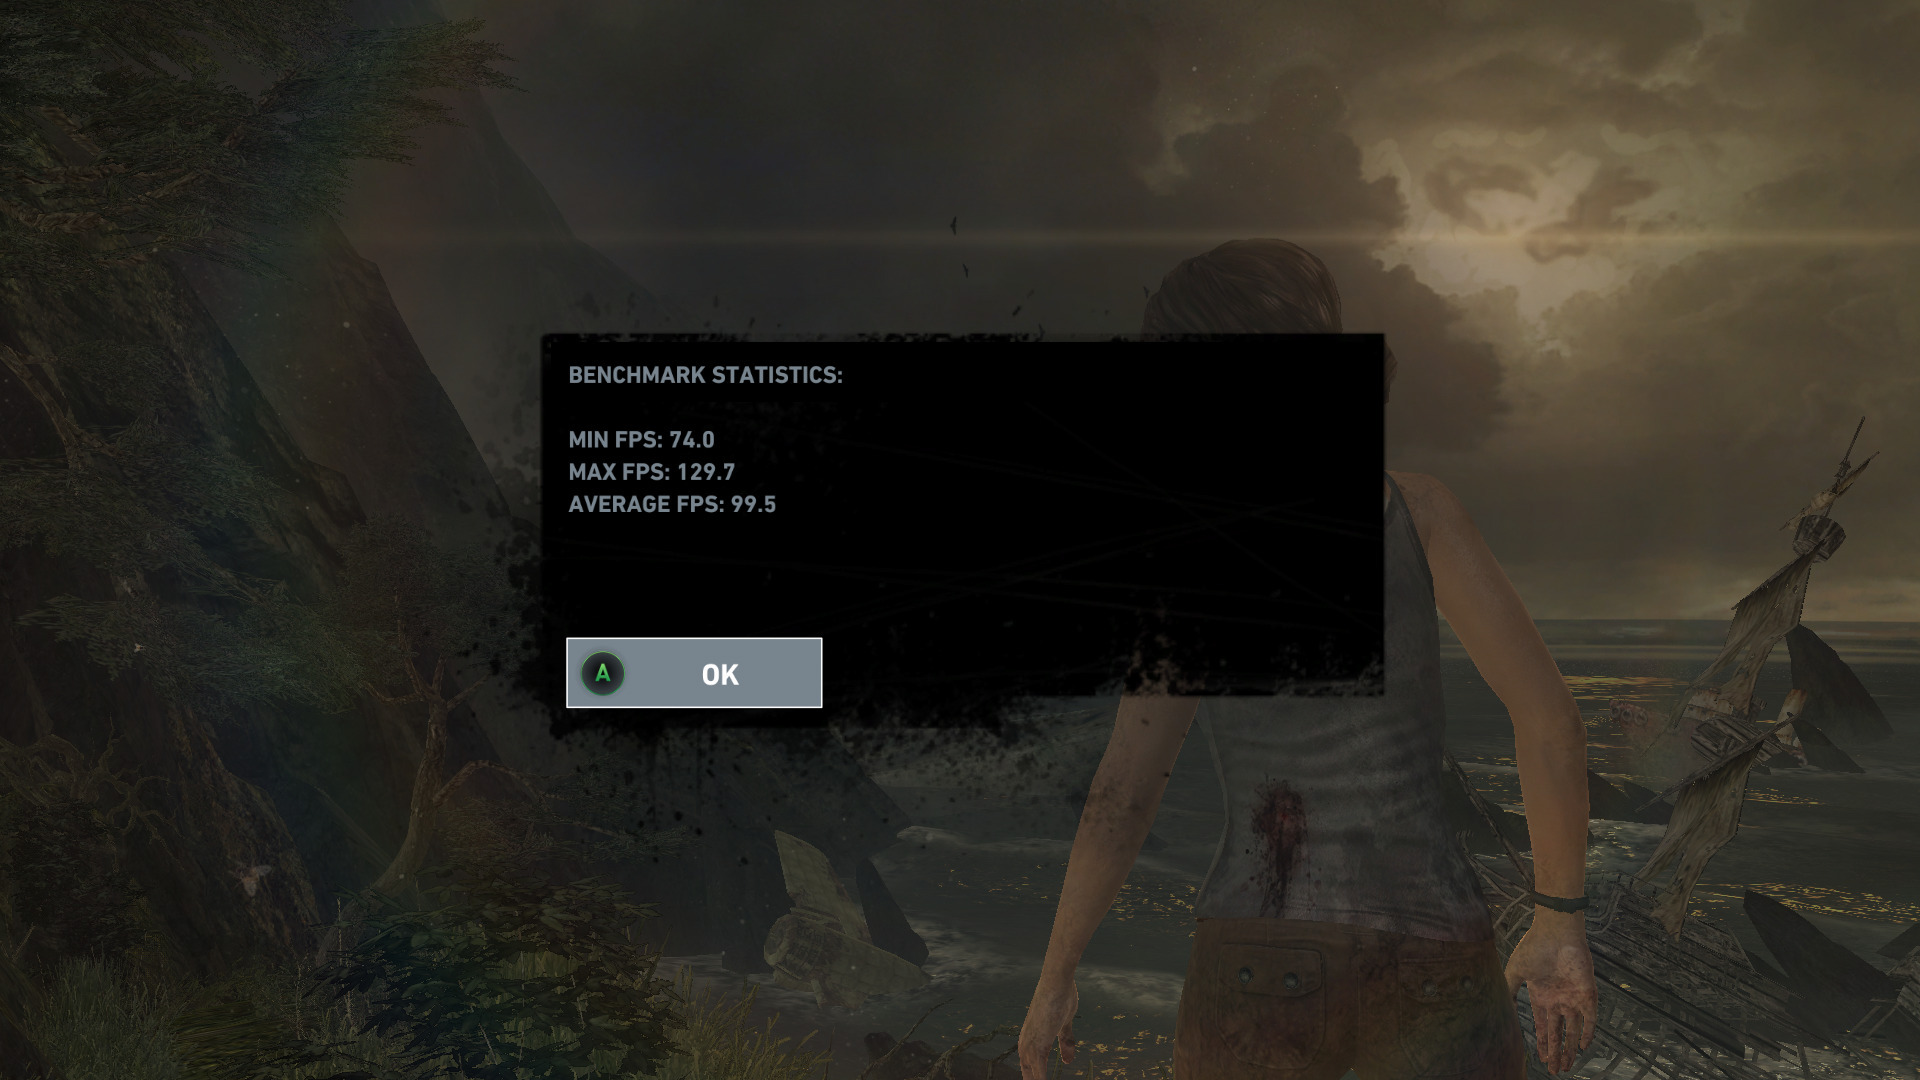
The Tomb Raider reboot is available native for Linux. With low settings, it runs fine at 1080p, with the benchmark indicating a 99 FPS average.

Shadow of the Tomb Raider, also available native for Linux, is a real challenge for this integrated GPU. I am running it at 1080p, lowest settings, though the benchmark comes back with just a 43 FPS average.

Lutris

Lutris has an Epic Games store installer, which runs the store-front under WINE. I decided to try it out, though it is easily the most buggy software mentioned in this blog post.

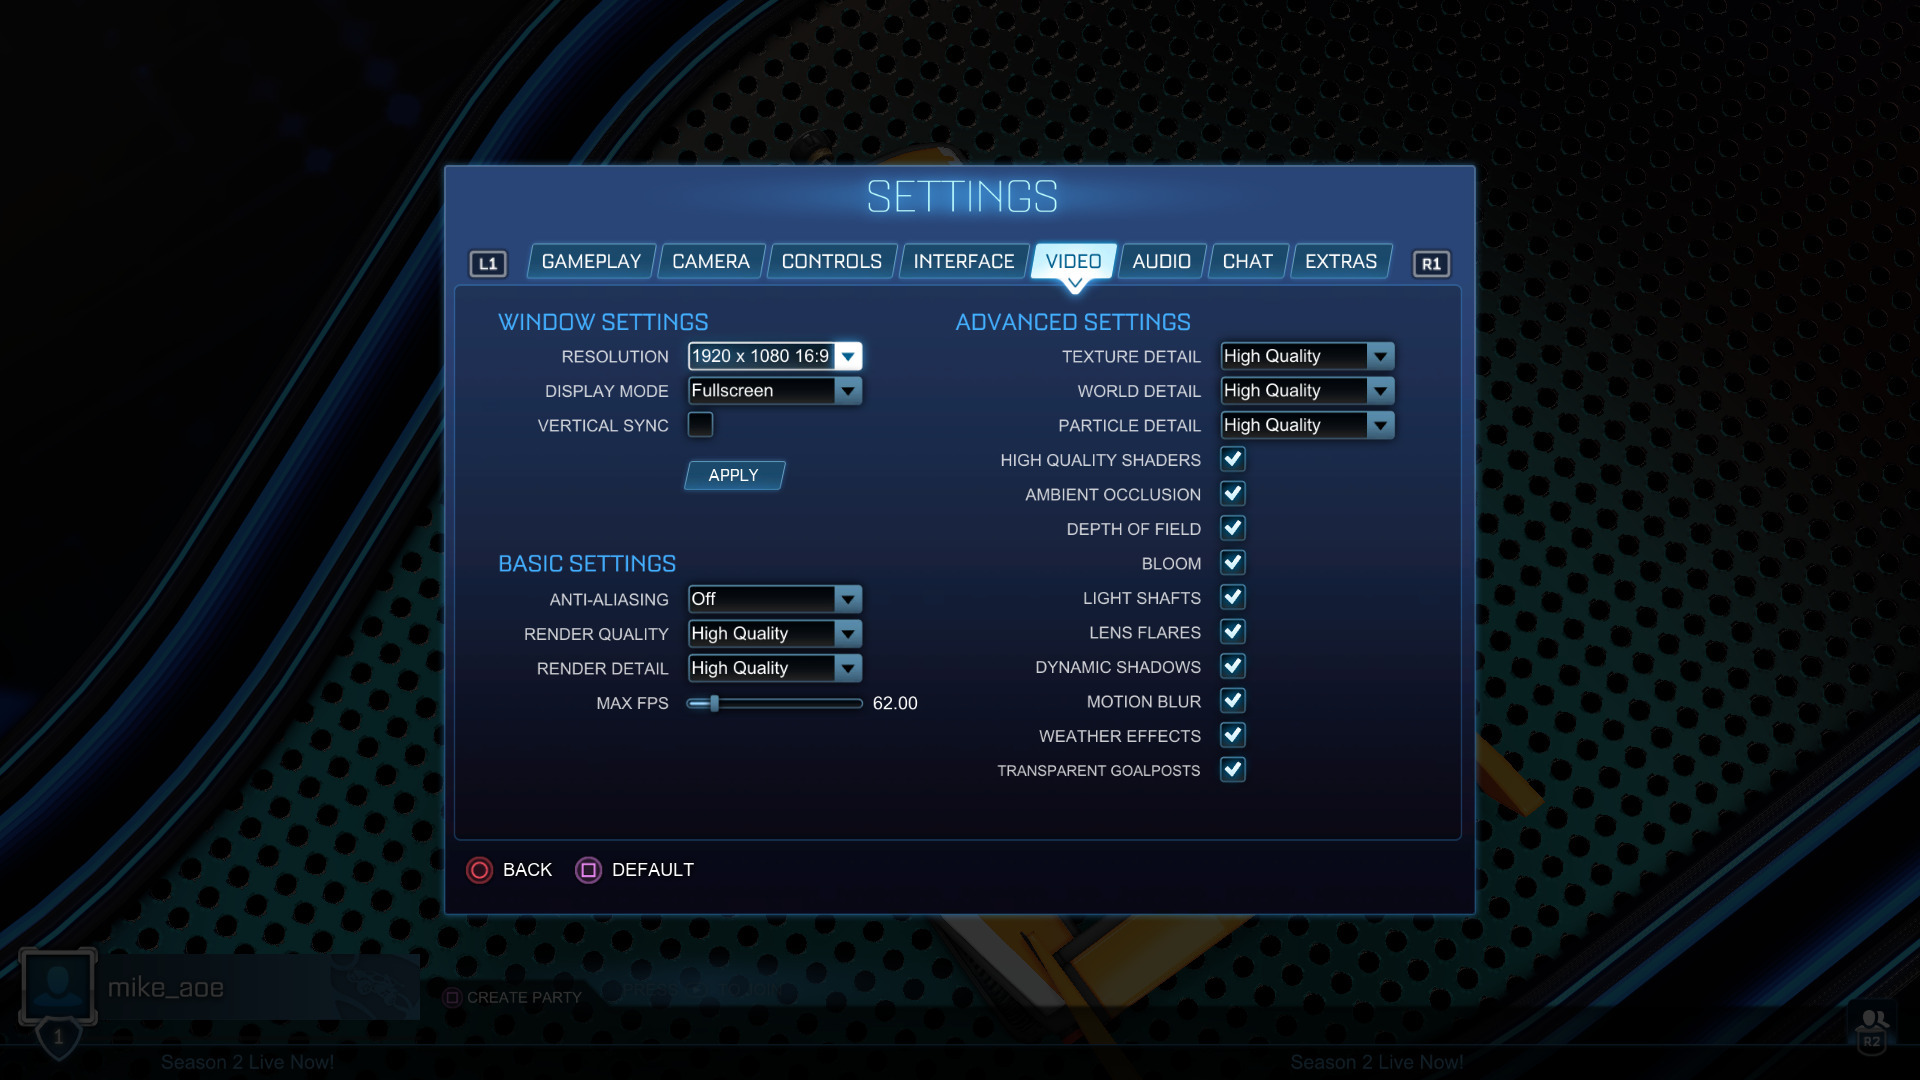
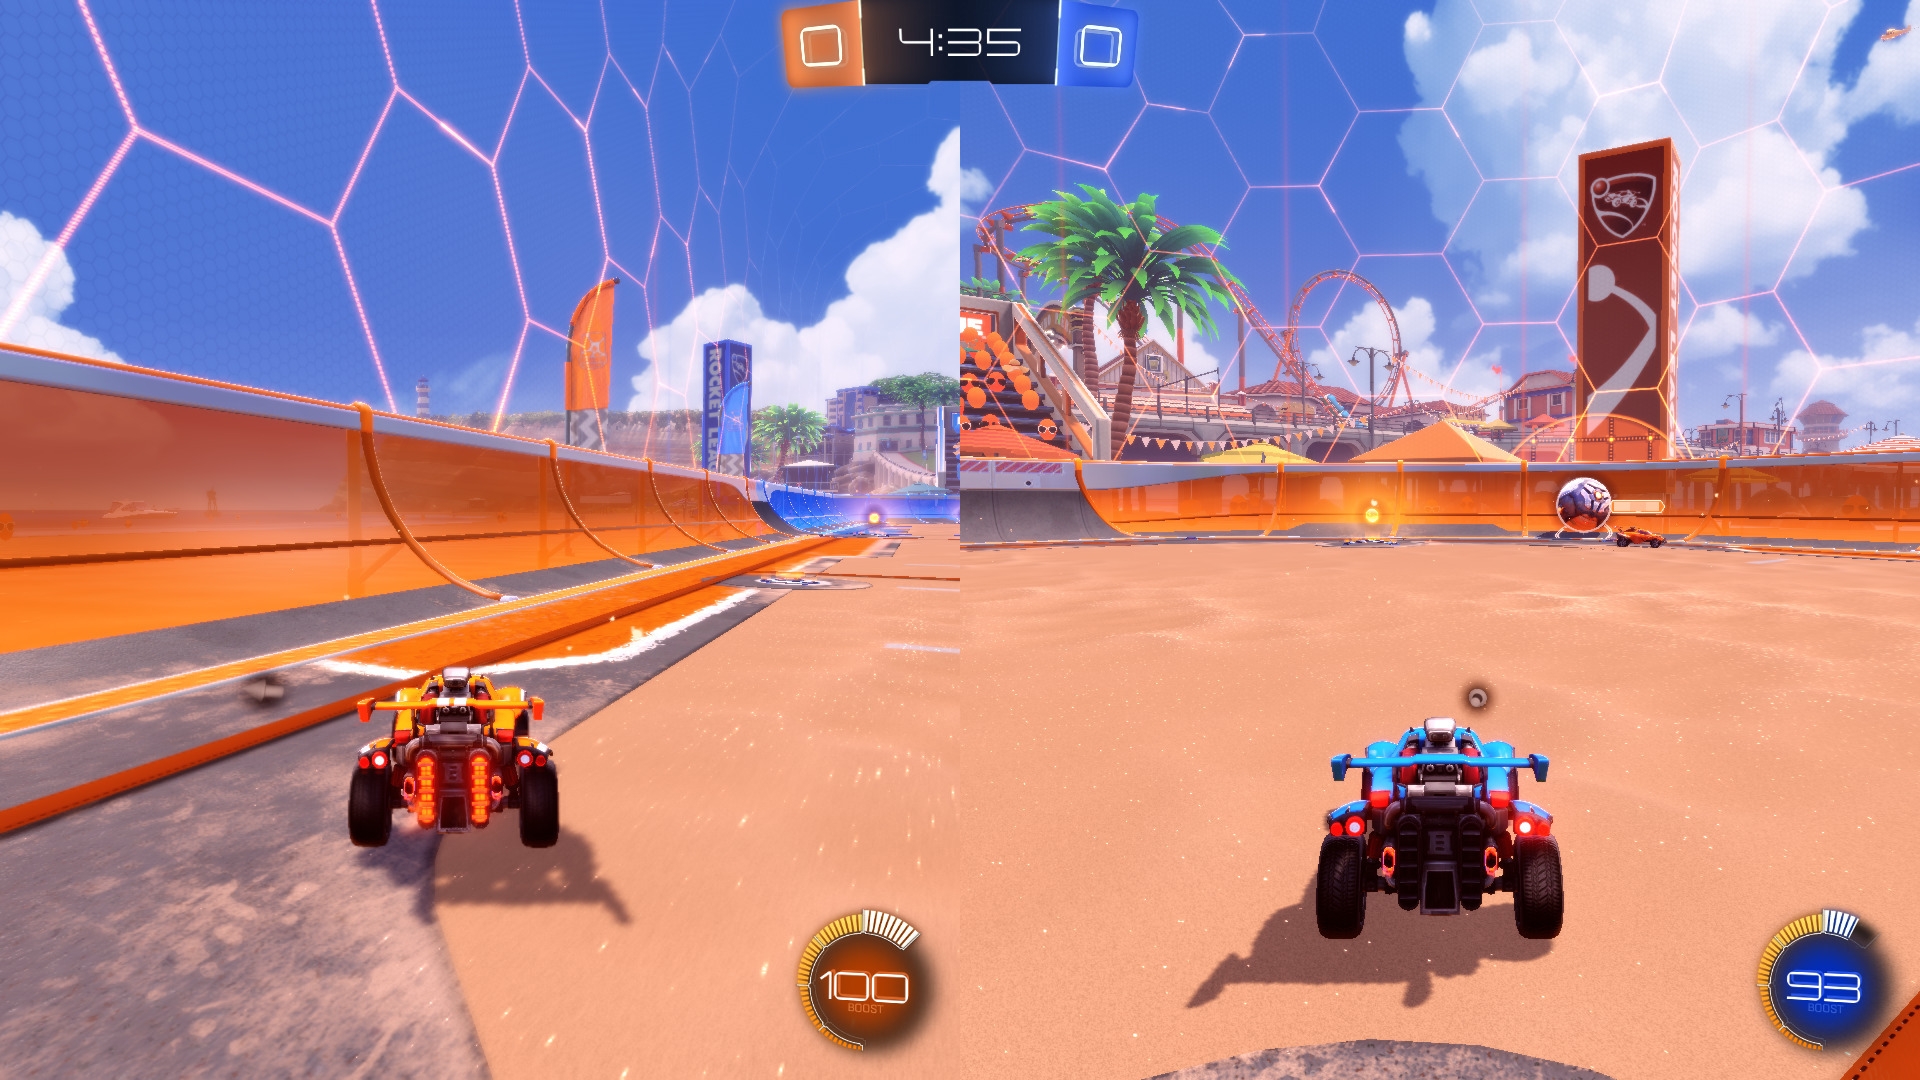
The only the only game I tested from there was Rocket League. Native Linux support was recently dropped from this title on Steam, but the Windows version from Epic runs just fine on integrated graphics, and has local multiplayer. I run it at 1080p.

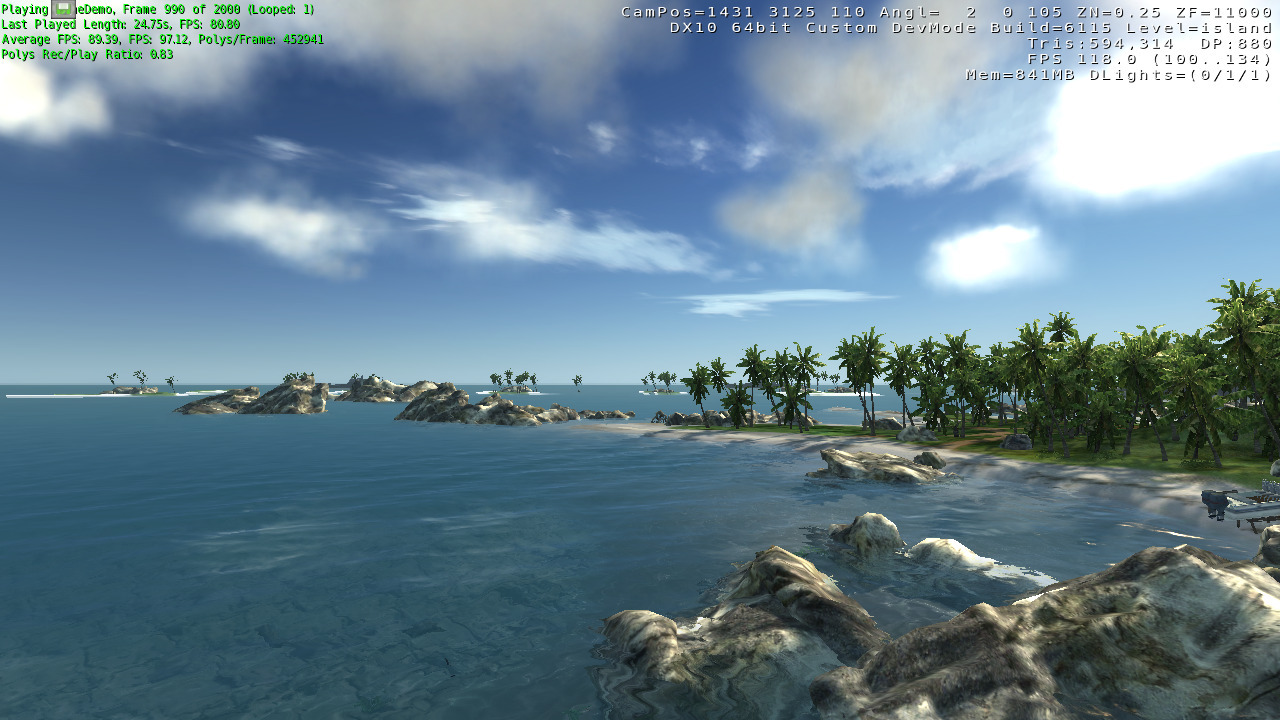
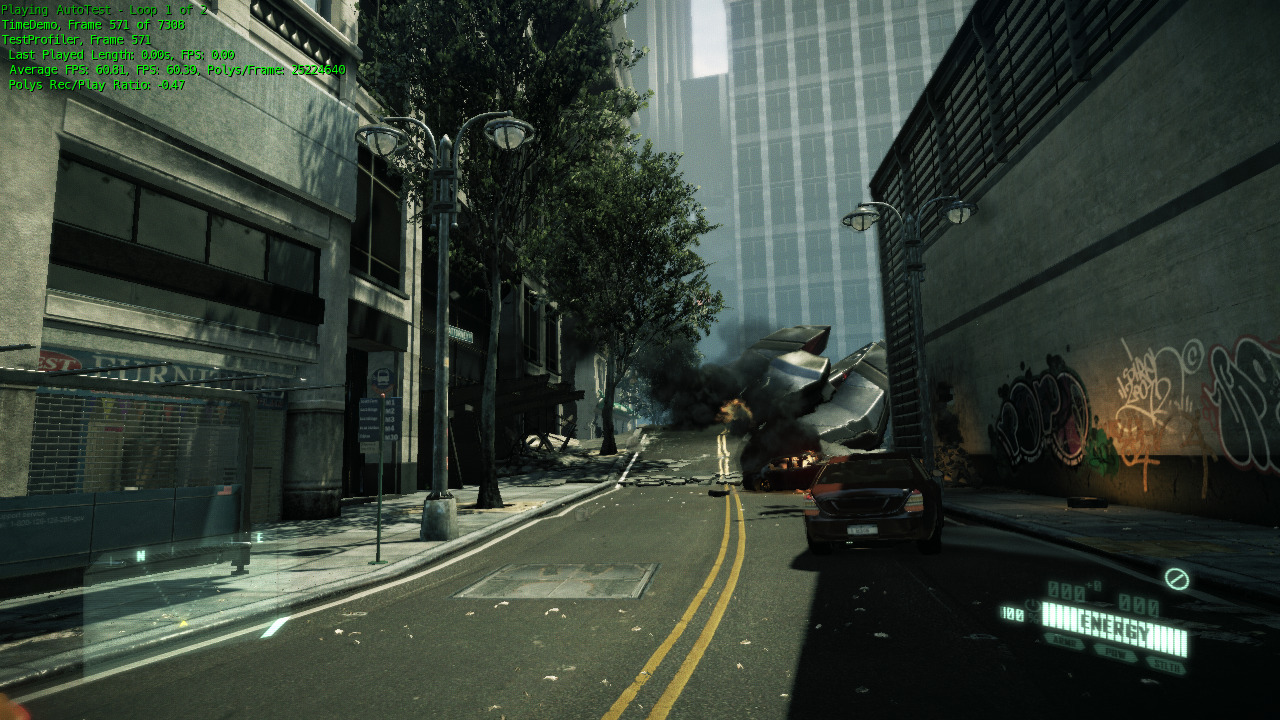
I also tested the original Crysis by manually setting up a WINE prefix and adding it to Lutris. I run this at 720p, medium settings. After a few loops, the benchmark indicates that this averages 112 FPS, so I could probably increase the quality or resolution.

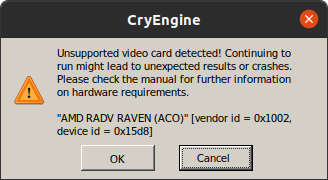
I also tested Crysis 2 via WINE, which had some concerns about my graphics card. I also run it at 720p, using the ‘Gamer’ profile. The benchmark indicates that this averages 60 FPS.

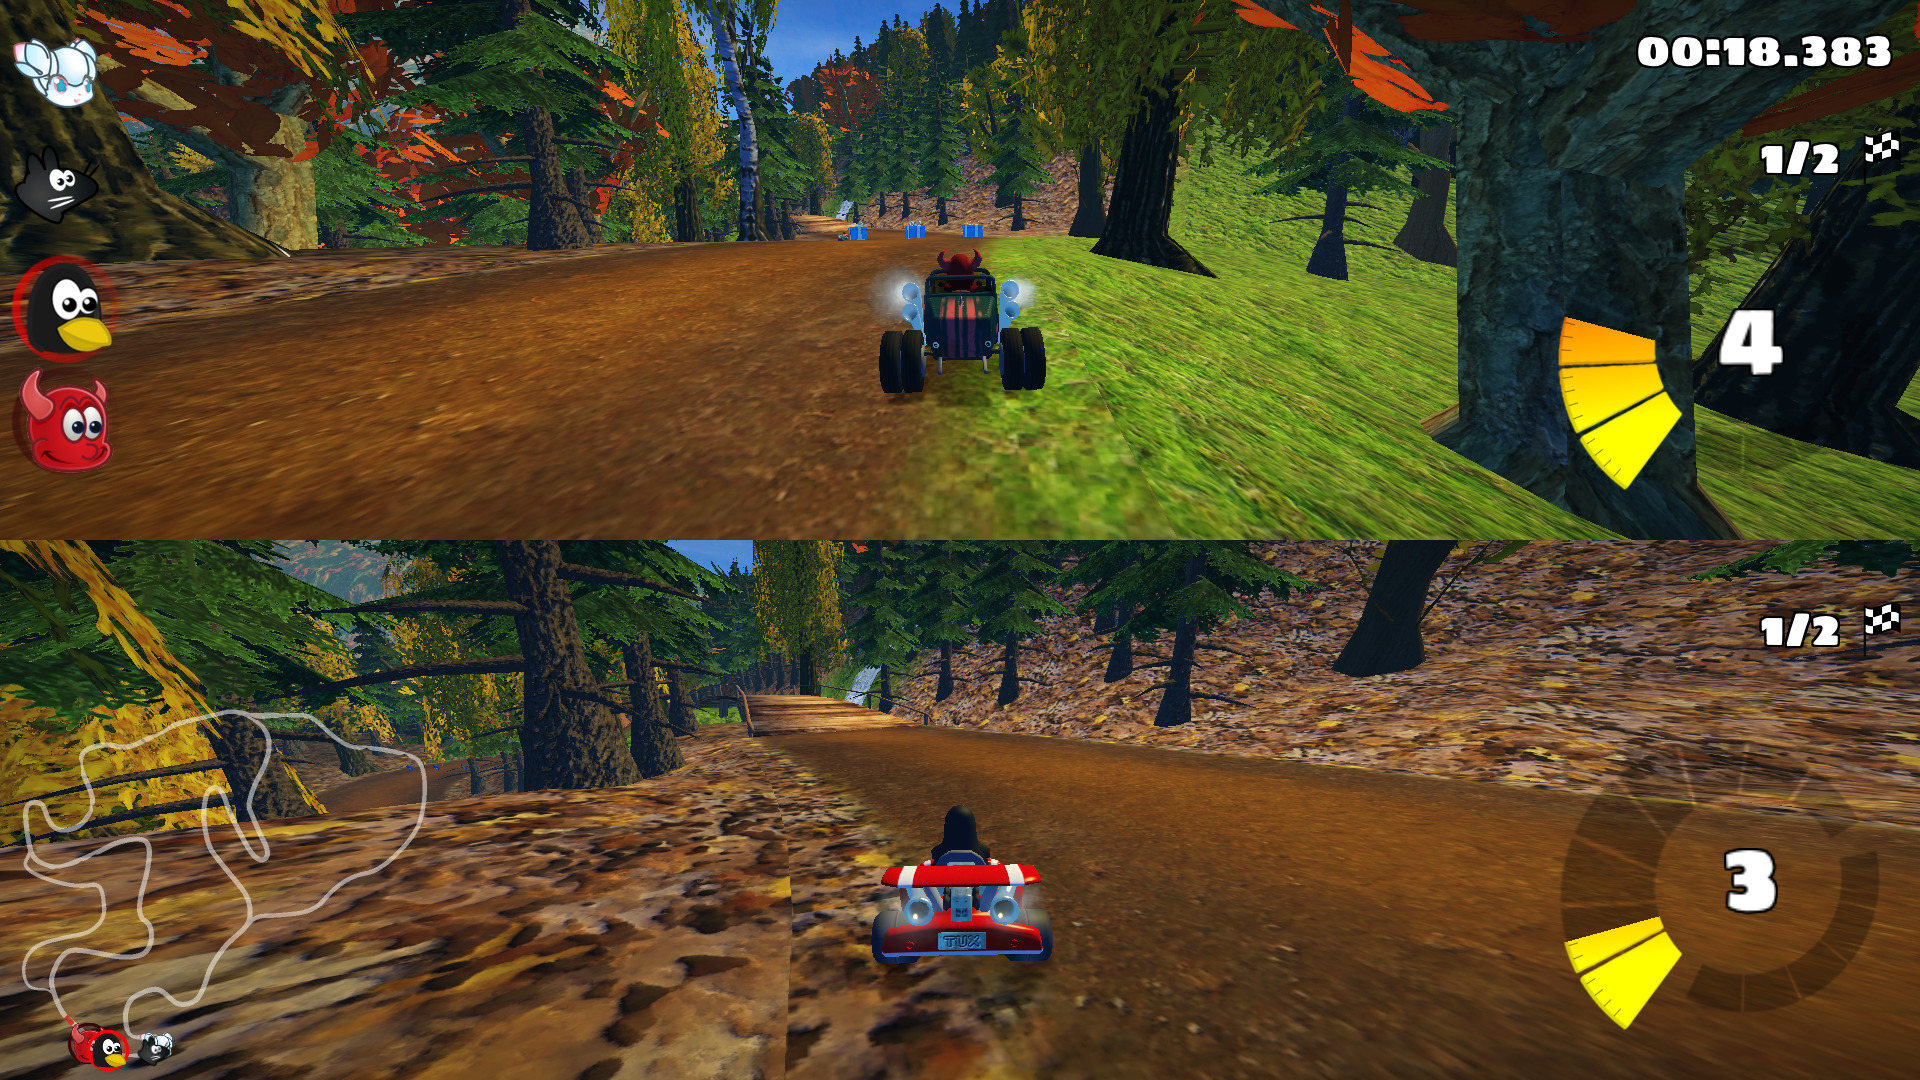
Super Tux Kart is an open source racing game, which can be installed via Lutris. This is a native Linux build, and runs just fine at 1080p. It has controller support and local multiplayer.

Wrap-up

This blog post touches on quite a few topics, so I’ve left out a lot of the details. If you’ve read this far, though, then it’s time to talk about down-sides. Some things did not work as planned.

  • Reading/controlling fan speeds did not work from Linux on this Gigabyte motherboard. This has worked so consistently for me on other hardware, that I did not even think to check for compatibility here. This means I can only set fan speeds in the BIOS.
  • The power supply is noisier than I expected under load. This is due to coil whine, not fan noise.
  • When using the 8BitDo SF30 controller over Bluetooth, RetroArch would pause for 10 or 15 seconds at a time. I tracked this down to the fact that I am connecting it as an Xbox controller, and RetroArch was attempting (and failing) to check its battery level. Connecting the controller after a core has launched avoids the problem.
  • I had hoped to run everything under Wayland, but the Epic Games store had terrible graphical glitches. Everything else on this page (Steam, Lutris, Retroarch) worked on Wayland, and this is apparently due to the way that this app uses OpenGL.

This setup works very well for me, and I am glad to be able to show that it’s possible to do some basic gaming without Microsoft Windows or a dedicated GPU. Still, there are a lot of trade-offs that come from this form-factor and platform, and that’s not for everybody.

If you’re using Linux or a Ryzen APU for gaming, or have tried building in the InWin Chopin case, then please feel free to leave a comment below. I would be interested to know about anything you’ve done differently, and how it worked out.

How to run Tetris on your Raspberry Pi

This is a simple walkthrough on how to install my Tetris clone, Blocks, on a Raspberry Pi.

On most computers running Debian (or Raspbian in the case of the Raspberry Pi), it’s as simple as clone, compile, run:

sudo apt-get install libncurses5-dev doxygen
git clone https://github.com/mike42/blocks
cd blocks
make
./bin/blocks

If you have any issues running this, then you need to fetch a newer version of GCC, as this needs C++11 support to compule (see last section for instructuins).

But if all goes to plan, you will get something like this in your terminal:

2015-04-tetris

Use the keyboard to control the game:

Move
Right, down, left
Rotate
Up
Drop
Spacebar
Quit
q

Get a screen

Basically any project with graphics can benefit from one of these. Simply add on a TFT shield, such as PiTFT to create a tiny console:

2015-04-tetris

Of course, this is still keyboard-controlled, but with some hacking, I’m sure you could map touch events to keyboard actions.

Troubleshooting: Update GCC

The Raspbian spftware image which many Raspberry Pi’s have is slightly too old to compile Blocks, which requires C++11 support.

Luckily, it’s very easy to upgrade from wheezy to jessie to add it. You know you need to do this if you get this error compiling:

$ git clone https://github.com/mike42/blocks
$ make
mkdir -p bin
g++ src/main.cpp src/blocks_game.cpp src/blocks_shape.cpp -o bin/blocks -lcurses -lrt -std=c++11 -Wall
cc1plus: error: unrecognized command line option ‘-std=c++11’
Makefile:2: recipe for target 'default' failed
make: *** [default] Error 1

Generally this means you don’t have GCC 4.8, which is not available in wheezy edition of Raspian.

$ g++ --version
g++ (Debian 4.6.3-14+rpi1) 4.6.3
Copyright (C) 2011 Free Software Foundation, Inc.
This is free software; see the source for copying conditions.  There is NO
warranty; not even for MERCHANTABILITY or FITNESS FOR A PARTICULAR PURPOSE.

So to summarise this thread, you need to:

nano /etc/apt/sources.list

Find this line:

deb http://mirrordirector.raspbian.org/raspbian/ wheezy main contrib non-free rpi

And change the word “wheezy” to “jessie”:

deb http://mirrordirector.raspbian.org/raspbian/ jessie main contrib non-free rpi

You can then update everything with:

sudo apt-get update && sudo apt-get dist-upgrade

You are now running the newer jessie release, which gives you access to the GCC 4.8 package we need:

apt-get install g++-4.8

So we can pick up where we left off, and compile the game:

make
./bin/blocks

Productivity: De-activate social networking on a schedule with cron

Sometimes you need to block out distractions for a set amount of time. One of these is social networking, and it’s fairly early to temporarily break it (all for productivity of course!).

Mac or Linux users can break example.com like this:

echo "127.0.0.1 example.com www.example.com" >> /etc/hosts

This tells the computer that it hosts example.com, so it wont load it from the internet.

And to compliment this, we have sed, which can delete lines from a file in-place based on a pattern:

sed -i '/example.com/d' /etc/hosts

Replace example.com above with your social network of choice, and have a shot. It will take a few minutes to have an effect, because of open connections and your computer’s DNS cache.

Scheduling it in

Cron is the go-to solution for scheduling any command on Unix. We’ll run this as root, as normal users don’t have permission to edit /etc/hosts:

su
crontab -e

If prompted, select nano as an editor.

If, for example, 6pm — 8pm weekdays is a distraction-free time for you, you would schedule the first command for 18:00 on days 1-5, and the second for 20:00 on days 1-5:

# m h  dom mon dow   command
0 18 * * 1-5 echo "127.0.0.1 example.com www.example.com" >> /etc/hosts
0 20 * * 1-5 sed -i '/example.com/d' /etc/hosts

If your use case calls for something more advanced, consider learning how to use squid to manage web traffic.

When you break something..

If you accidentally delete your /etc/hosts while experimenting, you can fetch its contents from /var/lib/dpkg/info/netbase.postinst (source).

Winning 2048 game with key-mashing?

This new, simple, addictive game is out, called 2048. You need to slide two numbers together, resulting in a bigger number, in ever-increasing powers of two. You get 2048, and you win.

2014-03-2048-1

I noticed that somebody already wrote neat AI for it, although it does run quite slowly. But then I also noticed a friend mashing keys in a simple pattern, and thought I should test whether this was more effective. The answer: it kinda is.

2014-03-2048-2

At least in the first half of the game, a simple key-mashing pattern is a much faster way to build high numbers. The PHP script below will usually get to 512 without much trouble, but rarely to 1024. I would suggest running it for a while, and then taking over with some strategy.

The script

This script spits out commands which can be piped to xte for some automatic key-mashing on GNU / Linux. Save as 2048.php

#!/usr/bin/env php
mouseclick 1
<?php
for($i = 0; $i < 10; $i++) {
	move("Left", 1);
	move("Right", 1);
}

while(1) {
	move("Down", 1);
	move("Left", 1);
	move("Down", 1);
	move("Right", 1);
}

function move($dir, $count) {
	for($i = 0; $i < $count; $i++) {
		echo "key $dir\nsleep 0.025\n";
		usleep(25000);
	}
}

And then in a terminal, run this then click over to a 2048 game:

sleep 3; php 2048.php | xte

Good luck!

USB Missile Launcher

Back in February I coded up a userspace driver to control a USB missile launcher manufactured by DreamCheeky. The video below shows one of the example programs in action.


The code being executed in the video is from basic-sync.cpp, the simplest demonstration I could think of:

Missile *launcher = new Missile(launcherHandle);

launcher -> async = false;
launcher -> move(ML_DOWN, 1000);
launcher -> move(ML_UP, 1000);
launcher -> move(ML_LEFT, 1000);
launcher -> move(ML_RIGHT, 1000);
launcher -> fire();

delete launcher;

The USB driver uses libusb, and was coded in response to this trivial bug not being fixed in the Ubuntu repositories for over a year.

Making an XKCD-style password generator in C++

I’m learning C++ at the moment, and I don’t find long tutorials or studying the standard template library particularly fun.

Making this type of password-generator is not new, but it is a nice practical exercise to start out in any language.

1. Get a list of common English words

Googling “common English words” yielded this list, purporting to contain 5,000 words. Unfortunately it contains almost 1,000 duplicates and numerous non-words! Wiktionary has a much higher-quality list of words compiled from Project Gutenberg, but the markup looks a bit like this:

==== 1 - 1000 ====
===== 1 - 100 =====
[[the]] = 56271872
[[of]] = 33950064
[[and]] = 29944184
[[to]] = 25956096
[[in]] = 17420636
[[I]] = 11764797  

Noting the wikilinks surrounding each word, I put together this PHP script to extract the link destinations and called it get-wikilinks.php:

#!/usr/bin/php
<?php
/* Return list of wikilinked words from input text */
$text = explode("[[", file_get_contents("php://stdin"));
foreach($text as $link) {
	$rbrace = strpos($link, "]]");
	if(!$rbrace === false) {
		/* Also escape on [[foo|bar]] links */
		$pipe = strpos($link, "|");
		if(!$pipe === false && $pipe < $rbrace) {
			$rbrace = $pipe;
		}
		$word = trim(substr($link, 0, $rbrace))."n";
		if(strpos($word, "'") === false && !is_numeric(substr($word, 0, 1))) {
			/* Leave out words with apostrophes or starting with numbers */
			echo $word;
		}
	}
}

The output of this script is much more workable:

$ chmod +x get-wikilinks.php
$ cat wikt.txt | ./get-wikilinks.php
the
of
and
to
in
I

Using sort and uniq makes a top-notch list of common words, ready for an app to digest:

$ cat wikt.txt | ./get-wikilinks.php | sort | uniq > wordlist.txt

2. Write some C++

There are two problems being solved here:

  • Reading a file into memory
    • An ifstream is used to access the file, and getline() will return false when EOF has been reached
    • Each line is loaded into a vector (roughly the same type of container as an ArrayList in Java), which is resized dynamically and accessed like an array.
  • Choosing random numbers
    • These are seeded from a random_device, being more cross-platform than reading from a file like /dev/urandom.
    • Note that random is new to C++11.
pw.cpp
#include <fstream>
#include <vector>
#include <string>
#include <iostream>
#include <random>
#include <cstdlib>

using namespace std;

int main(int argc, char* argv[]) {
    const char* fname = "wordlist.txt";

    /* Parse command-line arguments */
    int max = 1;
    if(argc == 2) {
        max = atoi(argv[1]);
    }

    /* Open word list file */
    ifstream input;
    input.open(fname);
    if(input.fail()) {
        cerr << "ERROR: Failed to open " << fname << endl;
    }

    /* Read to end and load words */
    vector<string> wordList;
    string line;
    while(getline(input, line)) {
        wordList.push_back(line);
    }

    /* Seed from random device */
    random_device rd;
    default_random_engine gen;
    gen.seed(rd());
    uniform_int_distribution<int> dist(0, wordList.size() - 1);

    /* Output as many passwords as required */
    const int pwLen = 4;
    int wordId, i, j;
    for(i = 0; i < max; i++) {
        for(j = 0; j < pwLen; j++) {
            cout << wordList[dist(gen)] << ((j != pwLen - 1) ? " " : "");
        }
        cout << endl;
    }

    return 0;
}

3. Compile

Lots of projects in compiled languages have a Makefile, so that you can compile them without having to type all the compiler options manually.

Makefiles are a bit heavy to learn properly, but for a project this tiny, something simple is fine:

default:
	g++ pw.cpp -o pw -std=c++11

clean:
	rm -f pw

Now we can compile and run the generator:

make
./pw

The output looks like this for ./pw 30 ("generate 30 passwords"):

Chromium B.S.U.

I was looking for the Chromium web browser and installed this mysterious chromium-bsu package at the suggestion of the package manager:

mike@mikebox:~$ sudo apt-get install chromium
...
Package chromium is not available, but is referred to by another package.
...
However the following packages replace it:
  chromium-bsu

All the most important discoveries were made by accident — including penicillin, teflon, coke, and what turned out to be a really cool space-shooter game.

Chromium B.S.U. screenshot

About an hour of clicking later— back to work. Installing the wrong package is a real time sink!

Gettting lost with depth-first search

I was thinking about how to make mazes, and ended up making a maze generator.

It’s based on ‘depth-first search’, a recursive algorithm to make a spanning tree. Example output below:

Unfortunately for us, java doesn’t particularly like deep recursion, so this generator will fizzle out with an error on really big mazes. On the other hand, it can produce output as HTML:

You can download the maze generator here:

It’s a command line program. From the terminal, the usage is like this:

java -jar MazeGenerator.jar [width] [height] [formatting]

Width/height will change the size of your maze. You can set the format to ‘html’, or type in a character for the filled-in blocks to be. (The default is u2588 ‘Solid block’).