What is ESC/POS, and how do I use it?

ESC/POS is the command set which makes receipt printers print-

Introduction

Before we begin, there’s three things you need to know about ESC/POS:

  1. Most modern receipt printers support it in some form.
  2. It’s dead simple to write.
  3. Commands start with an ESC character (ASCII 27).

The most useful reference for the protocol is this Epson FAQ, which I’ve used previously to implement an ESC/POS printer driver for PHP.

Download printing library (PHP code)

Incidentally, the receipt printed in the above video is an example from the escpos-php repository. I’ll step through this print-out, as it demonstrates all of the basic ESC/POS features.

Command structure

Four specific ASCII characters make appearances in the command sequences-

Abbreviation Name Code (Hex)
NUL Null 0x00
LF Line Feed 0x0A
ESC Escape 0x1B
GS Group Separator 0x1D

Regular text is simply sent to the printer, separated by line-breaks. Commands begin with ESC or GS, and are followed by a printable character, and sometimes some numbers

Numbers are simply passed as a character. For example, ‘5’ is passed as 0x05.

Examples

These examples are taken from the output of demo.php.

Initialisation

When you first connect to the printer, you should initialise it. This reverts to default formatting, rather than the triple-underlined double-strike font which the previous print-out may have been using.

The command to reset the formatting is:

ESC @
require __DIR__ . '/autoload.php';
use Mike42\Escpos\Printer;
use Mike42\Escpos\PrintConnectors\FilePrintConnector;
$connector = new FilePrintConnector("/dev/usb/lp0");
$printer = new Printer($connector);
$printer -> close();
00000000  1b 40                                             |.@|
00000003

“Hello world” text

This is the simplest type of receipt, and contains only unformatted text.

'Hello world' receipt example
Text is simply sent to the printer, separated by line-feeds.
require __DIR__ . '/autoload.php';
use Mike42\Escpos\Printer;
use Mike42\Escpos\PrintConnectors\FilePrintConnector;
$connector = new FilePrintConnector("/dev/usb/lp0");
$printer = new Printer($connector);

/* Text */
$printer -> text("Hello world\n");
$printer -> cut();
$printer -> close();
00000000  1b 40 48 65 6c 6c 6f 20  77 6f 72 6c 64 0a 1d 56  |.@Hello world..V|
00000010  41 03                                             |A.|
00000012

Line feeds

The printer can quickly skip past a given number of lines with this command.

Line feed receipt example
The commands are:

LF
ESC d [ number ]
ESC v [ number ]

The first command feeds forward, the second feeds in reverse. From the example, it can be seen that the demo printer does not support reverse paper feeding.

require_once(dirname(__FILE__) . "/escpos-php/Escpos.php");
$printer = new Escpos();

/* Line feeds */
$printer -> text("ABC");
$printer -> feed(7);
$printer -> text("DEF");
$printer -> feedReverse(3);
$printer -> text("GHI");
$printer -> feed();
$printer -> cut();
$printer -> close();
00000000  1b 40 41 42 43 1b 64 07  44 45 46 1b 65 03 47 48  |.@ABC.d.DEF.e.GH|
00000010  49 0a 1d 56 41 03                                 |I..VA.|
00000016

Print modes

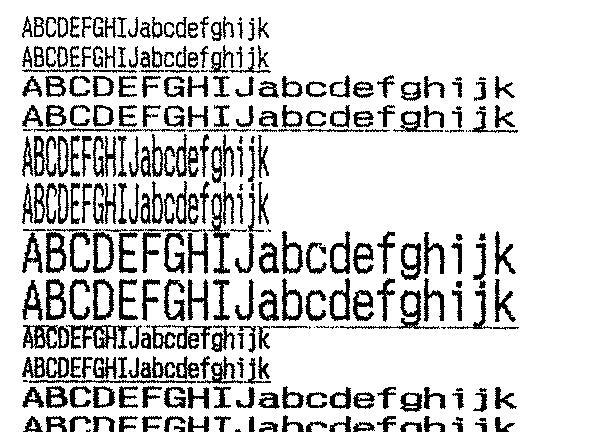
Print modes include font height, width and boldness into a single attribute.

Font mode receipt example
The command is:

ESC ! [number]

The font modes are made from logically OR’ing together a selection of attributes. 0 represents plan Font A text. Mode flags are:

Mode Number
Font A (no mode) 0
Font B 1
Emphasized 8
Double height 16
Double width 32
Underline 128

The example receipt illustrates the effect of each flag.

require __DIR__ . '/autoload.php';
use Mike42\Escpos\Printer;
use Mike42\Escpos\PrintConnectors\FilePrintConnector;
$connector = new FilePrintConnector("/dev/usb/lp0");
$printer = new Printer($connector);

/* Font modes */
$modes = array(
    Printer:::MODE_FONT_A,
    Printer:::MODE_FONT_B,
    Printer:::MODE_EMPHASIZED,
    Printer:::MODE_DOUBLE_HEIGHT,
    Printer:::MODE_DOUBLE_WIDTH,
    Printer:::MODE_UNDERLINE);
for($i = 0; $i < 2 ** count($modes); $i++) {
    $bits = str_pad(decbin($i), count($modes), "0", STR_PAD_LEFT);
    $mode = 0;
    for($j = 0; $j < strlen($bits); $j++) {
        if(substr($bits, $j, 1) == "1") {
            $mode |= $modes[$j];
        }
    }
    $printer -> selectPrintMode($mode);
    $printer -> text("ABCDEFGHIJabcdefghijk\n");
}
$printer -> selectPrintMode(); // Reset
$printer -> cut();
$printer -> close();
00000000  1b 40 1b 21 00 41 42 43  44 45 46 47 48 49 4a 61  |.@.!.ABCDEFGHIJa|
00000010  62 63 64 65 66 67 68 69  6a 6b 0a 1b 21 80 41 42  |bcdefghijk..!.AB|
00000020  43 44 45 46 47 48 49 4a  61 62 63 64 65 66 67 68  |CDEFGHIJabcdefgh|
00000030  69 6a 6b 0a 1b 21 20 41  42 43 44 45 46 47 48 49  |ijk..! ABCDEFGHI|
00000040  4a 61 62 63 64 65 66 67  68 69 6a 6b 0a 1b 21 a0  |Jabcdefghijk..!.|
00000050  41 42 43 44 45 46 47 48  49 4a 61 62 63 64 65 66  |ABCDEFGHIJabcdef|
00000060  67 68 69 6a 6b 0a 1b 21  10 41 42 43 44 45 46 47  |ghijk..!.ABCDEFG|
00000070  48 49 4a 61 62 63 64 65  66 67 68 69 6a 6b 0a 1b  |HIJabcdefghijk..|
00000080  21 90 41 42 43 44 45 46  47 48 49 4a 61 62 63 64  |!.ABCDEFGHIJabcd|
00000090  65 66 67 68 69 6a 6b 0a  1b 21 30 41 42 43 44 45  |efghijk..!0ABCDE|
000000a0  46 47 48 49 4a 61 62 63  64 65 66 67 68 69 6a 6b  |FGHIJabcdefghijk|
000000b0  0a 1b 21 b0 41 42 43 44  45 46 47 48 49 4a 61 62  |..!.ABCDEFGHIJab|
000000c0  63 64 65 66 67 68 69 6a  6b 0a 1b 21 08 41 42 43  |cdefghijk..!.ABC|
000000d0  44 45 46 47 48 49 4a 61  62 63 64 65 66 67 68 69  |DEFGHIJabcdefghi|
000000e0  6a 6b 0a 1b 21 88 41 42  43 44 45 46 47 48 49 4a  |jk..!.ABCDEFGHIJ|
000000f0  61 62 63 64 65 66 67 68  69 6a 6b 0a 1b 21 28 41  |abcdefghijk..!(A|
00000100  42 43 44 45 46 47 48 49  4a 61 62 63 64 65 66 67  |BCDEFGHIJabcdefg|
00000110  68 69 6a 6b 0a 1b 21 a8  41 42 43 44 45 46 47 48  |hijk..!.ABCDEFGH|
00000120  49 4a 61 62 63 64 65 66  67 68 69 6a 6b 0a 1b 21  |IJabcdefghijk..!|
00000130  18 41 42 43 44 45 46 47  48 49 4a 61 62 63 64 65  |.ABCDEFGHIJabcde|
00000140  66 67 68 69 6a 6b 0a 1b  21 98 41 42 43 44 45 46  |fghijk..!.ABCDEF|
00000150  47 48 49 4a 61 62 63 64  65 66 67 68 69 6a 6b 0a  |GHIJabcdefghijk.|
00000160  1b 21 38 41 42 43 44 45  46 47 48 49 4a 61 62 63  |.!8ABCDEFGHIJabc|
00000170  64 65 66 67 68 69 6a 6b  0a 1b 21 b8 41 42 43 44  |defghijk..!.ABCD|
00000180  45 46 47 48 49 4a 61 62  63 64 65 66 67 68 69 6a  |EFGHIJabcdefghij|
00000190  6b 0a 1b 21 01 41 42 43  44 45 46 47 48 49 4a 61  |k..!.ABCDEFGHIJa|
000001a0  62 63 64 65 66 67 68 69  6a 6b 0a 1b 21 81 41 42  |bcdefghijk..!.AB|
000001b0  43 44 45 46 47 48 49 4a  61 62 63 64 65 66 67 68  |CDEFGHIJabcdefgh|
000001c0  69 6a 6b 0a 1b 21 21 41  42 43 44 45 46 47 48 49  |ijk..!!ABCDEFGHI|
000001d0  4a 61 62 63 64 65 66 67  68 69 6a 6b 0a 1b 21 a1  |Jabcdefghijk..!.|
000001e0  41 42 43 44 45 46 47 48  49 4a 61 62 63 64 65 66  |ABCDEFGHIJabcdef|
000001f0  67 68 69 6a 6b 0a 1b 21  11 41 42 43 44 45 46 47  |ghijk..!.ABCDEFG|
00000200  48 49 4a 61 62 63 64 65  66 67 68 69 6a 6b 0a 1b  |HIJabcdefghijk..|
00000210  21 91 41 42 43 44 45 46  47 48 49 4a 61 62 63 64  |!.ABCDEFGHIJabcd|
00000220  65 66 67 68 69 6a 6b 0a  1b 21 31 41 42 43 44 45  |efghijk..!1ABCDE|
00000230  46 47 48 49 4a 61 62 63  64 65 66 67 68 69 6a 6b  |FGHIJabcdefghijk|
00000240  0a 1b 21 b1 41 42 43 44  45 46 47 48 49 4a 61 62  |..!.ABCDEFGHIJab|
00000250  63 64 65 66 67 68 69 6a  6b 0a 1b 21 09 41 42 43  |cdefghijk..!.ABC|
00000260  44 45 46 47 48 49 4a 61  62 63 64 65 66 67 68 69  |DEFGHIJabcdefghi|
00000270  6a 6b 0a 1b 21 89 41 42  43 44 45 46 47 48 49 4a  |jk..!.ABCDEFGHIJ|
00000280  61 62 63 64 65 66 67 68  69 6a 6b 0a 1b 21 29 41  |abcdefghijk..!)A|
00000290  42 43 44 45 46 47 48 49  4a 61 62 63 64 65 66 67  |BCDEFGHIJabcdefg|
000002a0  68 69 6a 6b 0a 1b 21 a9  41 42 43 44 45 46 47 48  |hijk..!.ABCDEFGH|
000002b0  49 4a 61 62 63 64 65 66  67 68 69 6a 6b 0a 1b 21  |IJabcdefghijk..!|
000002c0  19 41 42 43 44 45 46 47  48 49 4a 61 62 63 64 65  |.ABCDEFGHIJabcde|
000002d0  66 67 68 69 6a 6b 0a 1b  21 99 41 42 43 44 45 46  |fghijk..!.ABCDEF|
000002e0  47 48 49 4a 61 62 63 64  65 66 67 68 69 6a 6b 0a  |GHIJabcdefghijk.|
000002f0  1b 21 39 41 42 43 44 45  46 47 48 49 4a 61 62 63  |.!9ABCDEFGHIJabc|
00000300  64 65 66 67 68 69 6a 6b  0a 1b 21 b9 41 42 43 44  |defghijk..!.ABCD|
00000310  45 46 47 48 49 4a 61 62  63 64 65 66 67 68 69 6a  |EFGHIJabcdefghij|
00000320  6b 0a 1b 21 00 41 42 43  44 45 46 47 48 49 4a 61  |k..!.ABCDEFGHIJa|
00000330  62 63 64 65 66 67 68 69  6a 6b 0a 1b 21 80 41 42  |bcdefghijk..!.AB|
00000340  43 44 45 46 47 48 49 4a  61 62 63 64 65 66 67 68  |CDEFGHIJabcdefgh|
00000350  69 6a 6b 0a 1b 21 20 41  42 43 44 45 46 47 48 49  |ijk..! ABCDEFGHI|
00000360  4a 61 62 63 64 65 66 67  68 69 6a 6b 0a 1b 21 a0  |Jabcdefghijk..!.|
00000370  41 42 43 44 45 46 47 48  49 4a 61 62 63 64 65 66  |ABCDEFGHIJabcdef|
00000380  67 68 69 6a 6b 0a 1b 21  10 41 42 43 44 45 46 47  |ghijk..!.ABCDEFG|
00000390  48 49 4a 61 62 63 64 65  66 67 68 69 6a 6b 0a 1b  |HIJabcdefghijk..|
000003a0  21 90 41 42 43 44 45 46  47 48 49 4a 61 62 63 64  |!.ABCDEFGHIJabcd|
000003b0  65 66 67 68 69 6a 6b 0a  1b 21 30 41 42 43 44 45  |efghijk..!0ABCDE|
000003c0  46 47 48 49 4a 61 62 63  64 65 66 67 68 69 6a 6b  |FGHIJabcdefghijk|
000003d0  0a 1b 21 b0 41 42 43 44  45 46 47 48 49 4a 61 62  |..!.ABCDEFGHIJab|
000003e0  63 64 65 66 67 68 69 6a  6b 0a 1b 21 08 41 42 43  |cdefghijk..!.ABC|
000003f0  44 45 46 47 48 49 4a 61  62 63 64 65 66 67 68 69  |DEFGHIJabcdefghi|
00000400  6a 6b 0a 1b 21 88 41 42  43 44 45 46 47 48 49 4a  |jk..!.ABCDEFGHIJ|
00000410  61 62 63 64 65 66 67 68  69 6a 6b 0a 1b 21 28 41  |abcdefghijk..!(A|
00000420  42 43 44 45 46 47 48 49  4a 61 62 63 64 65 66 67  |BCDEFGHIJabcdefg|
00000430  68 69 6a 6b 0a 1b 21 a8  41 42 43 44 45 46 47 48  |hijk..!.ABCDEFGH|
00000440  49 4a 61 62 63 64 65 66  67 68 69 6a 6b 0a 1b 21  |IJabcdefghijk..!|
00000450  18 41 42 43 44 45 46 47  48 49 4a 61 62 63 64 65  |.ABCDEFGHIJabcde|
00000460  66 67 68 69 6a 6b 0a 1b  21 98 41 42 43 44 45 46  |fghijk..!.ABCDEF|
00000470  47 48 49 4a 61 62 63 64  65 66 67 68 69 6a 6b 0a  |GHIJabcdefghijk.|
00000480  1b 21 38 41 42 43 44 45  46 47 48 49 4a 61 62 63  |.!8ABCDEFGHIJabc|
00000490  64 65 66 67 68 69 6a 6b  0a 1b 21 b8 41 42 43 44  |defghijk..!.ABCD|
000004a0  45 46 47 48 49 4a 61 62  63 64 65 66 67 68 69 6a  |EFGHIJabcdefghij|
000004b0  6b 0a 1b 21 01 41 42 43  44 45 46 47 48 49 4a 61  |k..!.ABCDEFGHIJa|
000004c0  62 63 64 65 66 67 68 69  6a 6b 0a 1b 21 81 41 42  |bcdefghijk..!.AB|
000004d0  43 44 45 46 47 48 49 4a  61 62 63 64 65 66 67 68  |CDEFGHIJabcdefgh|
000004e0  69 6a 6b 0a 1b 21 21 41  42 43 44 45 46 47 48 49  |ijk..!!ABCDEFGHI|
000004f0  4a 61 62 63 64 65 66 67  68 69 6a 6b 0a 1b 21 a1  |Jabcdefghijk..!.|
00000500  41 42 43 44 45 46 47 48  49 4a 61 62 63 64 65 66  |ABCDEFGHIJabcdef|
00000510  67 68 69 6a 6b 0a 1b 21  11 41 42 43 44 45 46 47  |ghijk..!.ABCDEFG|
00000520  48 49 4a 61 62 63 64 65  66 67 68 69 6a 6b 0a 1b  |HIJabcdefghijk..|
00000530  21 91 41 42 43 44 45 46  47 48 49 4a 61 62 63 64  |!.ABCDEFGHIJabcd|
00000540  65 66 67 68 69 6a 6b 0a  1b 21 31 41 42 43 44 45  |efghijk..!1ABCDE|
00000550  46 47 48 49 4a 61 62 63  64 65 66 67 68 69 6a 6b  |FGHIJabcdefghijk|
00000560  0a 1b 21 b1 41 42 43 44  45 46 47 48 49 4a 61 62  |..!.ABCDEFGHIJab|
00000570  63 64 65 66 67 68 69 6a  6b 0a 1b 21 09 41 42 43  |cdefghijk..!.ABC|
00000580  44 45 46 47 48 49 4a 61  62 63 64 65 66 67 68 69  |DEFGHIJabcdefghi|
00000590  6a 6b 0a 1b 21 89 41 42  43 44 45 46 47 48 49 4a  |jk..!.ABCDEFGHIJ|
000005a0  61 62 63 64 65 66 67 68  69 6a 6b 0a 1b 21 29 41  |abcdefghijk..!)A|
000005b0  42 43 44 45 46 47 48 49  4a 61 62 63 64 65 66 67  |BCDEFGHIJabcdefg|
000005c0  68 69 6a 6b 0a 1b 21 a9  41 42 43 44 45 46 47 48  |hijk..!.ABCDEFGH|
000005d0  49 4a 61 62 63 64 65 66  67 68 69 6a 6b 0a 1b 21  |IJabcdefghijk..!|
000005e0  19 41 42 43 44 45 46 47  48 49 4a 61 62 63 64 65  |.ABCDEFGHIJabcde|
000005f0  66 67 68 69 6a 6b 0a 1b  21 99 41 42 43 44 45 46  |fghijk..!.ABCDEF|
00000600  47 48 49 4a 61 62 63 64  65 66 67 68 69 6a 6b 0a  |GHIJabcdefghijk.|
00000610  1b 21 39 41 42 43 44 45  46 47 48 49 4a 61 62 63  |.!9ABCDEFGHIJabc|
00000620  64 65 66 67 68 69 6a 6b  0a 1b 21 b9 41 42 43 44  |defghijk..!.ABCD|
00000630  45 46 47 48 49 4a 61 62  63 64 65 66 67 68 69 6a  |EFGHIJabcdefghij|
00000640  6b 0a 1b 21 00 1d 56 41  03                       |k..!..VA.|
00000649

Underline

Underline receipt example
The command is:

ESC – [ number ]

The argument is set to 0 for no underline, 1 for underline, 2 for heavy underline.

require __DIR__ . '/autoload.php';
use Mike42\Escpos\Printer;
use Mike42\Escpos\PrintConnectors\FilePrintConnector;
$connector = new FilePrintConnector("/dev/usb/lp0");
$printer = new Printer($connector);

/* Underline */
for($i = 0; $i < 3; $i++) {
    $printer -> setUnderline($i);
    $printer -> text("The quick brown fox jumps over the lazy dog\n");
}
$printer -> setUnderline(0); // Reset
$printer -> cut();
$printer -> close();
00000000  1b 40 1b 2d 00 54 68 65  20 71 75 69 63 6b 20 62  |.@.-.The quick b|
00000010  72 6f 77 6e 20 66 6f 78  20 6a 75 6d 70 73 20 6f  |rown fox jumps o|
00000020  76 65 72 20 74 68 65 20  6c 61 7a 79 20 64 6f 67  |ver the lazy dog|
00000030  0a 1b 2d 01 54 68 65 20  71 75 69 63 6b 20 62 72  |..-.The quick br|
00000040  6f 77 6e 20 66 6f 78 20  6a 75 6d 70 73 20 6f 76  |own fox jumps ov|
00000050  65 72 20 74 68 65 20 6c  61 7a 79 20 64 6f 67 0a  |er the lazy dog.|
00000060  1b 2d 02 54 68 65 20 71  75 69 63 6b 20 62 72 6f  |.-.The quick bro|
00000070  77 6e 20 66 6f 78 20 6a  75 6d 70 73 20 6f 76 65  |wn fox jumps ove|
00000080  72 20 74 68 65 20 6c 61  7a 79 20 64 6f 67 0a 1b  |r the lazy dog..|
00000090  2d 00 1d 56 41 03                                 |-..VA.|
00000096

Cuts

The command is:

ESC V [ number ]

The argument apparently represents whether to perform a ‘partial’ (65) or ‘full’ (66) cut, but has no effect on my model of printer.

require __DIR__ . '/autoload.php';
use Mike42\Escpos\Printer;
use Mike42\Escpos\PrintConnectors\FilePrintConnector;
$connector = new FilePrintConnector("/dev/usb/lp0");
$printer = new Printer($connector);

/* Cuts */
for($i = 0; $i < 5; $i++) {
    $printer -> cut(Printer:::CUT_PARTIAL);
    $printer -> cut(Printer:::CUT_FULL);
}
$printer -> cut();
$printer -> close();
00000000  1b 40 1d 56 42 03 1d 56  41 03 1d 56 42 03 1d 56  |.@.VB..VA..VB..V|
00000010  41 03 1d 56 42 03 1d 56  41 03 1d 56 42 03 1d 56  |A..VB..VA..VB..V|
00000020  41 03 1d 56 42 03 1d 56  41 03 1d 56 41 03        |A..VB..VA..VA.|
0000002e

Emphasis

Receipt emphasis example
The command is:

ESC E [ number ]

Use 1 to enable emphasis, and 0 to disable it.

require __DIR__ . '/autoload.php';
use Mike42\Escpos\Printer;
use Mike42\Escpos\PrintConnectors\FilePrintConnector;
$connector = new FilePrintConnector("/dev/usb/lp0");
$printer = new Printer($connector);

/* Emphasis */
for($i = 0; $i < 2; $i++) {
    $printer -> setEmphasis($i == 1);
    $printer -> text("The quick brown fox jumps over the lazy dog\n");
}
$printer -> setEmphasis(false); // Reset
$printer -> cut();
$printer -> close();
00000000  1b 40 1b 45 00 54 68 65  20 71 75 69 63 6b 20 62  |.@.E.The quick b|
00000010  72 6f 77 6e 20 66 6f 78  20 6a 75 6d 70 73 20 6f  |rown fox jumps o|
00000020  76 65 72 20 74 68 65 20  6c 61 7a 79 20 64 6f 67  |ver the lazy dog|
00000030  0a 1b 45 01 54 68 65 20  71 75 69 63 6b 20 62 72  |..E.The quick br|
00000040  6f 77 6e 20 66 6f 78 20  6a 75 6d 70 73 20 6f 76  |own fox jumps ov|
00000050  65 72 20 74 68 65 20 6c  61 7a 79 20 64 6f 67 0a  |er the lazy dog.|
00000060  1b 45 00 1d 56 41 03                              |.E..VA.|
00000067

Double-strike

Double-strike receipt example
The command is:

ESC G [ number ]

Use 1 to enable, or 0 to disable. On the model tested here, this appears to be identical to the “emphasis” mode above.

require __DIR__ . '/autoload.php';
use Mike42\Escpos\Printer;
use Mike42\Escpos\PrintConnectors\FilePrintConnector;
$connector = new FilePrintConnector("/dev/usb/lp0");
$printer = new Printer($connector);

/* Double-strike (looks basically the same as emphasis) */
for($i = 0; $i < 2; $i++) {
    $printer -> setDoubleStrike($i == 1);
    $printer -> text("The quick brown fox jumps over the lazy dog\n");
}
$printer -> setDoubleStrike(false);
$printer -> cut();
$printer -> close();
00000000  1b 40 1b 47 00 54 68 65  20 71 75 69 63 6b 20 62  |.@.G.The quick b|
00000010  72 6f 77 6e 20 66 6f 78  20 6a 75 6d 70 73 20 6f  |rown fox jumps o|
00000020  76 65 72 20 74 68 65 20  6c 61 7a 79 20 64 6f 67  |ver the lazy dog|
00000030  0a 1b 47 01 54 68 65 20  71 75 69 63 6b 20 62 72  |..G.The quick br|
00000040  6f 77 6e 20 66 6f 78 20  6a 75 6d 70 73 20 6f 76  |own fox jumps ov|
00000050  65 72 20 74 68 65 20 6c  61 7a 79 20 64 6f 67 0a  |er the lazy dog.|
00000060  1b 47 00 1d 56 41 03                              |.G..VA.|
00000067

Fonts

Receipt fonts example
The command is:

ESC M [ number ]

There are three possible fonts, documented as “A”, “B” and “C”, and numbered 0, 1, and 2. Many printers, including this one, don’t have Font C.

require __DIR__ . '/autoload.php';
use Mike42\Escpos\Printer;
use Mike42\Escpos\PrintConnectors\FilePrintConnector;
$connector = new FilePrintConnector("/dev/usb/lp0");
$printer = new Printer($connector);

/* Fonts (many printers do not have a 'Font C') */
$fonts = array(
    Printer:::FONT_A,
    Printer:::FONT_B,
    Printer:::FONT_C);
for($i = 0; $i < count($fonts); $i++) {
    $printer -> setFont($fonts[$i]);
    $printer -> text("The quick brown fox jumps over the lazy dog\n");
}
$printer -> setFont(); // Reset
$printer -> cut();
$printer -> close();
00000000  1b 40 1b 4d 00 54 68 65  20 71 75 69 63 6b 20 62  |.@.M.The quick b|
00000010  72 6f 77 6e 20 66 6f 78  20 6a 75 6d 70 73 20 6f  |rown fox jumps o|
00000020  76 65 72 20 74 68 65 20  6c 61 7a 79 20 64 6f 67  |ver the lazy dog|
00000030  0a 1b 4d 01 54 68 65 20  71 75 69 63 6b 20 62 72  |..M.The quick br|
00000040  6f 77 6e 20 66 6f 78 20  6a 75 6d 70 73 20 6f 76  |own fox jumps ov|
00000050  65 72 20 74 68 65 20 6c  61 7a 79 20 64 6f 67 0a  |er the lazy dog.|
00000060  1b 4d 02 54 68 65 20 71  75 69 63 6b 20 62 72 6f  |.M.The quick bro|
00000070  77 6e 20 66 6f 78 20 6a  75 6d 70 73 20 6f 76 65  |wn fox jumps ove|
00000080  72 20 74 68 65 20 6c 61  7a 79 20 64 6f 67 0a 1b  |r the lazy dog..|
00000090  4d 00 1d 56 41 03                                 |M..VA.|
00000096

Justification

Receipt justification example
The command is:

ESC a [ number ]

Use 0 to justify left, 1 to centre the text, or 2 to right-align it.

require __DIR__ . '/autoload.php';
use Mike42\Escpos\Printer;
use Mike42\Escpos\PrintConnectors\FilePrintConnector;
$connector = new FilePrintConnector("/dev/usb/lp0");
$printer = new Printer($connector);

/* Justification */
$justification = array(
    Printer:::JUSTIFY_LEFT,
    Printer:::JUSTIFY_CENTER,
    Printer:::JUSTIFY_RIGHT);
for($i = 0; $i < count($justification); $i++) {
    $printer -> setJustification($justification[$i]);
    $printer -> text("A man a plan a canal panama\n");
}
$printer -> setJustification(); // Reset
$printer -> cut();
$printer -> close();
00000000  1b 40 1b 61 00 41 20 6d  61 6e 20 61 20 70 6c 61  |.@.a.A man a pla|
00000010  6e 20 61 20 63 61 6e 61  6c 20 70 61 6e 61 6d 61  |n a canal panama|
00000020  0a 1b 61 01 41 20 6d 61  6e 20 61 20 70 6c 61 6e  |..a.A man a plan|
00000030  20 61 20 63 61 6e 61 6c  20 70 61 6e 61 6d 61 0a  | a canal panama.|
00000040  1b 61 02 41 20 6d 61 6e  20 61 20 70 6c 61 6e 20  |.a.A man a plan |
00000050  61 20 63 61 6e 61 6c 20  70 61 6e 61 6d 61 0a 1b  |a canal panama..|
00000060  61 00 1d 56 41 03                                 |a..VA.|
00000066

Barcodes

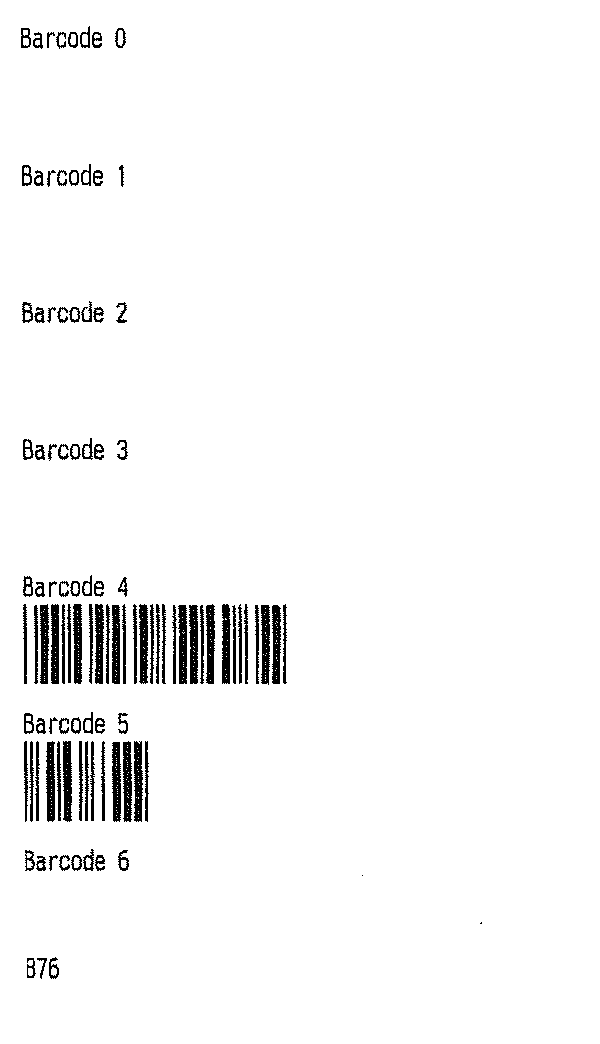
Barcoded receipt example
The commands are:

GS h [ number ]
ESC k [ number ] [ text ] NUL

The first command sets the barcode height — measured in dots, while the second one prints the actual barcode. The number represents the barcode standard, which for most purposes should be “4”, representing CODE39. 6 standards are supported by the PHP driver.

You will notice that due to driver glitches or printer incompatibility, not all of the barcodes print! As above, my advice is to use CODE39 if you run into this.

require __DIR__ . '/autoload.php';
use Mike42\Escpos\Printer;
use Mike42\Escpos\PrintConnectors\FilePrintConnector;
$connector = new FilePrintConnector("/dev/usb/lp0");
$printer = new Printer($connector);

/* Barcodes */
$barcodes = array(
    Printer:::BARCODE_UPCA,
    Printer:::BARCODE_UPCE,
    Printer:::BARCODE_JAN13,
    Printer:::BARCODE_JAN8,
    Printer:::BARCODE_CODE39,
    Printer:::BARCODE_ITF,
    Printer:::BARCODE_CODABAR);
$printer -> setBarcodeHeight(80);
for($i = 0; $i < count($barcodes); $i++) {
    $printer -> text("Barcode $i " . "\n");
    $printer -> barcode("9876", $barcodes[$i]);
    $printer -> feed();
}
$printer -> cut();
$printer -> close();
00000000  1b 40 1d 68 50 42 61 72  63 6f 64 65 20 30 20 0a  |.@.hPBarcode 0 .|
00000010  1d 6b 00 39 38 37 36 00  0a 42 61 72 63 6f 64 65  |.k.9876..Barcode|
00000020  20 31 20 0a 1d 6b 01 39  38 37 36 00 0a 42 61 72  | 1 ..k.9876..Bar|
00000030  63 6f 64 65 20 32 20 0a  1d 6b 02 39 38 37 36 00  |code 2 ..k.9876.|
00000040  0a 42 61 72 63 6f 64 65  20 33 20 0a 1d 6b 03 39  |.Barcode 3 ..k.9|
00000050  38 37 36 00 0a 42 61 72  63 6f 64 65 20 34 20 0a  |876..Barcode 4 .|
00000060  1d 6b 04 39 38 37 36 00  0a 42 61 72 63 6f 64 65  |.k.9876..Barcode|
00000070  20 35 20 0a 1d 6b 05 39  38 37 36 00 0a 42 61 72  | 5 ..k.9876..Bar|
00000080  63 6f 64 65 20 36 20 0a  1d 6b 06 39 38 37 36 00  |code 6 ..k.9876.|
00000090  0a 1d 56 41 03                                    |..VA.|
00000095

Resources

Linked previously in this post:

And if you’ve just received an Epson printer and need to figure out how it works:

Update 2015-03-10: Re-wrote examples for the newer version of escpos-php.

Update 2016-04-22: Updated examples again to match the latest driver code.

Using xte to script your workflow

In the classic world of desktop automation, “macros” allow you to repeat a task easily. In general, xte is the best way of scripting this up on Linux.

First, you need to install it:

apt-get install xautomation
yum install xautomation

To use xte, you need to send it information via a ‘pipe’. The man page covers the key codes and commands in detail, but I’ll step through some basic examples below.

Example 1: Do a Google search

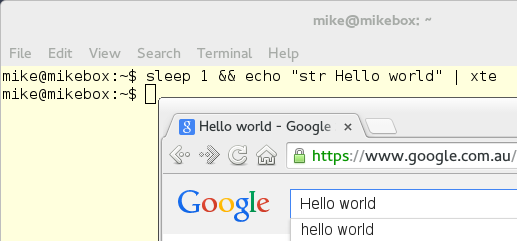
The example below uses xte to type “Hello world” into a text box.

Minimal xte example - Typing text in a box

Type the command, press enter, then quickly click on the text box:

sleep 1 && echo "Hello world" | xte

Example 2: Open a browser and search Wikipedia

To write a script which combines a few commands for xte, you could put it in a bash script. Remember to put a pause between commands so that the windowing system can catch up.

The script below will use Gnome Shells “overview mode” to launch Chromium, then open a new tab, and search Wikipedia for “cars”:

#!/bin/sh
xte << EOF
key Super_L
usleep 100000
str chromium
usleep 100000
key Return
sleep 1
keydown Control_L
key t
keyup Control_L
sleep 1
str http://en.wikipedia.org
usleep 100000
key Return
sleep 3
key Tab
usleep 100000
str cars
usleep 100000
key Return
EOF

Example 3: Draw a spiral in GIMP

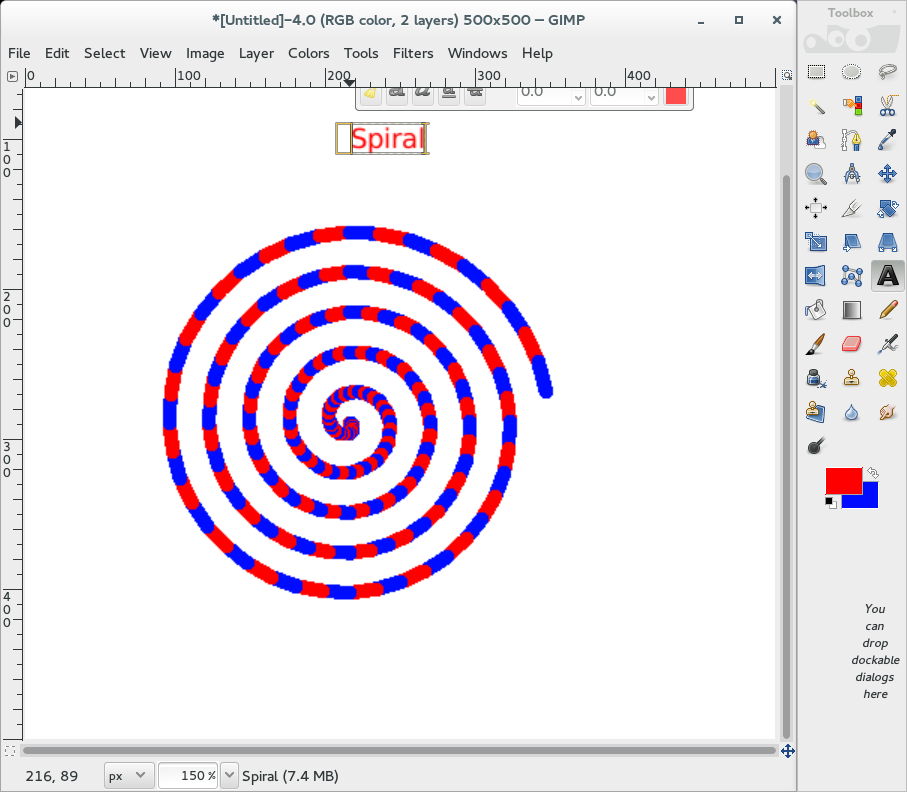
When you script an operation, you can interact with any program using a set of rules. Below is a PHP script called spiral.php, which draws and labels a spiral in GIMP, switching the foreground & background colours at each step.

This requires an open GIMP window in the correct part of the screen:

xte example - Drawing a spiral in GIMP automatically

The interaction in this case is quite simple for a computer, but would be tedious to do manually:

N
Open the Line tool
T
Open the Text tool
X
Swap foreground & background colours
Click & Drag
Draw a line
#!/usr/bin/env php
sleep 2
key N
usleep 100000
<?php
// Where the canvas is on-screen
$top_x = 150;
$top_y = 150;
$canvas_width = 400;

// Spiral properties
$pi = 3.14159265358979;
$centre_x = $top_x + $canvas_width / 2;
$centre_y = $top_y + $canvas_width / 2 + 100;
$spins = 5;

// Centre the mouse
echo "mousemove $centre_x $centre_y\n";
echo "usleep 100000\n";

// Draw a spiral
for($t = 0; $t < 1; $t += 0.005) {
	$angle = $spins * $t * 2 * $pi;
	$radius = $canvas_width / 2 * $t;
	$x = (int) ($centre_x + $radius * cos($angle));
	$y = (int) ($centre_y + $radius * sin($angle));
	echo "mousedown 1\n";
	echo "mousemove $x $y\n";
	echo "usleep 100000\n";
	echo "mouseup 1\n";
	echo "key X\n";
}

// Label the spiral
echo "mousemove $centre_x $top_y\n";
echo "key T\n";
echo "usleep 100000\n";
echo "mouseclick 1\n";
echo "usleep 100000\n";
echo "str Spiral\n";
?>

After cropping, the spiral image on its own is:

A spiral drawn automatically in GIMP via xte

Example 4: Forward emails

Google’s Gmail has keyboard shortcuts for quick navigation. This example uses:

f
Forward an email
Tab
Move between fields
Ctrl+Enter
Send
j
Next email

Using these shortcuts, this script, forward.txt, will forward an email too bob@email.com and fred@example.com, then navigate to the next email:

sleep 1
key f
sleep 1
str bob@example.com
sleep 1
str fred@example.com
sleep 0.1
key Return
sleep 3
key Return
sleep 1
key Tab
sleep 0.1
keydown Control_L
key Return
keyup Control_L
sleep 3
key j
sleep 2

To send one email through xte, you could run this, and then click over to an open email in Gmail:

cat forward.txt | xte

To send the next 106 emails (e.g. in a label or search), you could instead type:

#!/bin/bash
for i in {1..106}; do echo $i; (cat forward.txt | xte); done

This is not fool-proof, so you would need to adjust the timing if your Internet connection is laggy.

When to use xte

Usually, a task which is supposed to be automated will have an API. For example, GIMP provides a python plugin interface, Gmail can be accessed via IMAP, and Google and Wikipedia searches can be done directly through HTTP. This is always the best way to do things.

However, the automation junkie should have xte in their toolkit for as an inventive time-saver, in situations where proper automation is not practical, such as when:

  • you don’t want learn an API, to only use it for one day.
  • you doing a repetitive task in a program or website which is feature-poor.
  • you need to test some feature repeatedly under different circumstances.
  • you find a game which requires you to click fast.

Good luck!

Setting up an Epson receipt printer

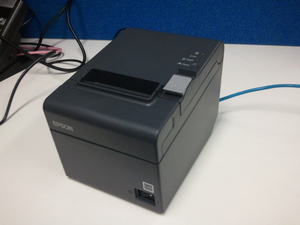
I recently picked up one of these networked thermal receipt printers.

Epson receipt printer
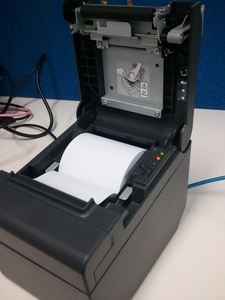
An open Epson receipt printer

Being Point-of-Sale equipment, these come from a different tradition of printing, and have only a few things in common with regular laser printers. This post will cover the basic steps to getting the printer up and running.

This one is model TM-T82II.

Setting up the printer

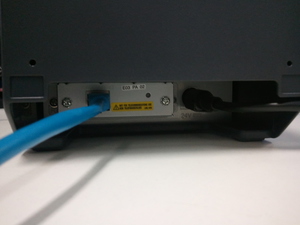
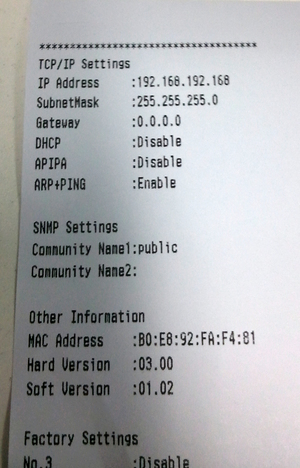
Firstly, this particular printer only has an ethernet interface, which comes configured with a static IP by default, rather than DHCP. Holding the button next to the network port prints out the settings:

Epson receipt printer network card.
Epson receipt printer network settings.

The IP address of the printer is shown 192.168.192.168, and subnet mask 255.255.255.0. To speak to it, we need a computer on the same subnet— in this case the last number of the IP address is the only part which needs to be different.

On GNU/Linux, this is best done with ifconfig:

sudo ifconfig eth0 192.168.192.169 netmask 255.255.255.0

If you used the correct interface, address and netmask, then you should now be able to ping the printer:

$ sudo ifconfig
eth0      Link encap:Ethernet  HWaddr ...
          inet addr:192.168.192.169  Bcast:192.168.192.255  Mask:255.255.255.0
          ...
$ ping 192.168.192.168
PING 192.168.192.168 (192.168.192.168) 56(84) bytes of data.
64 bytes from 192.168.192.168: icmp_seq=1 ttl=255 time=1.09 ms
64 bytes from 192.168.192.168: icmp_seq=2 ttl=255 time=0.506 ms
...

The printer has a web interface, and is open on two ports for printing:

$ nmap 192.168.192.168
...
PORT     STATE SERVICE
80/tcp   open  http
515/tcp  open  printer
9100/tcp open  jetdirect

The web interface will let you set different IP settings, so that you can get the printer on your network. If you mess up and can’t connect, then do a factory reset: Hold the button used before, and then reboot the printer.

Using the printer

Epson provides drivers for several platforms, which may fit your use case.
However, these printers do support ESC/POS (See Wikipedia). making it quite accessible without installed drivers.
The printer will immediately print any regular text it receives over Port 9100, line by line:

echo "Hello World" | nc 192.168.192.168 9100

ESC/POS commands allow you to to format the text, print barcodes, and cut the paper. A good resource for them is this PDF reference from Epson.

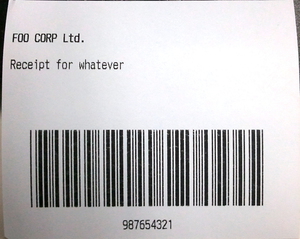
I’ve included a PHP script to produce the ESC/POS commands for the below receipt, showing how to use a few of the supported features:

Example receipt from an Epson receipt printer, printed using PHP

And the script which created it:

<?php
/* ASCII constants */
const ESC = "\x1b";
const GS="\x1d";
const NUL="\x00";

/* Output an example receipt */
echo ESC."@"; // Reset to defaults
echo ESC."E".chr(1); // Bold
echo "FOO CORP Ltd.\n"; // Company
echo ESC."E".chr(0); // Not Bold
echo ESC."d".chr(1); // Blank line
echo "Receipt for whatever\n"; // Print text
echo ESC."d".chr(4); // 4 Blank lines

/* Bar-code at the end */
echo ESC."a".chr(1); // Centered printing
echo GS."k".chr(4)."987654321".NUL; // Print barcode
echo ESC."d".chr(1); // Blank line
echo "987654321\n"; // Print number
echo GS."V\x41".chr(3); // Cut
exit(0);

This would again sent to the printer using netcat:

php foo.php | nc 192.168.192.168 9100

Good luck!

Productivity: De-activate social networking on a schedule with cron

Sometimes you need to block out distractions for a set amount of time. One of these is social networking, and it’s fairly early to temporarily break it (all for productivity of course!).

Mac or Linux users can break example.com like this:

echo "127.0.0.1 example.com www.example.com" >> /etc/hosts

This tells the computer that it hosts example.com, so it wont load it from the internet.

And to compliment this, we have sed, which can delete lines from a file in-place based on a pattern:

sed -i '/example.com/d' /etc/hosts

Replace example.com above with your social network of choice, and have a shot. It will take a few minutes to have an effect, because of open connections and your computer’s DNS cache.

Scheduling it in

Cron is the go-to solution for scheduling any command on Unix. We’ll run this as root, as normal users don’t have permission to edit /etc/hosts:

su
crontab -e

If prompted, select nano as an editor.

If, for example, 6pm — 8pm weekdays is a distraction-free time for you, you would schedule the first command for 18:00 on days 1-5, and the second for 20:00 on days 1-5:

# m h  dom mon dow   command
0 18 * * 1-5 echo "127.0.0.1 example.com www.example.com" >> /etc/hosts
0 20 * * 1-5 sed -i '/example.com/d' /etc/hosts

If your use case calls for something more advanced, consider learning how to use squid to manage web traffic.

When you break something..

If you accidentally delete your /etc/hosts while experimenting, you can fetch its contents from /var/lib/dpkg/info/netbase.postinst (source).

How to install JOGL on Debian

JOGL is an OpenGL binding for Java (wiki) which wraps the C OpenGL API. On Debian-based systems, installing and using it is not a complex task.

First, install it:

apt-get install libjogl2-java

Next, you need these JAR files in your build path:

/usr/share/java/jogl2.jar
/usr/share/java/gluegen2-rt.jar

In Eclipse, this is achieved by clicking Project -> Properties -> Java Build Path -> Libraries -> Add External Jar.

(If you don’t have gluegen2-rt.jar, then you need to install the libgluegen2-rt-java package as well).

How to generate professional-quality PDF files from PHP

There are a few ways to go about making PDF files from your PHP web app. Your options are basically-

  1. Put all of your text in a 210mm column and get the user to save it as PDF.
  2. Learn a purpose-built library, such as FPDF (free) or pdflib (proprietary).
  3. Use PHP for generating markup which can be saved to PDF. This is of course LaTeX

This article assumes an intermediate knowledge of both PHP and LaTeX, and that your server is not running Windows.

The software mix

PHP is an open-source server package which generates HTML pages, usually based on some sort of dynamic data. It is equally good at (but less well known for) generating other types of markup.

LaTeX is an open source document typesetting system, which will take a markup file in .tex format, and output a printable document, such as a PDF. The engine I will use here is XeLaTeX, because it supports modern trimmings such as Unicode and OpenType fonts.

Naturally, this post will use PHP to populate a .tex file, and then xelatex to create a PDF for the user.

This sounds straightforward enough, but it may not work with all shared hosts. Check your setup before you read on:

  1. Your server needs PHP, with safe mode disabled, so that it can run commands.
  2. This server needs xelatex, or a suitable substitute such as pdflatex.

A bit about markup

We will be working with .tex templates, which will be valid LaTeX files. The basic rules are:

  1. Define a \newcommand for every variable, so that you can compile the document without PHP.
  2. Drop PHP code in comments, which will print out code to override those variables.

So you will end up with code like this:

% Make placeholders visible
\newcommand{\placeholder}[1]{\textbf{$<$ #1 $>$}}

% Defaults for each variable
\newcommand{\test}{\placeholder{Data here}}

% Fill in
% <?php echo "\n" . "\\renewcommand{\\test}{" . LatexTemplate::escape($data['test']) . "}\n"; ?>

Look messy? A multi-line block of PHP is a little easier to follow. This example is from the body of a table, see if you can figure out the syntax:

%<?php                                                                      /*
% */ foreach($data['invoiceItem'] as $invoiceItem) {                        /*
% */    echo "\n" . LatexTemplate::escape($invoiceItem['item']) . " & " .   /*
% */        LatexTemplate::escape($invoiceItem['qty']) . " & " .            /*
% */        LatexTemplate::escape($invoiceItem['price']) . " & " .          /*
% */        LatexTemplate::escape($invoiceItem['total']) . "\\\\\n";        /*
% */ } ?>

So what about this LatexTemplate::escape() business? In LaTeX, just about every symbol seems to be part of the syntax, so it is sadly not very simple to escape.

I have settled on the following series of str_replace() calls to sanitise information for display. It is crude but effective. Generating LaTex is much like generating SQL, HTML or LDIF from your website: it is quite important to make a habit of wrapping every piece of data with a function to prevent users from writing (‘injecting’) arbitrary code into your document:

/**
 * Series of substitutions to sanitise text for use in LaTeX.
 *
 * http://stackoverflow.com/questions/2627135/how-do-i-sanitize-latex-input
 * Target document should \usepackage{textcomp}
 */
public static function escape($text) {
	// Prepare backslash/newline handling
	$text = str_replace("\n", "\\\\", $text); // Rescue newlines
	$text = preg_replace('/[\x00-\x1F\x7F-\xFF]/', '', $text); // Strip all non-printables
	$text = str_replace("\\\\", "\n", $text); // Re-insert newlines and clear \\
	$text = str_replace("\\", "\\\\", $text); // Use double-backslash to signal a backslash in the input (escaped in the final step).

	// Symbols which are used in LaTeX syntax
	$text = str_replace("{", "\\{", $text);
	$text = str_replace("}", "\\}", $text);
	$text = str_replace("$", "\\$", $text);
	$text = str_replace("&", "\\&", $text);
	$text = str_replace("#", "\\#", $text);
	$text = str_replace("^", "\\textasciicircum{}", $text);
	$text = str_replace("_", "\\_", $text);
	$text = str_replace("~", "\\textasciitilde{}", $text);
	$text = str_replace("%", "\\%", $text);

	// Brackets & pipes
	$text = str_replace("<", "\\textless{}", $text);
	$text = str_replace(">", "\\textgreater{}", $text);
	$text = str_replace("|", "\\textbar{}", $text);

	// Quotes
	$text = str_replace("\"", "\\textquotedbl{}", $text);
	$text = str_replace("'", "\\textquotesingle{}", $text);
	$text = str_replace("`", "\\textasciigrave{}", $text);

	// Clean up backslashes from before
	$text = str_replace("\\\\", "\\textbackslash{}", $text); // Substitute backslashes from first step.
	$text = str_replace("\n", "\\\\", trim($text)); // Replace newlines (trim is in case of leading \\)
	return $text;
}

We then have a template which we can include() from PHP, or run xelatex over. Below is minimal.tex, a minimal example of a PHP-latex template in this form:

% This file is a valid PHP file and also a valid LaTeX file
% When processed with LaTeX, it will generate a blank template
% Loading with PHP will fill it with details

\documentclass{article}
% Required for proper escaping
\usepackage{textcomp} % Symbols
\usepackage[T1]{fontenc} % Input format

% Because Unicode etc.
\usepackage{fontspec} % For loading fonts
\setmainfont{Liberation Serif} % Has a lot more symbols than Computer Modern

% Make placeholders visible
\newcommand{\placeholder}[1]{\textbf{$<$ #1 $>$}}

% Defaults for each variable
\newcommand{\test}{\placeholder{Data here}}

% Fill in
% <?php echo "\n" . "\\renewcommand{\\test}{" . LatexTemplate::escape($data['test']) . "}\n"; ?>

\begin{document}
	\section{Data From PHP}
	\test{}
\end{document}

Generate a PDF on the server

Here is where the fun begins. There is no plugin for compiling a LaTeX document, so we need to directly execute the command on a file.

Looks like we need to save the output somewhere then. You would generate your filled-in LaTeX code in a temporary file by doing something like this:

/**
 * Generate a PDF file using xelatex and pass it to the user
 */
public static function download($data, $template_file, $outp_file) {
	// Pre-flight checks
	if(!file_exists($template_file)) {
		throw new Exception("Could not open template");
	}
	if(($f = tempnam(sys_get_temp_dir(), 'tex-')) === false) {
		throw new Exception("Failed to create temporary file");
	}

	$tex_f = $f . ".tex";
	$aux_f = $f . ".aux";
	$log_f = $f . ".log";
	$pdf_f = $f . ".pdf";

	// Perform substitution of variables
	ob_start();
	include($template_file);
	file_put_contents($tex_f, ob_get_clean());

The next step is to execute your engine of choice on the output files:

	// Run xelatex (Used because of native unicode and TTF font support)
	$cmd = sprintf("xelatex -interaction nonstopmode -halt-on-error %s",
			escapeshellarg($tex_f));
	chdir(sys_get_temp_dir());
	exec($cmd, $foo, $ret);

Once this is done, you can delete a lot of the extra LaTeX files, and check if a .pdf appeared as expected:

	// No need for these files anymore
	@unlink($tex_f);
	@unlink($aux_f);
	@unlink($log_f);

	// Test here
	if(!file_exists($pdf_f)) {
		@unlink($f);
		throw new Exception("Output was not generated and latex returned: $ret.");
	}

And of course, send the completed file back via HTTP:

	// Send through output
	$fp = fopen($pdf_f, 'rb');
	header('Content-Type: application/pdf');
	header('Content-Disposition: attachment; filename="' . $outp_file . '"' );
	header('Content-Length: ' . filesize($pdf_f));
	fpassthru($fp);

	// Final cleanup
	@unlink($pdf_f);
	@unlink($f);
}

The static functions escape($text) and download($data, $template_file, $outp_file) are together placed into a class called LatexTemplate for the remainder of the example (complete file on GitHub).

Gluing it all together

With the library and template, it is quite easy to set up a PHP script which triggers the above code:

<?php
require_once('../LatexTemplate.php');

$test = "";
if(isset($_GET['t'])) {
	// Make the LaTeX file and send it through
	$test = $_GET['t'];
	if($test =="") {
		// Test pattern to show symbol handling
		for($i = 0; $i < 256; $i++) {
			$test .= chr($i) . " . ";
		}
	}

	try {
		LatexTemplate::download(array('test' => $test), 'minimal.tex', 'foobar.pdf');
	} catch(Exception $e) {
		echo $e -> getMessage();
	}

}
?>
<html>
<head>
<title>LaTeX test (minimal)</title>
</head>
</html>
<body>
	<p>Enter some text to be placed on the output:</p>
	<form>
		<input type="text" name="t" /><input type="submit" value="Generate" />
	</form>
</body>
</html>

The above code will show a form, which asks for input. When it gets some text, it will generate a PDF containing the text. If no text is given, it will output an ASCII table, simply to show that it can handle the symbols.

Once the template code is hidden away, this powerful technique is easily applied.

Results

This is only a minimal example. In any real application, your template would be more extensive.

Compiling the template directly creates this PDF:

From the web, a form is presented to fill this single field:

Which results in a PDF containing the user data:

Tips

  1. The text after \end{document} is not even parsed in latex. Use this area to write <?php ?> with
    fewer constraints.
  2. Consult the github repository for this code to see the complete example.
  3. Comment out the line @unlink($tex_f); of you want to preserve (for debugging, etc) the generated markup.

How to query Microsoft SQL Server from PHP

This post is for anybody who runs a GNU/Linux server and needs to query a MSSQL database. This setup will work on Debian and its relatives. As it’s a dense mix of technologies, so I’ve included all of the details which worked for me.

An obvious note: Microsoft SQL is not an ideal choice of database to pair with a GNU/Linux server, but may be acceptable if you are writing something which needs to import some data from external application which has a better reason to be using it.

A command-line alternative to this setup would be sqsh, which will let you running scheduled queries without PHP, if that’s what you’re after.

Prerequisites

Once you have PHP, the required libraries can be fetched with:

sudo apt-get install unixodbc php5-odbc tdsodbc

MSSQL is accessed with the FreeTDS driver. Once the above packages are installed, you need to tell ODBC where to find this driver, by adding the following block to /etc/odbcinst.ini:

[FreeTDS]
Description=MSSQL DB
Driver=/usr/lib/x86_64-linux-gnu/odbc/libtdsodbc.so
UsageCount=1

The path is different on platforms other than amd64. Check the file list for the tdsodbc package on your architecture if you lose track of the path.

The next step requires that you know the database server address, version, and database name. Add a block for your database to the end of /etc/odbc.ini:

[foodb]
Driver = FreeTDS
Description = Foo Database
Trace = Yes
TraceFile = /tmp/sql.log
ForceTrace = yes
Server = 10.x.x.x
Port = 1433
Database = FooDB
TDS_Version = 8.0

Experiment with TDS_Version values if you have issues connecting. Different versions of MSSQL require different values. The name of the data source (‘foodb’), the Database, Description and Server are all bogus values which you will need to fill.

An example

For new PHP scripts, database grunt-work is invariably done via PHP Data Objects (PDO). The good news is, it is easy to use it with MSSQL from here.

The below file takes a query on standard input, throws it at the database, and returns the result as comma-separated values.

Save this as query.php and fill in your data source (‘odbc:foodb’ here), username, and password.

#!/usr/bin/env php
<?php
$query = file_get_contents("php://stdin");
$user = 'baz;
$pass = 'super secret password here';

$dbh = new PDO('odbc:foodb', $user, $pass);
$dbh -> setAttribute(PDO::ATTR_ERRMODE, PDO::ERRMODE_EXCEPTION);
$sth = $dbh -> prepare($query);
$sth -> execute();
$results = $sth -> fetchAll(PDO::FETCH_ASSOC);

/* Quick exit if there are no rows */
if(count($results) == 0) {
	return 0;
}
$f = fopen("php://stdout", "w");

/* Output header */
$a = $results[0];
$header = array();
foreach($a as $key => $val) {
	$header[] = $key;
}
fputcsv($f, $header);

/* Output rows */
foreach($results as $result) {
	fputcsv($f, $result);
}

fclose($f);

To test the new script, first make it executable:

chmod +x query.php

To run a simple test query:

echo "SELECT Name from sys.tables ORDER BY Name;" | ./query.php

Refining the setup

The above script has some cool features: It’s short, actually useful, and it sets PDO::ERRMODE_EXCEPTION. This means that if something breaks, it will fail loudly and tell you why.

Hopefully, if your setup has issues, you can track down the cause with the error, and solve it by scrolling through this how-to again.

If you encounter a MSSQL datablase with an unknown schema, then you may want to list al rows and columns. This is achieved with:

SELECT tables.name AS tbl, columns.name AS col FROM sys.columns JOIN sys.tables ON columns.object_id = tables.object_id ORDER BY tbl, col;

The catch

I’ve run into some bizarre limitations using this. Be sure to run it on a server which you can update at the drop of a hat.

A mini-list of issues I’ve seen with this combination of software (no sources as I never tracked down the causes):

  • An old version of the driver would segfault PHP, apparently when non-ASCII content appeared in a text field.
  • Substituting non-text values fails in the version I am using, although Google suggests that updating the ODBC driver fixes this.

A Yes/No filtering tool for images

While collecting very large numbers of screen captures for writing documentation, I noticed that it takes far too long to filter out the junk.

To fix this, I coded up yn (source code via github). Given a list of images, it will display each one to the user, which they then include by pressing Y (yes) or exclude by pressing N (no) (hence the name yn).

The images which are selected are saved as a list, so that a script can continue by processing them in some way. This could be by copying them elsewhere, or generating a document with spaces to caption them. The example in the README.md does both of these.

The code to this early version is very simple, which makes it a good example of a simple OpenCV C++ app. I’ve stepped through it below.

The code

C++ does console input and output via the iostream library:

#include <iostream>

To use OpenCV with a GUI, you need these headers. You then need to add them to your include path, and link to OpenCV for the program to compile:

#include <cv.h>
#include <highgui.h>

This line simly tells the compiler that when we say cout (console out), we mean std::cout.

using namespace std;

The only OpenCV code is in the below function. The steps are:

  1. load an image from a file via imread(),
  2. display it in a window with imshow(),
  3. capture the next keypress with waitKey(), then
  4. delete the window with destroyWindow()
/**
 * Load a file, and wait for the user to press a key.
 *
 * If the pressed key is 'y', print the filename.
 */
bool yn(string fn) {
    cv::Mat img;
    char key = 0;

    img = cv::imread(fn);
    if(!img.data) {
        cerr << "Failed to load " << fn << endl;
    } else {
        cv::namedWindow(fn);
        cv::imshow(fn, img);
        key = cv::waitKey(0);
        cv::destroyWindow(fn);
        if(key == 'y') {
            cout << fn << endl; // 'y' pressed
        } else if(key == 0x1B) {
            return false; // ESC pressed
        }
    }
    return true;
}

So with that library usage out of the way, all we need to do is get the list of files to check, and stop popping up windows when the user has pressed the escape key.

/**
 * Get list of files from command-line arguments and display them in turn
 */
int main(int argc, char** argv) {
    int i;

    /* Command-line arguments given */
    for(i = 1; i < argc; i++) {
        if(yn(string(argv[i])) == false) {
            cerr << "Quitting.\n";
            break;
        }
    }

    return 0;
}

Next

The delay between images appearing can be removed by loading them in a separate thread, which I may do in a future version.

Crash course: Run Windows on desktop Linux

Sometimes, you need to use a tricky windows-only proprietary program on a GNU/Linux desktop. If you have a Windows install disk and licence at your disposal, then this post will show you how to get a Windows environment running without dual-booting.

The host here is a Debian box, and the guest is running Windows 7. The instructions will work with slight modifications for any mix of GNU/Linux and Windows

On the desktop, some things are not as important as the server world. Some things are excluded for simplicity: network bridging, para-virtualised disks, migration between hosts, and disk replication.

Software setup

Everything required from the host machine can be pulled in via Debian’s qemu-kvm package.

sudo apt-get install qemu-kvm

Install

Prepare a disk image for Windows. The qcow2 format is suggested for the desktop as it will not expand the file to the full size until the guest uses the space:

qemu-img create -f qcow2 windows.img 30G

Launch the Windows installer in KVM with a command that looks something like this:

kvm -hda windows.img --cdrom windows-install-disc.iso -vga std -localtime -net nic,model=ne2k_pci -m 2048

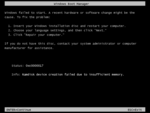
Note the -m option is the number of megabytes of RAM to allocate. You can set it a little lower if you don’t have much to spare, but if it’s too low you’ll get this screen:

2014-06-04-capture-noboot

If you have a physical disk but no .iso of it, then using the disk drive via --cdrom /dev/cdrom will work.

Install

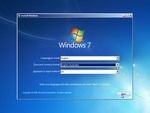
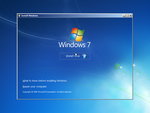
If you have GNU/Linux, chances are you have installed an OS before. In case you haven’t seen the Windows 7 installer, the steps are below:

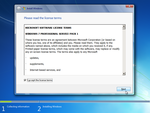
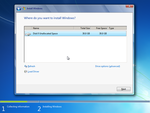
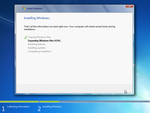
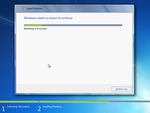
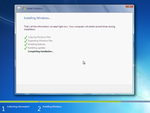
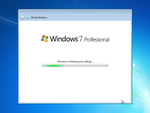
Select language, accept the licence agreement, choose the target disk, and let the files copy:

2014-06-04-capture-005
2014-06-04-capture-023
2014-06-04-capture-024
2014-06-04-capture-028
2014-06-04-capture-033
2014-06-04-capture-035
2014-06-04-capture-081
2014-06-04-capture-149

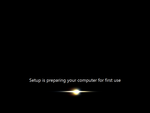
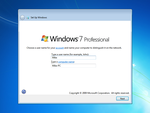
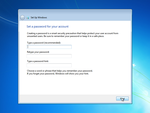
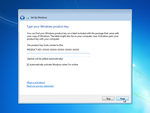
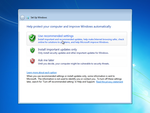
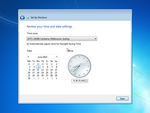
After reboot, enter the user details, licence key, update settings and timezone:

2014-06-04-capture-160
2014-06-04-capture-178
2014-06-04-capture-190
2014-06-04-capture-191
2014-06-04-capture-199
2014-06-04-capture-205
2014-06-04-capture-214
2014-06-04-capture-250
2014-06-04-capture-254
2014-06-04-capture-261

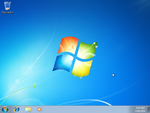
After another reboot, Windows is installed in the virtual machine:

2014-06-04-capture-263
2014-06-04-capture-265
2014-06-04-capture-277

Post-install tasks

The guest you have now will only run at standard VGA resolutions, and will probably not be networked. This section will show you how to fix that.

Network drivers

You will notice that we are launching the guest with -net nic,model=virtio. This means that we are using a virtual network card, rather than simulating a real one. You need to fetch a disk image with the latest binary drivers, which are best tracked down on linux-kvm.org via google.

Once you have the disk image in the same folder as your virtual machine, shut down and launch it with a CD:

kvm -hda windows.img --cdrom virtio-win-0.1-74.iso -vga std -localtime -net nic,model=ne2k_pci -m 2048

Under "My Computer" track down the "Device Manager", find your network card, and tell Windows to update the drivers. You can then point it to the CDROM’s "Win7" directory (or other one, if you are installing a different guest). After the network adapter is recognised, you will be connected automatically.

Note that you are using "user-mode" networking, which means you are on a simulated subnet, and can only communicate via TCP and UDP (ie, ping will not work). This can be a little slow, but will work on a laptop host whether plugged in or running on WiFi.

Remote desktop

You may also be annoyed by the screen resolution and mouse sensitivity having strange settings. The best way around this is not to fiddle with settings and drivers, but to enable remote desktop and log in via the network. This lets you use an arbitrary screen size, and match mouse speed to the host.

This is set up to run locally, so it is neither laggy nor a security issue, and makes it possible to leverage all RDP features.

First, in the guest, enable remote desktop using these Microsoft instructions.

Then shut down and boot up with the extra -redir tcp:3389::3389 option:

kvm -hda windows.img -vga std -localtime -net nic,model=ne2k_pci -m 2048 -redir tcp:3389::3389

On the host, wait for the guest to boot, then use rdesktop to log in:

rdestkop localhost

One this works, you can shut down and boot with the extra -nographic option to leave remote desktop as the only way to interact with the guest:

kvm -hda windows.img -vga std -localtime -net nic,model=ne2k_pci -m 2048 -nographic -redir tcp:3389::3389

The rdesktop tool supports sound, file and printer redirection. It can also run fullscreen when launched with -f. All the details are in man rdesktop

If you end up using the guest operating system more, it is worth investigating USB-redirection for any peripherals (printers or mobile phones), running a virtual sound card, or running SAMBA on the host to share files.

Including git commit history in a LaTeX document

LaTeX is a document typesetting system, which lends itself well to use within a source-code management program such as git. I found a need to include a changelog in a document, and found this brilliant blog article by Jerel Unruh which creates a HTML log using git log.

For inclusion within a Makefile target, I re-worked this into a shell script, changes.sh, which will also auto-detect URL’s for any Github-hosted repository:

#!/bin/bash
# Find remote URL for hashes (designed for GitHub-hosted projects)
origin=`git config remote.origin.url`
base=`dirname "$origin"`/`basename "$origin" .git`

# Output LaTeX table in chronological order
echo "\\begin{tabular}{l l l}\\textbf{Detail} & \\textbf{Author} & \\textbf{Description}\\\\\\hline"
git log --pretty=format:"\\href{$base/commit/%H}{%h} & %an & %s\\\\\\hline" --reverse
echo "\end{tabular}"

The above script outputs a LaTeX table, including a hyperlink to each commit. In the pre-amble, you need:

\usepackage{hyperref}

In your Makefile, you might add something like:

changelog:
	./changes.sh > changelog.tex

The resulting changelog can then be included in the document via:

\input{changelog.tex}